Monthly Archives: November 2014

Easily Clean Minerals Out of Humidifiers

It’s cold weather time again and most of us are getting out our humidifiers. One big thing about running them is that they get gunked up inside with minerals.

In the past, we’ve painstakingly taken our humidifier apart and manually attempted to clean the mineral buildup out of the filter, tank, and any mechanism we could access. We were not overly successful. Lately our humidifier started making sounds like it was popping popcorn! Try sleeping through that! Sleep? What’s that?!?

I came up with an EASY way to fix the problem. There’s no work whatsoever. I started adding white vinegar to the water tank every time I filled it. Not a lot of vinegar at one time or the house would really smell strong…perhaps up to 1/2 cup to a tank full of water. After a few days, I noticed the popping sound diminishing. Now, after less than a week, the humidifier is quiet. We hardly know it’s there!

After I’m convinced that it’s completely cleaned inside, I’m going to continue to add one or two tablespoons of white vinegar to the water tank each time I fill it. That will continue to keep it clean and prevent minerals from building up inside it again. What an EASY, effortless fix!!

Note that you can add as much vinegar to the water tank as you want. The more you add, the faster it will clean up the problem, BUT the more your house will smell like vinegar. Too much vinegar and…well…it’s not a nice aroma for a home to say the least. So, that’s why I kept the amount down and s-l-o-w-l-y cleaned it out. The maintenance amount of only a tablespoon or two shouldn’t produce any noticeable odor. Why didn’t I think of this sooner??

I produced a video covering this simple tip. The link is below.

Enjoy!
Judi


Baking, Cooking, Food, Cleaning Questions Answered

I recently had someone ask me a question, which sparked an idea. Since I have a lot of food, nutrition, and Family and Consumer Sciences education and experience, I’ll put that to work for YOU!

I’ve decided to make myself open to researching answers to YOUR QUESTIONS related to food–be it cooking, baking, preparation, preservation, or nutrition– and household issues, such as cleaning.

Most people know HOW to find answers to their questions, but simply don’t have the time for the research. I’ll do it for you. Answers will likely come in the form of a video. They may also be in a blog post, or simply a reply to a posted comment. Whichever is most appropriate will suffice.

Below is a link to my video offering this service. Feel free to comment below the video on YouTube or below this post! I’m happy to help!

Judi

EASY Vegetables with Pasta

We’re told to eat more vegetables and that most Americans aren’t getting enough of such foods. This is no issue for me because fruits and veggies are my favorite foods. (Yep, I know I’m unusual!) We’re also told to cut back on processed foods of all sorts. Pasta is included in that list. However, I for one am Italian. I don’t see any way I could live without my pasta! I was raised on the stuff! It makes me feel good and satisfied when I eat it, so I don’t think I’m about to eliminate it from my food list.

However, that doesn’t mean that I can’t cut back on it. Hence, this dish was developed. It’s vegetables with pasta…not pasta with vegetables. It’s a lot of vegetables with a little bit of pasta. Just enough pasta to tell you it’s a pasta dish and to satisfy that pasta urge. It’s a light dish, yet satisfying. You can eat a lot of it without feeling bloated or bogged down.

Furthermore, it’s extremely flexible and easy to prepare. Make it YOUR way…with the array of vegetables that you want and have on hand. The key to the dish is the herb combination, lending a yummy flavor to no matter what veggies are included.

Use about half the pasta you normally would per person and double up on the amount of vegetables you’d normally fix per person. The recipe/video below are geared for an individual serving. Increase the amounts accordingly per your taste and vegetable preference.

Vegetables with Pasta
Makes 1 Serving (Increase as needed)

1 oz dry pasta of choice
Extra virgin olive oil
1 large clove garlic, chopped
1/4 cup chopped onion
1/4 tsp dried basil
1/4 tsp dried oregano
1/2 to 3/4 tsp dried parsley flakes
Salt and pepper to taste
Small pinch of dried red pepper flakes, optional
1-1/2 to 2 cups vegetables of choice

Vegetable Combo Suggestion:

Large handful of fresh spinach leaves
1/2 Roma tomato, chopped
1 to 1-1/4 cup frozen California blend of vegetables (not thawed)
1/2 cup red kidney beans, optional
Parmesan and or shredded Mozzarella cheese

Gather vegetables of choice and herbs. Put water on for pasta. When water boils, add pasta and cook according to directions.

As pasta is cooking, heat a large skillet over medium heat. Add about 2 Tbsp extra virgin olive oil and allow it to heat briefly. Add garlic and onion and allow them to saute for about 1 minute. Add remaining ingredients except cheese. Stir to combine.

Cover vegetables and allow them to cook for 3 to 5 minutes over medium heat until slightly tender. Stir occasionally while cooking. If they start getting too dry, add a little of the boiling pasta water (a couple tablespoons at a time) to keep them moist. Reduce heat to low to keep them warm until the pasta is finished.

Drain cooked pasta and top with vegetable mixture. Add more olive oil if desired for moisture. Toss pasta with vegetables. Top with grated Parmesan and/or shredded Mozzarella cheese.

Note: This dish would also be good served with chicken or meatballs. They may be cooked in the skillet before the garlic and onion are added.

Enjoy!
Judi

Thanksgiving Harvest Table Runners

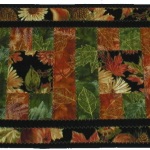
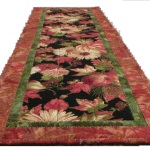
I found some absolutely beautiful quilting fabric recently. Making Thanksgiving table runners was a must with such pretty stash in hand. I’ve made the following two runners out of it so far. As always each item I make is unique. No two are identical, which makes each one special in its own way.

This one was made in a patchwork style featuring blocks of the harvest theme fabric in the center and the border. It measures 13-1/4 inches x 39-5/8 inches long. It is backed with a coordinating fabric so it’s reversible. This would add an elegant theme to anyone’s table for Thanksgiving!

It is machine stitched with decorative stitching reinforcing all seams. This ensures it will stand up to regular use without issue. As always, it’s machine washable on the gentle cycle with cool water. Air or machine dry on low heat. May be steam pressed. It’s available on Amazon.com.


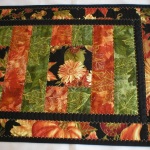
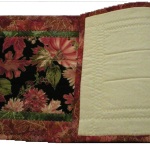
The second Thanksgiving table runner I made with these same fabrics shows more of the harvest produce fabric. It’s really elegant! It is 12-1/4 inches x 45-1/4 inches long.


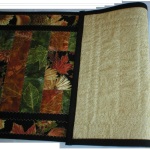
This view shows the backing, which is in a coordinating fabric.


As with the other runner, the piece was machine stitched with decorative stitching  reinforcing all seams. I make my runners to be USED, not just looked at! All are machine washable (cool water, gentle cycle) and can be air or machine dried on low heat. Steam pressing is fine if desired. Available on Amazon.com.

Happy Thanksgiving to all!
Judi


How to Slow Banana Ripening

We buy a lot of bananas. I don’t eat many of them, but my husband eats them like there’s no tomorrow. Keeping them fresh has always been an issue and I often end up with a lot of them in the freezer. So for me…I either make banana bread or a lot of banana “pretend” ice cream. It’s really pretty good, so I’m not complaining!

I recently ran across a simple trick that works for keeping bananas fresh longer. Wrap the stems in plastic wrap. Really. Why does this work? The gas that they release that enhances ripening of fruit is released through the stems. So wrapping the stems tightly in plastic wrap slows the release of the gas and allows the fruit to stay fresh longer! Simple and easy.

You could wrap the stems of a bunch of bananas together, which works fairly well. However, in this case it’s really hard to make it tight because of the gaps between the bananas at the bottom of the stems.

It’s much more effective to separate the bananas and wrap each stem individually. The seal is much tighter and hence, more effective. The bananas are in a “grab-and-go” state, so they will keep longer and be ready for you when you want them. No they won’t keep forever, but they will certainly last longer then if the stems were not wrapped.

Try it!!! It REALLY works!

Judi

Roasted Acorn Squash with Pears, Berries, Walnuts

Roasted Acorn Squash with Pears, Berries, Walnuts

Roasted Acorn Squash with Pears, Berries, Walnuts

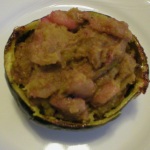
I was recently given some extra produce from our neighbor’s garden. They’ve shared a lot of assorted vegetables with me which was FABULOUS! Acorn squash was in the mix. Hence, I decided to get creative with it. I roasted one, then mixed it with stewed pears, walnuts and mixed berries. It was heavenly! I can truly picture it with a Thanksgiving meal. The sweetness of the squash and fruit would blend wonderfully with turkey and gravy.

So, of course I recorded a video of it and I have the recipe below. I urge you to try it because it’s really simple to make and doesn’t take much time, either. Watch the video to get a good feel for the flow of things. Enjoy! Judi

Roasted Acorn Squash with Pears, Berries and Walnuts
Makes 4 to 6 Servings

1 medium size acorn squash, roasted
1 large pear, any type
1 Tbsp lemon juice
2 Tbsp water
2 Tbsp butter
1 to 2 tsp honey, optional*
Cinnamon to taste
1/4 cup walnuts, coarsely chopped
About 1/4 cup berries of choice, fresh or frozen and thawed, cut into small pieces

Roast the squash: Preheat oven to 400F. Wash the squash then cut it lengthwise and remove the seeds. Coat each half (both inside and outside) with extra virgin olive oil. Place cut side down on an oiled baking sheet or one that was lined with parchment paper. Roast squash for 30 to 40 minutes, or until it’s fork-tender. Remove the squash from the oven and leave it on the baking sheet to cool a few minutes.

Meanwhile, while the squash is roasting, peel and core the pear. Cut into bite-size pieces and place them in a bowl. Add the lemon juice and water and toss to coat all pieces. Set aside until squash has roasted.

While the squash is cooling, heat a small pan over medium heat. Add butter and allow it to partially melt. Add the pear pieces AND the juice/water mixture to the pan. Stir in the honey or sweetener, if using it. Sprinkle generously with cinnamon. Stir to combine and allow the pears to stew for 2 to 3 minutes, until they are lightly cooked but not mushy. Remove them from the heat and stir in the walnuts and berries. Set aside.

Remove the squash from the peel and place it in a large bowl. Pour entire contents of the pan of pear mixture onto the squash. Toss lightly to coat the squash and serve immediately either from the bowl or use the squash skin shells as decorative serving bowls.

*Sweetener is optional in this dish, but does enhance the flavor. If you prefer something other than honey, any sweetener could be used–brown sugar, granulated sugar, maple syrup, maple sugar, agave nectar, stevia or something else your imagination leads you to try!

Why Preshrink Fabrics Before Quilting

There seems to be some debate out there as to whether to preshrink fabric before using it in a quilted project. I for one will always treat my fabric first before working with it. Here’s why I do it and how I do it.

First, before working with the fabric at all, I preshrink it. I do this for TWO reasons. Here’s the “WHY.”

(1) It will tell me if the fabric is colorfast. The LAST thing I’d want is to complete a project only to learn that one fabric bleeds. My customers or gift recipients would not be happy with what I made if it ended up as one dull color after being washed. No one wants that. Subjecting the fabric to hot water first will tell me if it will bleed. If it does, I treat it to stop the bleeding before going any further with it. THAT’S the subject for another blog post!

(2) Different fabrics will shrink at different rates. If untreated fabrics are used in a quilt project, you may end up with something quite skewed after it’s washed and dried. Again, my customers or gift recipients would not be happy and so neither would I!

Even if you like the crinkle look that aged projects have, it’s still necessary to preshrink the fabrics before working with them. That being done, simply use cotton batting that has NOT been preshrunk. Then you know that your finished project will have an evenly crinkled look after it’s laundered. You will have treated any bleeding fabrics and your project will look very nice for a long time to come.

Now…That’s the “why.” So, what’s an easy way to preshrink fabric? Here’s what I do…

Plug the kitchen sink, then fill it with hot tap water. Place one fabric at a time in the hot water and make sure it’s totally soaked. Leave it there briefly (a minute is enough time). I then squeeze out what water I can and wrap it in a clean dry towel to remove what excess water I can. Then I place the fabric (not the towel) in the dryer on high heat until it’s dry. This usually doesn’t take long. I suggest you don’t overload the dryer. This will allow the fabric to dry quickly plus it will minimize fraying of the raw edges.

After the fabric has been dried, I like to iron it with a steam iron to be sure it’s totally dry, shrunk, and smooth. That also makes it easier and more accurate to cut. Done! The whole process is really simple and fast. It’s well worth the effort to avoid unpleasant surprises with your finished project!

Hope this helps,
Judi