Category Archives: Meatless Main Dishes

Spring Mix Salad with Carrot-Orange Dressing

Spring Mix Salad with Carrot-Orange Dressing

Here’s a delicious, very healthful and easy salad to put together. Of course, feel free to vary the vegetables according to your preferences and what you have available. The suggested dressing is Carrot-Orange Dressing and the recipe is below. This dressing is light, with it being free of oil, salt and sugar. It’s healthful and the flavor is adjustable according to your taste. Give it a try sometime!

Below are videos showing how to make the dressing and the salad. The written recipes follow the videos.

Enjoy!
Judi

Spring Mix Salad with Carrot-Orange Dressing

This recipe is designed so you can make as much or as little as you want, and of course, change the vegetables according to your preferences. The dressing recommendation is below, but you could use any dressing you prefer.

Spring mix
Shredded red cabbage
Onion (diced red, yellow, or scallions), optional
Cucumbers
Celery
Shaved or diced carrot
Broccoli sprouts, or chopped fresh broccoli
Blueberries
Clementine segments
Fresh cilantro, chopped, optional
Garbanzo beans, or beans/peas of choice (cooked or canned, rinsed, drained)
Green peas (frozen and thawed)
Avocado slices, optional
Sliced almonds or walnuts, optional

To make the salad:
Wash all vegetables and cut them into desired size pieces. Arrange ingredients in a serving bowl and top with a few avocado slices, if desired. Mix dressing ingredients as directed and drizzle over salad. Enjoy!

Carrot-Orange Sauce, Dip, or Salad Dressing
Makes About 1-1/4 Cups

This delicious mixture can be used as a sauce over cooked vegetables or grains, as a dip, and as a dressing for green salads. The key is in the amount of lemon juice or vinegar you add. See the suggestion below!

¾ cup chopped carrots (raw, blanched, or frozen and thawed)*
2 Tbsp ground flaxseed
½ cup orange juice
½ tsp ground coriander seed
2 to 4 Tbsp lemon juice or apple cider vinegar**

Place all ingredients in a blender or food processor. (See notes below.)** Pulse or process until smooth. Transfer to a covered container, and place in the refrigerator for at least 20 minutes to allow it to thicken. Use within 1 week.

If you have a high-powered blender, the raw carrots can be pureed until smooth. If you do not own such a blender, using blanched, or frozen and thawed carrots will give you a smoother product since they will be easier to puree.

*Cook’s Note: To blanch fresh carrots, placed diced carrots in boiling water for 2 minutes. Drain and allow to cool some before processing.

** Suggestion: The amount of lemon juice or apple cider vinegar you add to this dressing transforms it from a sauce to a dip, or to a salad dressing. Use less acid (2 to 3 tablespoons) if you want to use this as a sauce over vegetables or a grain. Use a medium amount (3 tablespoons) if you want to use this as a dip. Use the full amount (4 tablespoons) if you use this as a salad dressing, so the tang will bring the flavor out above the salad greens. If you’re not sure, add just 2 tablespoons at first, taste it, and add more acid as desired.

The flavors will blend well when this mixture is allowed to sit in a covered container in the refrigerator overnight. This is especially helpful when adding 4 tablespoons of lemon juice or vinegar. When using this as a sauce with less lemon juice or vinegar, it may be used right away. However, allowing it to rest for 20 to 30 minutes gives the ground flaxseed time to thicken the mixture before it is used.

Pinto Beans

Pinto Beans 101 – The Basics

Below is a comprehensive article all about our beloved pinto beans! Everything from what they are to how to cook and use them is covered. So, if you have a specific question about what to do with pinto beans, you should find what you are looking for below!

Enjoy,
Judi

About Pinto Beans
Most people are familiar with pinto beans, with their beige color with splashes of brown. When cooked, they become pinkish in color with a creamy texture. Pinto beans are among the “common beans” that appear to have originated in Peru. From there, they spread throughout the Americas, then to Europe when Spanish explorers introduced them after returning from voyages to the New World in the 15th century. Spanish and Portuguese traders introduced them to Africa and Asia. Today, the world’s largest producers of dried common beans are India, China, Indonesia, Brazil, and the United States.

Since beans are an inexpensive source of protein, they have become popular in many cultures around the world. Today, pinto beans are the most commonly eaten bean in the United States. They can be eaten whole, mashed, pureed, refried, simmered and stewed.

Nutrition and Health Benefits of Pinto Beans
Pinto beans are an excellent source of the essential trace mineral molybdenum. They are also a good source of fiber, folate, copper, manganese, phosphorus, protein, Vitamin B1, Vitamin B6, magnesium, potassium, and iron. One cup of cooked pinto beans has about 245 calories. Pinto beans are also a good source of some phytonutrients that have been shown to help prevent some cancers, notably stomach cancer.

Fiber. Like other beans, pinto beans are high in fiber. A one cup serving provides 15 grams of fiber. Of that, 4 grams are soluble fiber. This type of fiber forms a gel-like substance in the digestive tract and binds with bile removing it from the body. The body is then prompted to make more needed bile acids, and it uses cholesterol in the process. So, in an indirect way, soluble fiber helps to reduce blood cholesterol. Translation…eating pinto beans helps to lower your cholesterol!

The remaining fiber in pinto beans is the insoluble variety. This is known to help speed the movement of gastrointestinal contents, warding off constipation. It also helps to prevent digestive disorders such as irritable bowel syndrome and diverticulosis.

Heart Attack Risk. In a study that compared the food intake of over 16,000 middle-aged men in various countries, researchers found an 82% decrease in heart attack risk in those who ate the most legumes. In another study published in the Archives of Internal Medicine, researchers followed about 10,000 Americans for 19 years. Those who ate the most fiber (21 grams per day) had far less risk of heart disease than those who ate the least fiber (about 5 grams daily).

The nutrient profile in pinto beans also contributes to their aid in reducing the risk of cardiovascular disease. Folate is known to lower homocysteine levels. Homocysteine is an amino acid that is known to be an independent risk factor for heart disease when its levels are elevated. Having an adequate amount of folate in the diet helps to keep homocysteine levels in check, and eating pinto beans can help with that.

Furthermore, magnesium, also found in pinto beans, acts as nature’s calcium channel blocker. This helps to improve blood flow and the transport of oxygen and nutrients around the body. Researchers have found that a deficiency in magnesium is associated with heart attacks.

Potassium, also plentiful in pinto beans, is an important electrolyte in the body, used in nerve transmission and muscle contraction. This makes potassium important for maintaining normal blood pressure and heart function. A one cup serving of pinto beans provides 746 mg of potassium and only 1.7 mg of sodium, making them a noteworthy food to eat for preventing high blood pressure and preventing atherosclerosis and stroke.

Blood Sugar Control. The benefits of the fiber in pinto beans doesn’t stop with GI transit time and cholesterol removal from the body. It also helps to stabilize blood sugar levels. This is especially helpful for those with insulin resistance or diabetes. People eating high fiber diets have been shown to have lower blood sugar and insulin levels, and lower total cholesterol, triglycerides, and VLDL (very low-density lipoproteins) blood levels. These are all markers for heart disease and are often elevated in those with diabetes and insulin resistance.

Sulfite Sensitivity. Pinto beans are an excellent source of molybdenum, a trace mineral that is part of the enzyme that metabolizes sulfites. Sulfites are added to many foods and even medications as preservatives. Yet, some people are sensitive to sulfites, causing a rapid heartbeat, headache and disorientation. Those who react to sulfites may be deficient in molybdenum. If this is the case, pinto beans may help alleviate that problem.

Iron. Pinto beans are a good source of the essential mineral iron. Iron is a crucial part of hemoglobin, the molecule that transports oxygen in the blood. Iron deficiency leads to fatigue because not enough oxygen is reaching tissues around the body. Furthermore, the mineral copper (which is plentiful in pinto beans) is used in the making of hemoglobin. Anyone who suffers from low iron levels would benefit by including pinto beans in their meals when possible.

Energy Production and Antioxidant Defense. If all that’s not enough, pinto beans are a good source of manganese and copper. These two minerals are key components of an enzyme (superoxide dismutase) that disarms free radicals in the mitochondria (the cellular organelle where energy is produced). Copper is also used in another enzyme (lysyl oxidase) used in the production of collagen and elastin, important in making our blood vessels, bones and joints.

Memory. Vitamin B1 (thiamine) is critical for proper cognitive brain functioning. Thiamine is used in the making of acetylcholine, a vital neurotransmitter used in the memory function. Low levels of acetylcholine have been associated with age-related senility and Alzheimer’s disease. Since pinto beans are a good source of thiamine, it’s another powerful reason to eat these beans when you can!

Protein. Eating pinto beans is an easy way to add protein to your menu when looking for a meat alternative. Combine them with a grain product, like rice, pasta, or a tortilla, and you have an amino acid combination that will rival any animal food you can name. Furthermore, it will be free of cholesterol and saturated fat, and have fewer calories. One cup of pinto beans provides over 15 grams of protein. When combining 1 cup of cooked pinto beans with 1 cup of brown rice, the protein level jumps to 21 grams!

How to Select Pinto Beans
Dried Pinto Beans. Dried pinto beans are usually found pre-packaged in most grocery stores in America. They may also be found in bulk bins. As when purchasing any dried food, whether it is pre-packaged or in bulk bins, be sure there is no sign of moisture or insects in the beans. When purchasing from bulk bins, it’s best to purchase from a store than has a good turnover of product to be sure they are not old.

Canned Pinto Beans. Canned beans are a very convenient alternative to their dried counterparts. Most grocery stores carry them. Read the ingredients list because some canned beans are processed with additives and flavorings that you may or may not want.

If you’re concerned with BPA (bisphenol A) that has been a common anticorrosive component of can liners and other products, check the label or information that was stamped on the can. Many processors are now using BPA-free liners. If the label or can does not state BPA-free, it may contain BPA.

How to Store Pinto Beans
Dried Pinto Beans. Store dried pinto beans in an airtight container in a dry, cool, dark place. They should keep well for 1 to 3 years. Depending on conditions, they may keep well for longer than that, but their quality may deteriorate over time, although they should still be safe to eat. If they have any signs of mold or moisture on them, or insect or rodent damage, they should not be eaten. [Note that the longer dried beans are stored, the longer they may need to cook to get tender. They absolutely should be soaked before being cooked, which will help to shorten the cooking time.]

Canned Pinto Beans. For the longest shelf life, store canned pinto beans in a cool, dry place. An unopened commercially processed can will usually last 3 to 5 years for best quality. They are still safe to eat after the expiration date if the can is not damaged and they were stored in a cool, dry place. Note that the quality may decline with age, with changes in color, flavor, and texture. If the can was bulging, rusting, severely damaged, or if you notice an “off” odor, flavor, or appearance when opened, the beans are not safe to eat and should be discarded.

Cooked pinto beans or unused beans from opened cans will keep well in a covered container in the refrigerator for 3 to 5 days.

How to Preserve Cooked Pinto Beans
If you’ve cooked more dried pinto beans then you can eat within a reasonable amount of time, the extra beans may be frozen. Simply transfer them to a freezer container or bag. Label them with the contents and date and store them in the freezer for up to 6 months for best quality. They will be safe to eat beyond that, but their quality may decline over time.

Dried vs Canned Pinto Beans
Cost. When comparing cost per serving, dried beans are cheaper than canned beans. The cost of a serving of canned beans is usually about twice that of cooked dried beans. Even if we were to take into consideration the cost of the water and electricity used in cooking the dried beans, the dried beans would very likely still be cheaper. So, if you’re looking for ways to save on groceries, buy dried beans and take the time to cook them. To use less water and electricity in the long run, cook a big batch (a pound or two of beans) at one time and store the extra cooked beans in the freezer. They’ll be ready when you need them.

Convenience. Needless to say, canned beans are more convenient than dried beans. You simply open the can, rinse and drain the beans, and they’re ready to use. The canned beans are an excellent choice if you’re always short on time and can’t (or don’t want to) take the time to cook dried beans. Also, canned beans should be a staple item kept in your pantry in case of an emergency. If the power goes out or if you temporarily lose your water supply, canned beans can be eaten straight from the can. They can be a lifesaving source of food when there is no way to cook. It’s better to be prepared, and not need it, then need it and not be prepared!

Many people believe cooking dried beans is a big ordeal. However, when considering “hands on” time, it’s actually very little. It takes little time to sort and rinse the beans then cover them with water in a pot. After being soaked, it takes little time to drain them then refill the pot with water. The cooking process pretty much takes care of itself. Then draining them takes little time, again. So, it’s really not hard nor time-consuming to cook dried beans when considering actual hands-on time. Furthermore, they can be cooked in a slow cooker or pressure cooker to make things a little simpler.

Nutritional Value. The nutritional value of canned pinto beans is about the same as cooked dried pinto beans. Either way, the beans need to be cooked completely before being eaten or canned, so they should have about the same nutrient content. So, this factor should not be a determinant when considering which form of pinto bean to buy.

Additives. If you want to avoid any additives in your foods, cooking dried beans is your best option. In this case, you can control what is added to the beans. Canned beans may have added salt and other ingredients as firming or color retention agents. Organic canned beans will not have firming or color retention agents, but still may have added salt. So, if salt is no issue, organic beans may be a good choice for you. Otherwise, cooking dried beans gives you complete control as to what is added to your beans.

BPA. BPA (bisphenol-A) is an anticorrosive agent that has been used in can linings and other applications such as water bottles, bottle caps, water supply lines and even dental sealants. Research has found that this agent may cause harmful effects such as increased blood pressure and damage to unborn fetuses and young children. If you’re concerned about the possible harmful effects of BPA, it’s wise to look for cans labeled as BPA-free. Progressively, more manufacturers are using BPA-free cans, but not all. So, it pays to read the label or the information that was stamped on the end of the can. To avoid BPA from cans, cooking dried beans ensures you’re not ingesting any of the chemical.

Taste. Taste is subjective and differs from person to person. However, the overall consensus is that cooked dried beans taste better than canned beans. I agree with that statement (in my humble opinion). If taste is a big factor for you, then cooking dried beans is your best option. Also, the advantage of cooking your own dried beans gives you the opportunity to flavor them to your liking. Adding onions, garlic, and/or herbs during the cooking process allows flavors to infuse in the beans that would not otherwise happen. If you still need the convenience of canned beans, adding them to soups, stews or other dishes where they will be combined with a lot of other foods, may mask the flavor difference of canned beans.

How to Prepare Dried Pinto Beans
Dried pinto beans should be soaked before being cooked. This makes them more tender, reduces cooking time, and also reduces their gas-producing tendencies when eaten. Preparing dried pinto beans is not hard, but does take some time.

First, place your dried beans in your cooking pot or a bowl. Sort through them to remove any stones or other debris that may be among them, and any beans that don’t look good. Then rinse the beans and drain the water. Next, cover the beans with fresh water in your pot by at least two inches. There are two methods of soaking to choose from at this point…

Overnight Method. Cover the pot and allow the beans to soak overnight or for at least 6 hours. Drain the water and cover the beans with fresh water by at least two inches. Cook your beans (see directions below).

Quick Soak Method. Cover your sorted, rinsed, and drained beans in your cooking pot with fresh water. Place the lid on the pot and bring them to a boil. Boil them for two minutes. Remove the pot from the heat and allow them to rest in the covered pot for two hours. Drain the water, then fill the pot with fresh water. Cook your beans (see directions below).

Cooking Your Soaked Beans. Place your pot filled with fresh water and soaked beans on the stove. The water level should be at least one inch above the soaked beans. Cover the pot and bring them to a boil, then lower the heat. Tilt the lid on the pot and allow the beans to simmer until they are soft. This can take anywhere from 45 minutes to 2 hours depending upon how fast they are cooked and how long they soaked. Stir them occasionally. Be sure they remain submerged. If needed, add more hot water to the pot. Do NOT add salt or acidic ingredients like vinegar or lemon juice to the water at first. This will cause the beans to be tough and will make them hard to cook. If salted or flavored water is desired, add flavorings when the beans are close to being done. When they are soft, drain the water and use them as desired.

If you want to flavor your beans as they cook, aromatic ingredients such as onions, garlic and herbs may be added to the cooking water from the start. This will infuse a rich flavor into your beans that they would not otherwise have. However, just remember to save the salt and acid ingredients until VERY late in the cooking process. In this case, the bean broth can be saved and stored in the freezer to be used in soups and stews for extra flavoring.

Soaked dried beans may also be cooked in a pressure cooker or slow cooker. Follow the manufacturer’s directions for cooking soaked, dried beans in your appliance.

Quick Tips and Ideas for Using Pinto Beans
* Try using cooked or canned pinto beans in chili recipes instead of kidney beans.

* Make an easy sandwich or tortilla filling or dip by blending pinto beans with sage, oregano, garlic, and black pepper.

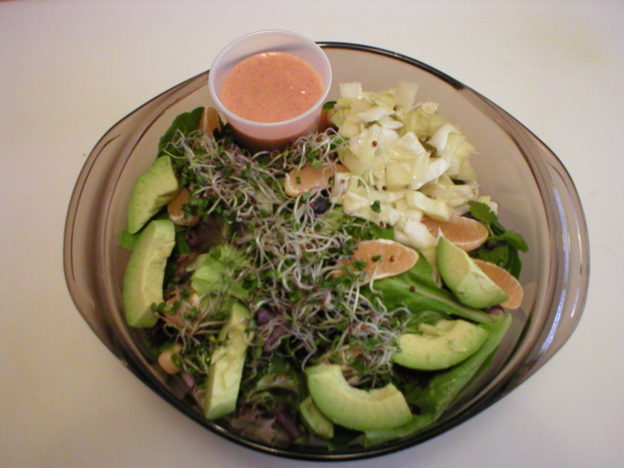
* Make a yummy wrap by layering cooked pinto beans, chopped tomatoes, and chopped onions on a tortilla. Top with shredded cheddar cheese. Broil briefly until the filling is hot and the cheese melts. Top with diced avocado and chopped cilantro.

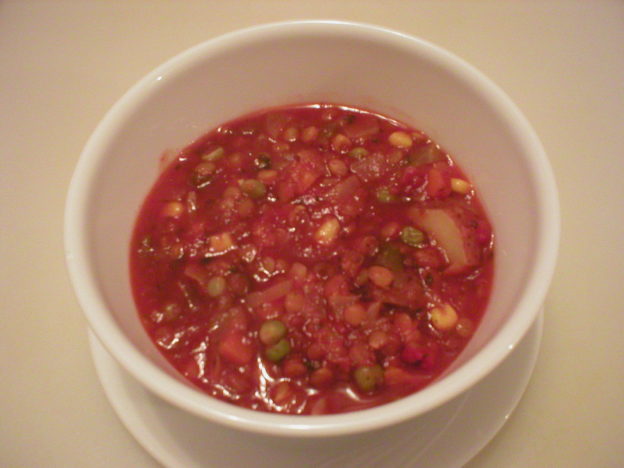
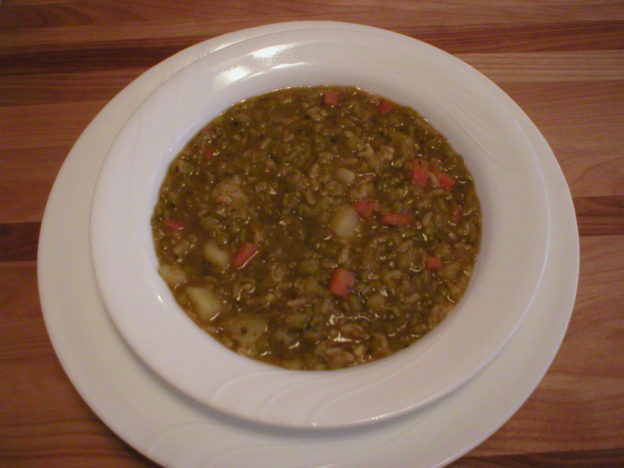
* Add pinto beans to vegetable soup.

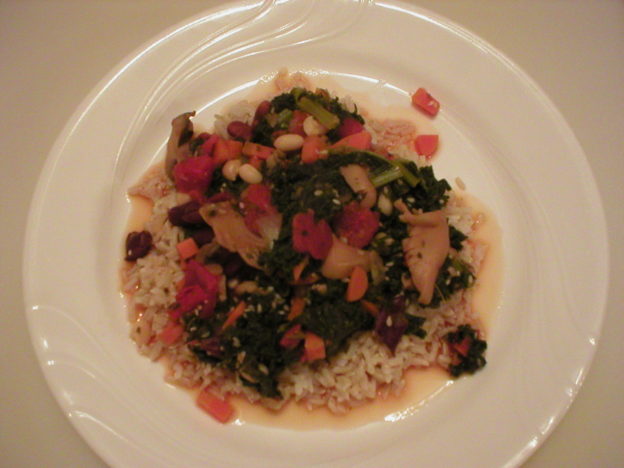
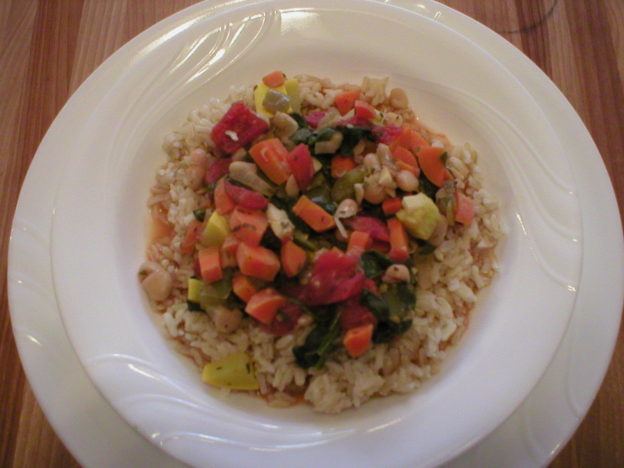
* Make a simple one pot meal by heating cooked pinto beans, cooked rice, and cooked vegetables such as carrots, zucchini, and tomatoes. Season to taste and enjoy!

* When cooking dried beans, if you want to flavor them, try adding aromatic ingredients such as garlic, onions, and herbs. These ingredients can be added at the start of cooking, so the flavors will infuse the beans as they cook. Just don’t add any salt or acid ingredients until the end of cooking to avoid making the beans tough. Then save the water when you drain the beans. Freeze it in measured amounts and add the flavored bean water to soups and stews later.

* Even though some people do not soak beans before cooking them, it IS highly recommended to soak them first. This makes them easier to digest, reducing their gas-forming tendencies, and also reduces their cooking time.

Herbs/Spices That Go Well with Pinto Beans
Anise seeds, bay leaf, chili powder, cilantro, cumin, garlic, oregano, parsley, pepper (black), sage, salt, savory, thyme

Foods That Go Well with Pinto Beans
Proteins, Legumes, Nuts, Seeds: Bacon, beans (others such as black, kidney), beef, eggs, ham, pork

Vegetables: Chiles (i.e. ancho, chipotle, jalapeno, poblano, serrano), fennel, kale, mushrooms, onions, scallions, tomatoes and tomato puree

Fruits: Avocados, lemon, lime

Grains and Grain Products: Chips (tortilla), corn, quinoa, rice, spelt, tortillas

Dairy and Non-Dairy: Cheese (esp. cheddar, Jack)

Other Foods: Barbecue sauce, beer, liquid smoke, maple syrup, mustard, oil (esp. olive), stock (i.e. vegetable)

Pinto beans have been used in the following cuisines and dishes…
Burritos, casseroles, chili (meat and meatless), dips, frijoles, Mexican cuisine, nachos, pates, purees, salads (i.e. taco salad), salsas, soups, Southwestern (U.S.) cuisine, spreads, stews, tacos, Tex-Mex cuisine, tostadas, veggie burgers

Suggested Flavor Combos Using Pinto Beans
Add pinto beans to any of the following combinations…

Chiles + Sage
Chili Powder + Cumin
Cilantro + Liquid Smoke + Onions
Cumin + Garlic + Onions + Quinoa
Oregano + Sage + Thyme

Recipe Links

Perfect Pinto Beans https://www.foodnetwork.com/recipes/ree-drummond/perfect-pinto-beans-3339174

Mexican Pinto Beans From Scratch (1 Pot) https://minimalistbaker.com/mexican-pinto-beans-scratch-1-pot/

Easy Refried Beans https://www.camelliabrand.com/recipes/easy-refried-beans/

Pinto Bean Burrito Bowl with Avocado Cilantro Dressing https://www.camelliabrand.com/recipes/pinto-bean-burrito-bowl-with-avocado-cilantro-dressing/

Chipotle Pinto Bean Tortilla Soup https://www.camelliabrand.com/recipes/chipotle-pinto-bean-tortilla-soup/

Cheesy Bean Quesadilla https://www.camelliabrand.com/recipes/cheesy-bean-quesadilla/

Pinto Bean Recipes https://www.foodandwine.com/beans-legumes/pinto-bean/pinto-bean-recipes

10 Amazing Dishes to Make with Canned Pinto Beans https://www.goodhousekeeping.com/food-recipes/g986/canned-pinto-bean-recipes/

Tuscan Pinto Bean Soup https://www.goodhousekeeping.com/food-recipes/a16075/tuscan-pinto-bean-soup-recipe-ghk0414/

Pinto Bean Burritos https://www.goodhousekeeping.com/food-recipes/a10513/pinto-bean-burritos-recipe-ghk1010/

Three Bean Vegan Tamale Pie https://www.connoisseurusveg.com/three-bean-vegan-tamale-pie/#wprm-recipe-container-13289

Vegan Pinto Bean Brownies http://www.exsloth.com/vegan-pinto-bean-brownies/

Homemade Vegetarian Chili https://cookieandkate.com/vegetarian-chili-recipe/#tasty-recipes-23997

Easy Refried Beans https://cookieandkate.com/easy-refried-beans-recipe/#tasty-recipes-28453

Loaded Veggie Nachos https://cookieandkate.com/loaded-veggie-nachos-recipe/#tasty-recipes-28532

Pinto Posole https://cookieandkate.com/pinto-posole-recipe/#tasty-recipes-28231

Mole Pinto Beans https://www.food.com/recipe/mole-pinto-beans-173251

Resources

http://www.whfoods.com/genpage.php?tname=foodspice&dbid=89#descr

https://www.healthline.com/nutrition/what-is-bpa

https://www.stilltasty.com/fooditems/index/18010

https://www.leaf.tv/articles/how-to-tell-if-pinto-beans-are-stale-or-too-old/

https://www.stilltasty.com/fooditems/index/18011

https://www.umassmed.edu/nutrition/Cardiovascular/handouts/beans/

https://beaninstitute.com/dry-vs-canned-beans-which-is-better/

https://www.bonappetit.com/story/dried-beans-worth-effort

https://www.mayoclinic.org/healthy-lifestyle/nutrition-and-healthy-eating/expert-answers/bpa/faq-20058331

https://www.niehs.nih.gov/health/topics/agents/sya-bpa/index.cfm

https://www.camelliabrand.com/dry-beans-vs-canned-whats-the-difference/

https://www.ehow.com/info_8245575_things-make-pinto-beans.html

https://foodcombo.com/find-recipes-by-ingredients/beans-pinto

https://cals.arizona.edu/fps/sites/cals.arizona.edu.fps/files/cotw/Pinto_Beans.pdf

Page, Karen. (2014) The Vegetarian Flavor Bible. New York, NY: Little, Brown and Company.

About Judi
Julia W. Klee (Judi) began her journey enjoying “all things food” in elementary school when she started preparing meals for her family. That love of food blossomed into a quest to learn more and more about health and wellness as related to nutrition. She went on to earn a BS Degree in Food and Nutrition, then an MS Degree in Nutrition. She has taught nutrition and related courses at the college level to pre-nursing and exercise science students. Her hunger to learn didn’t stop upon graduation from college. She continues to research on a regular basis about nutrition as it relates to health. Her hope is to help as many people as possible to enjoy foods that promote health and wellness.

Simple Vegetable Soup

Simple Vegetable Soup

To me (and many people), there’s nothing more comforting than a warm bowl of soup on a cold day. Here’s a delicious vegetable soup that’s easy to put together and cooks up in less than an hour. Other than opening a can, you can’t get much easier than that! As written, this recipe makes four meal-size servings. However, if you need more, it can very easily be increased.

Below is a video demonstration of how to make the soup. The written recipe follows the video. I hope this helps!!

Enjoy!
Judi

Simple Vegetable Soup
Makes 4 Meal-Size Servings

4 cups vegetable broth
1 (28 oz) can crushed tomatoes
1 (12 oz) bag frozen mixed vegetables
1 cup diced cabbage
1 cup diced potato
½ cup diced onion
½ cup brown lentils, rinsed
2 Bay leaves
1 Tbsp dried parsley
1 tsp dried marjoram

Put all ingredients in a large pot. Bring to a boil. Cover the pot, reduce the heat to medium-low and simmer for 45 minutes, until everything is tender and flavors are blended. Stir occasionally while it cooks. Enjoy!

Store leftovers in a covered container in the refrigerator. Use within 5 days.

About Judi
Julia W. Klee (Judi) began her journey enjoying “all things food” in elementary school when she started preparing meals for her family. That love of food blossomed into a quest to learn more and more about health and wellness as related to nutrition. She went on to earn a BS Degree in Food and Nutrition, then an MS Degree in Nutrition. She has taught nutrition and related courses at the college level to pre-nursing and exercise science students. Her hunger to learn didn’t stop upon graduation from college. She continues to research on a regular basis about nutrition as it relates to health. Her hope is to help as many people as possible to enjoy foods that promote health and wellness.

Black Beans

Black Beans 101 – The Basics

Black beans are a popular and extremely health-promoting legume to include in your meals whenever you can. If you’re wondering about the health benefits of black beans or are looking for ideas on what to do with them, such as what foods, herbs, or spices go well with black beans, you’re in the right place! I’ve answered those questions and a lot more! Read onward for a comprehensive review of black beans.

Enjoy!
Judi

Black Beans 101 – The Basics

About Black Beans
Black beans are native to North, South and Central America. They date as far back as 7,000 years ago when they were a staple food for Central and South Americans. Black beans are about one-half inch long with a shape similar to a pinto bean. They are members of the plant family Phaseolus vulgaris, along with navy, kidney, and pinto beans. Black beans are sometimes referred to as turtle beans or black turtle beans. Today, black beans are grown worldwide and are enjoyed in many cuisines. Cooked black beans are soft in texture with a mild, but slightly sweet flavor.

Nutrition and Health Benefits of Black Beans
Black beans are an excellent source of molybdenum. This trace mineral is critical in the formation of enzymes used in a variety of essential functions including carbohydrate metabolism. They also contain a lot of folate, fiber, copper, manganese, Vitamin B1, phosphorus, magnesium and iron. Furthermore, a one cup serving of black beans provides about 15 grams of protein (about one-third of the day’s needs), 15 grams of fiber, and about 180 mg of alpha-linolenic acid (an omega-3 fatty acid). That’s impressive!

Blood Sugar Control and Resistant Starch. The high fiber content of black beans coupled with the high protein content makes them an excellent food for helping to control blood sugar levels. Both fiber and protein help to regulate the passage of food through the gastrointestinal tract, reducing spikes in blood sugar from absorbed carbohydrates. This property gives black beans (and other legumes) a low rating on the glycemic index.

Also, recent studies have shown that black beans have specific peptides (types of proteins) that inhibit the formation of glucose transport molecules. This further inhibits glucose absorption from the digestive tract, also helping to keep blood sugars level. This can help in the management of blood sugar issues, especially Type 2 diabetes.

In addition to the high fiber content of black beans, much of their carbohydrate content consists of resistant starch. Resistant starch is not easily broken down in the upper digestive tract. Instead, it is carried to the large intestines where bacteria feed on the starch, breaking it down into short chain fatty acids. The fatty acids become fuel for our intestinal cells and may play a key role in the prevention of metabolic syndrome, bowel disorders, and some cancers. Short chain fatty acids have been found to aid in the treatment of ulcerative colitis, Crohn’s disease, and antibiotic-associated diarrhea. These properties help to decrease the risk of colorectal cancer in those who regularly eat black beans and other legumes.

Phytonutrient Content: Black beans are an outstanding source of anthocyanins and other flavonoids. Many of these compounds contribute to the rich, dark color of black beans. Anthocyanins acts as antioxidants, fighting harmful molecules in the body. They may provide anti-inflammatory, anti-viral, and anti-cancer benefits as well.

A 2010 report published in Nutrition Reviews found that anthocyanins may help to protect heart health by improving cholesterol levels and blood sugar levels, in addition to fighting oxidative stress. All of these factors contribute to heart disease. A 2011 study published in the American Journal of Clinical Nutrition found that anthocyanins may help to prevent high blood pressure, further protecting our heart health.

Dried vs Canned Black Beans
Dried Black Beans. Dried black beans should first be soaked, rinsed and drained, then cooked before being eaten. This takes some time and may not be feasible for all cooks. However, the nutrient content of dried, soaked and cooked beans is a little higher than that of the canned variety. Dried black beans are cheaper to buy when considering the amount of cooked beans you get from a one-pound bag vs the amount in one can of beans. If the cost factor is important to you, dried beans are the best option.

Storing Dried Black Beans. Store dried black beans in a cool, dry area in a sealed container. When properly stored, they should stay fresh for 2 to 3 years, although they are usually safe to eat beyond that. If you open a container of dried black beans and do not use them all, return the remaining unused beans to an airtight, sealed container stored in a cool, dry place. Dried beans are usually safe to eat beyond their ‘best by” date, although the quality may decline over time. If your dried beans develop an “off” odor or appearance, or show signs of mold or insect infestation, it’s time to discard them.

Canned Black Beans. Canned black beans are a convenient staple food to have in the pantry, and can be found in just about any grocery store. They should be rinsed and drained before eating. Since they are fully cooked, canned black beans can be eaten cold, cooked, pureed, or baked.

The nutrient content of canned black beans is slightly less than that of their dried counterparts, but not so much that they should be avoided. They are typically sorted before processing, as you would dry beans. The beans are then pre-hydrated before being cooked in their sealed cans. Some varieties of canned black beans have added salt and/or calcium chloride to maintain firmness. If you want to avoid those additives, organic and no salt added varieties of canned black beans are available at many grocery stores. The processing of canned black beans is relatively low when compared with other foods, and are considered to be a healthy alternative to dried black beans.

Storing Canned Black Beans. The quality of unopened cans of black beans can be good for 3 to 5 years if kept in a cool, dry place. They are usually safe to eat beyond that, but the quality may decline. Canned black beans usually have a “best by” date stamped on the can. If kept properly, the beans should be safe to eat beyond that day, but the quality may decline. If you notice a bad odor, off appearance or flavor, or mold, the beans should certainly be discarded. If any canned items are leaking, rusting, bulging, or severely dented, they should be discarded.

[On a personal note…When I was young, my parents had a pantry room off the kitchen where they stored canned foods. Apparently, they didn’t check them routinely. One day, a large can of fruit cocktail exploded in the room. It was everywhere! We did the best we could with clean-up, but that room smelled like old fruit cocktail for a VERY long time after that. So…lesson learned: Monitor your canned goods to be sure they are not bulging and use them within a reasonable amount of time!]

How to Prepare Dried Black Beans
Black beans should be soaked before being cooked. This makes them more tender, reduces cooking time, and also reduces their gas-producing tendencies when eaten. Preparing dried black beans is not hard, but does take some time.

First, place your dried beans in your cooking pot. Sort through them to remove any stones or other debris that may be in the bag, and any beans that don’t look good. Then rinse the beans and drain the water. Next, cover the beans with fresh water by at least two inches. There are two methods of soaking to choose from at this point…

Overnight method. Cover the pot and allow the beans to soak overnight or for at least 6 hours. Drain the water and cover the beans with fresh water by at least two inches. Cook your beans (see directions below).

Quick soak method. Cover your rinsed and drained beans in your cooking pot with fresh water. Place the lid on the pot and bring them to a boil. Boil them for two minutes. Remove the pot from the heat and allow them to rest in the covered pot for two hours. Drain the water, then fill the pot with fresh water. Cook your beans (see directions below).

Cooking your soaked beans. Place your pot filled with water and soaked beans on the stove. Cover the pot and bring them to a boil, then lower the heat. Tilt the lid on the pot and allow the beans to simmer until they are soft. This can take anywhere from 45 minutes to 2 hours depending upon how fast they are cooked and how long they soaked. Stir them occasionally. Be sure they remain submerged. If needed, add more hot water to the pot. Do NOT add salt or acidic ingredients like vinegar or lemon juice to the water at first. This will cause the beans to be tough and will make them hard to cook. If salted or flavored water is desired, add flavorings when they are close to being done. When they are soft, drain the water and use them as desired. Soaked dried beans may also be cooked in a pressure cooker or slow cooker.

Quick Ideas and Tips for Using Black Beans
* To have a supply of freshly cooked black beans readily available, cook a pound or two of dried beans. Cool them down in cold water, drain well, then transfer them to freezer bags or containers and store them in the freezer. You’ll have plenty of cooked black beans ready when you need them.

* Make a simple salad by combining black beans with celery, bell peppers, tomatoes and your favorite spicy dressing. Serve this on its own, on a bed of greens, or with a cooked grain of your choice.

* Make a quick taco by filling shells with cooked black beans, greens of choice, chopped tomatoes, avocado slices, onions and any other veggies you want. Top with chopped cilantro, a sprinkle of cheese, a drizzle of lime juice, and a dollop of sour cream or cashew cream.

* Make a black bean hummus by blending a can of black beans with tahini or avocado, lime, chili powder, and garlic to taste.

* Add cooked blacked beans to a stuffed baked potato.

* Use black beans in a burrito in place of refried beans.

* Make an easy dip by layering black beans with guacamole, diced tomatoes, onions, and chopped cilantro.

* Make a black bean salsa by combining black beans with diced tomatoes, red onion, jalapeno, and chopped cilantro. Add lime juice and salt to taste. Let rest for 20 minutes for flavors to blend, then serve with tortilla chips.

* Stuff baked sweet potatoes with a mixture of black beans, chopped onions, corn, diced tomatoes, all flavored with cumin, chili powder, cilantro and lime juice. Place the mixture in the baked sweet potato and top with cheddar cheese and a dollop of plain yogurt, sour cream or cashew cream.

* Try a black bean and walnut lettuce wrap. In a bowl, combine black beans, chopped walnuts, paprika, chili powder, cumin, chopped onion, diced tomatoes and any other vegetables you want, some lime juice, a little cheese, guacamole, sour cream, and/or salsa. Spoon the filling into large lettuce leaves, wrap and enjoy!

Herbs/Spices That Go Well with Black Beans
Basil, bay leaf, cayenne, chili pepper flakes, chili powder, cilantro, coriander, cumin, garlic, ginger, mint, mustard, oregano, paprika, parsley, pepper, rosemary, salt, savory, thyme

Foods That Go Well with Black Beans
Proteins, Legumes, Nuts, Seeds: Beef, chicken, chickpeas, eggs, pork, seafood, tempeh

Vegetables: Bell peppers, carrots, celery, chiles, chives, cucumbers, jicama, mushrooms, onions, potatoes, scallions, spinach, squash (winter), sweet potatoes, tomatoes

Fruits: Avocado, citrus fruits (esp. lemon, lime, orange), mangoes, olives, plantains

Grains and Grain Products: Corn, grains (in general), quinoa, rice, tortillas

Dairy and Non-Dairy: Cheese, sour cream

Other Foods: Chocolate, coffee, liquid smoke, miso, oil, sherry (dry), soy sauce, stock (vegetable), vinegar

Black beans have been used in the following cuisines and dishes…
Black bean cakes, Brazilian cuisine, burritos, Caribbean cuisine, casseroles, Central American cuisines, chili (vegetarian), Cuban cuisine, dips, empanadas, enchiladas, Jamaican cuisine, Latin American cuisines, Mexican cuisine, nachos, pates, Puerto Rican cuisine, purees, quesadillas, refried beans, salads, soups, South American cuisines, Southwestern (U.S.) cuisine, spreads, stews, tacos, Tex-Mex cuisine, tostadas, veggie burgers

Suggested Flavor Combos Using Black Beans
Add black beans to any of the following combinations…

Avocado + cilantro + corn + lime juice
Avocado + cilantro + onions + rice
Bell peppers + corn + lettuce + scallions
Bell peppers + garlic + onions
Brown rice + salsa + tomatoes
Cheddar cheese + chickpeas + corn + green onions
Chiles + cilantro + coriander + cumin + lime + scallions
Cilantro + lime + oregano + red onions
Cilantro + orange
Coriander + cumin + ginger
Garlic + thyme
Kale + sweet potatoes
Mango + quinoa
Salsa + sweet potatoes + tortillas

Recipe Links
Black Bean and Rice Salad https://www.thespruceeats.com/black-bean-and-rice-salad-3051221

Crock Pot Black Bean Chili https://www.thespruceeats.com/crockpot-black-bean-chili-recipe-481139

Easy Crock Pot Santa Fe Chicken https://www.thespruceeats.com/cindys-crock-pot-santa-fe-chicken-3054743

Southwest Black Bean and Corn Salad https://www.thespruceeats.com/southwest-black-bean-and-corn-salad-3377848

Quick and Easy Vegetarian Black Bean Soup https://www.thespruceeats.com/quick-vegetarian-black-bean-soup-3378007

Grilled Bean Burgers https://www.tasteofhome.com/recipes/grilled-bean-burgers/

Texas Black Bean Soup https://www.tasteofhome.com/recipes/texas-black-bean-soup/

Black Bean and Corn Quinoa https://www.tasteofhome.com/recipes/black-bean-corn-quinoa/

Black Bean Brownies https://www.tasteofhome.com/recipes/black-bean-brownies/

Black Bean and Rice Enchiladas https://www.tasteofhome.com/recipes/black-bean-and-rice-enchiladas/

Slow Cooked Stuffed Peppers https://www.tasteofhome.com/recipes/slow-cooked-stuffed-peppers/

Taco Lasagna https://www.tasteofhome.com/recipes/taco-lasagna/

Chili Tortilla Bake https://www.tasteofhome.com/recipes/chili-tortilla-bake/

15-Minute Black Bean Salad http://www.whfoods.com/genpage.php?tname=recipe&dbid=20

Mexican Black Bean Wrap with Avocado and Tri-Colored Slaw https://hellolittlehome.com/mexican-black-bean-wrap-avocado-tri-color-slaw/

Veggie Burrito Bowls https://www.easycheesyvegetarian.com/veggie-burrito-bowls/

Resources

http://www.whfoods.com/genpage.php?tname=foodspice&dbid=2

https://www.stilltasty.com/Fooditems/index/16542

https://www.stilltasty.com/Fooditems/index/16544

https://www.thespruceeats.com/cooking-black-beans-1808034

https://www.bonappetit.com/recipes/article/12-things-to-do-with-a-can-of-black-beans

https://domesticsuperhero.com/southwestern-stuffed-sweet-potatoes/

https://www.verywellhealth.com/the-scoop-on-anthocyanins-89522

https://www.ncbi.nlm.nih.gov/pmc/articles/PMC5613902/

https://www.phlabs.com/the-benefits-of-black-beans-will-blow-you-away

https://www.thespruceeats.com/black-bean-history-1807569

Page, Karen. (2014) The Vegetarian Flavor Bible. New York, NY: Little, Brown and Company.

About Judi
Julia W. Klee (Judi) began her journey enjoying “all things food” in elementary school when she started preparing meals for her family. That love of food blossomed into a quest to learn more and more about health and wellness as related to nutrition. She went on to earn a BS Degree in Food and Nutrition, then an MS Degree in Nutrition. She has taught nutrition and related courses at the college level to pre-nursing and exercise science students. Her hunger to learn didn’t stop upon graduation from college. She continues to research on a regular basis about nutrition as it relates to health. Her hope is to help as many people as possible to enjoy foods that promote health and wellness.

Stir-Steamed Kale with Vegetables and Beans

Stir-Steamed Kale with Vegetables and Beans

Here’s a great way to work in your greens in an easy meal to put together. It can be served over any cooked grain or starchy vegetable like potatoes. It would even be good stuffed into an acorn squash! Below is a video demonstration of how to make this dish. The written recipe follows the video.

Enjoy!
Judi

Stir-Steamed Kale with Vegetables and Beans
Makes 5 (1 cup each) Main Dish Servings

1 cup vegetable broth
½ cup chopped onion
3 cloves garlic, chopped
1 cup diced carrot
2 tsp dried thyme
1 Tbsp dried parsley
1 tsp dried basil
6 cups chopped kale (about ½ pound)
1 cup chopped mushrooms, OR 1 (4 oz) jar of mushrooms, drained
1 cup cooked beans or peas of choice
1 (14.5 oz) can diced tomatoes
1 Tbsp red wine vinegar
Sesame seeds, optional garnish
5 cups (or more) hot cooked grain of choice (i.e. rice, quinoa, millet, polenta, couscous, etc. OR stuff it into an acorn squash instead of on top of a grain)

In a large pot, heat about 1/4 to 1/3 cup of the vegetable broth. Add chopped onion, garlic, carrots and herbs. Sauté about 3 to 5 minutes, until the onions and carrots start to soften. Add the kale, mushrooms, beans, and the rest of the vegetable broth. Stir to combine. Cover the pot and allow the vegetables to cook, stirring often, for about 13 to 15 minutes, until the vegetables are tender and most of the broth is gone. Stir in the tomatoes, and vinegar; allow everything to heat through for a minute or two. Remove from heat. Sprinkle with sesame seeds, if desired. Serve over a hot cooked grain (or grain product) of choice. If preferred, simply mix the grain in with the veggies and serve it all together. OR use this mixture as stuffing for an acorn squash. Enjoy!

Vegetable-Bean Medley

Vegetable-Bean Medley

Here’s an easy recipe for a vegetable mixture that’s really versatile. It would be excellent served over a bed of any starch you choose…rice, quinoa, couscous, millet, or any other grain product, or even mashed potatoes! It would also be delicious served as a simple soup, suitable for those who like a little broth, but not a lot. The mixture has some liquid in it (deliberately) so there’s something to moisten the base, like mashed potatoes.

Below is a video where I demonstrate how to make this dish. The written recipe is below the video. I hope this helps 🙂

Enjoy!
Judi

Vegetable-Bean Medley
Makes 4 to 5 Servings

1-1/2 cups vegetable broth
1 (14.5 oz) can diced tomatoes with juice
3 cloves garlic, chopped
1/2 cup diced onion
1-1/2 cups diced carrots
3/4 cup diced bell pepper
1-1/2 tsp dried thyme
3/4 tsp dried basil
2 tsp dried parsley

½ tsp salt, optional (or to taste)*
1 cup diced zucchini or yellow squash
2 cups coarsely chopped fresh spinach
2 cups cooked great northern beans
OR 1 (15.8 oz) can great northern beans, rinsed and drained

Cooked starch of choice, like rice, quinoa, couscous, pasta, millet, or even mashed potatoes (optional)

In a medium to large pot with a tight-fitting lid, add the vegetable broth through parsley from the ingredients list. Stir to combine. Cover the pot and bring to a boil. Reduce heat to medium-low and simmer, stirring occasionally for about 10 minutes, until the carrots start to soften.

Taste the mixture to see if seasonings need adjusting to your taste, and if it needs any added salt. Add any seasoning adjustments plus the squash, spinach, and beans. Stir to combine. Cover the pot and allow the vegetables to simmer another 5 to 7 minutes, or until the squash is lightly cooked, the beans are heated through, and the spinach is wilted. Remove from heat and serve over your hot, cooked starch of choice, OR eat it like it is as a soup. Enjoy!

Cook’s Note: At the end of cooking time, there will still be some liquid in the pot with the vegetables. Use this to your advantage to help moisten whatever starch you serve this with. It will only enhance the dish!

* Added salt may or may not be needed in this dish. It depends upon your personal tastes and how much salt was in the vegetable broth.

About Judi
Julia W. Klee (Judi) began her journey enjoying “all things food” in elementary school when she started preparing meals for her family. That love of food blossomed into a quest to learn more and more about health and wellness as related to nutrition. She went on to earn a BS Degree in Food and Nutrition, then an MS Degree in Nutrition. She has taught nutrition and related courses at the college level to pre-nursing and exercise science students. Her hunger to learn didn’t stop upon graduation from college. She continues to research on a regular basis about nutrition as it relates to health. Her hope is to help as many people as possible to enjoy foods that promote health and wellness.

Hearty Split Pea Soup

Hearty Split Pea Soup

Here’s an easy to put together recipe for a thick and hearty split pea soup. It’s delicious…and even passed the “husband test!” He loved it. So…I think it’s worthy of a try if you’re looking for a thick and satisfying soup for a cold winter day.

Below is a video showing how to make the soup. The written recipe is below the video. Enjoy!

Judi

Hearty Split Pea Soup
Makes About 10 Cups of Soup

1 lb (2 cups) dry split green peas
1 cup chopped onion
3 cloves garlic, chopped
1 cup chopped celery
1 cup chopped carrots
2 Bay leaves
1 Tbsp dried parsley
1 tsp dried basil
1 tsp dried thyme
¼ tsp black pepper
8 cups vegetable stock
1 cup diced potatoes
½ cup uncooked rice of choice, rinsed and drained
Salt, to taste

Sort through the peas to remove any stones or debris. Place the sorted peas in a colander and rinse well, then drain.

Add all the ingredients except the potatoes, rice, and salt to a large soup pot; stir to combine. Bring the mixture to a boil; cover the pot and reduce the heat to medium-low so the soup will simmer. Stir occasionally and cook for about 45 minutes. Taste the soup and adjust seasonings and add salt as needed (the amount will vary depending upon how much salt is in the broth). Add the potatoes and rice, and continue cooking for another 45 minutes to 1 hour, or until everything is very tender and the flavors are blended. Total cooking time is about 1 hour and 45 minutes. Serve in a chunky style, or blend to creamy smooth, if desired.

Store leftover soup in a covered container in the refrigerator and use within 5 days. This soup may also be frozen.

Note! This soup will thicken up a lot when it is stored in the refrigerator. It is helpful to add some water to it when reheating leftovers. Simply add some water and stir it in until the soup is the consistency you want, then reheat it in the microwave or on the stove.

Red Lentil Soup with Italian Herbs

Red Lentil Soup with Italian Herbs

Here’s a delicious soup that’s very easy to put together, takes little time to cook, and is flexible so it can easily be increased/decreased to meet your needs and adjusted to your preferences. What more can you ask for?? Give it a try sometime.

Below is a video demonstration of how to make the soup. The written recipe follows the video.

Enjoy!
Judi

Red Lentil Soup with Italian Herbs
Makes 5 to 6 Cups of Soup
(2 to 3 Meal-Size Servings)

4 cups vegetable broth
1 (14.5 oz.) can diced tomatoes (or 2 cups fresh tomatoes, diced)
1 cup diced carrots
½ cup red lentils, rinsed and drained
1 Tbsp dried minced onion (or 1/4 to 1/3 cup chopped onion)
1 tsp dried parsley flakes
½ tsp dried basil leaves
¼ tsp dried oregano
¼ tsp garlic powder (or 2 cloves of garlic, minced)
½ tsp salt (or to taste)
1/8 tsp black pepper
2 cups loosely packed fresh spinach
1 cup spiral pasta, uncooked

Add all ingredients (except the spinach and pasta) to a pot with a lid. Bring to a boil, cover the pot, then lower heat to simmer. Simmer, stirring occasionally, for 10 minutes. Stir in the spinach and pasta. Raise heat if needed to bring the soup back to a boil, then lower heat back to simmer. Simmer with the lid on the pot, stirring occasionally, until the pasta is tender. Serve.

Store extra soup in the refrigerator in a covered container. Use within 5 days. This soup may also be frozen.

Millet Vegetable Pilaf

Millet Vegetable Pilaf

If you’re looking for something different to fix for a social gathering, or simply to make ahead for a weeknight meal, this should do the trick. It’s not hard to make and is ready in about the time it takes to cook a small pot of millet.

Below is a video demonstration of how to make this dish. The written recipe follows the video.

Enjoy!
Judi

Millet Vegetable Pilaf
Makes 4 to 5 Meal-Size Servings (or About 8 Side Servings)

1 cup millet
2 cups vegetable broth

1/2 cup vegetable broth, or more as needed
1/2 cup chopped onion
3 cloves garlic, minced
1/3 cup diced bell pepper
1 cup diced carrot
1 tsp dried basil leaves
1 tsp dried thyme leaves
1 Tbsp dried parsley flakes
Salt and pepper to taste
1 small (4 oz) can or jar of mushroom pieces OR 1 cup sliced fresh mushrooms
1-1/2 cups diced zucchini or yellow squash
1-1/2 cups cooked great northern beans OR 1 (15 oz) can great northern beans, optional
2 cups coarsely chopped fresh spinach
Zest of 1 lemon
Juice of one lemon

Place the millet in a fine strainer and rinse it under running water. Allow it to drain over a bowl. In a medium pot with a lid, bring the 2 cups of vegetable broth to a boil. Add the millet. Cover the pot and reduce heat to medium-low so the millet will simmer. Cook for 20 minutes, until most of the liquid has been absorbed. Remove from heat and allow the millet to rest for 5 minutes, with the lid still on the pot.

Meanwhile, cook the vegetables. In a skillet with a lid, heat about 1/3 cup of the vegetable broth. Add the onion, garlic, bell pepper, carrots, basil, thyme, parsley flakes, and salt and pepper to taste. Stir-steam the vegetables over medium heat until they are almost crisp-tender, keeping the skillet covered when not stirring. Add more broth as needed to keep the mixture from getting dry. When the carrots are almost fork-tender, stir in the mushrooms, zucchini, the cooked beans (if using them), chopped spinach, any remaining broth, and the lemon zest. Continue cooking about another 1 to 2 minute, to allow the spinach to wilt and the zucchini to cook to a crisp-tender. Turn off the heat and stir in the lemon juice. Total cooking time is roughly 13 minutes. Remove from heat. Gently stir in the cooked millet and serve.

Red Lentil Vegetable Patties

Red Lentil Vegetable Patties

Looking for a veggie burger recipe that’s easy to make YOUR way? Well…you’ve found it! This recipe is extremely flexible and an easy way to use up some leftover cooked potatoes or vegetables you’re just not sure what to do with. It’s SO flexible, you can use cooked potatoes or rice, and vegetables that are cooked, frozen, or raw! How convenient is that? If that’s not enough, the burgers can be pan-fried or baked in the oven without any added oil. Something for everyone 🙂

Below is a demonstration of how to make the patties. The written recipe is below the video. I hope this helps!

Enjoy,
Judi

Red Lentil Vegetable Patties
Makes 10 Patties (1/2 cup of mixture in each)

This recipe makes delicious veggie burgers that easily include leftover cooked vegetables or extra veggies that you have on-hand, whether fresh or frozen. The flavor will change a bit based on which veggies you use, but that’s the fun of this recipe! Experiment with it and enjoy! jk

1 cup red lentils
2 cups water
1-1/4 cup oats (any type), or more if needed
1 cup cooked rice of choice, or cooked potatoes (any kind)
2 cups any combination vegetables of choice, raw, cooked or frozen (and thawed)*
1 (6 oz) can tomato paste
2 Tbsp dried minced onion
2 Tbsp dried parsley
1 tsp dried oregano
1 Tbsp dried basil
2 tsp garlic powder
¼ tsp black pepper
1 tsp salt, or to taste (use less of including cooked vegetables that were already salted)
Water, as needed
1 to 2 Tbsp extra virgin olive oil, optional (use if pan frying the patties)

Place the red lentils in a pot with the 2 cups of water. Bring to a boil, then lower the heat and simmer for 10 minutes with a lid cocked on the pot, or until the lentils are tender and the water is absorbed. Remove from the heat and set aside to cool.

Place the oats in a food processor and pulse until coarsely chopped. Transfer oats to a large bowl; set aside. Add the cooked rice to the bowl, if using it. Or, if using mashed potatoes, add them to the bowl. If using other cooked potatoes that are in pieces, place them in the bowl of a food processor. Add the 2 cups vegetables of choice (see note below) to the food processor and pulse until finely grated (but not pureed). Transfer the vegetables to the bowl with the oats.

Transfer the cooled lentils to the bowl with the oats and vegetables. Add in the tomato paste and seasonings; stir well to combine. Add water as needed to make a mixture that holds together when lightly pressed together. If the mixture is too soft from too much liquid, add more processed oats until the mixture sticks together. If the mixture is too dry and will not hold together, add a little more water, until the mixture holds together when lightly pressed.

To bake the patties: Measure the mixture by ½-cup increments onto a baking tray lined with parchment paper or a silicone baking mat. Lightly press the mixture with your moist (from water or oil) fingers to form patties. Bake them in a 400°F oven until lightly browned on the first side, about 25 to 30 minutes. Flip the patties over and bake another 15 to 18 minutes, until the patties are lightly browned on the second side, and are firm to the touch, but still have a slight “give” when lightly pressed. Serve.

To pan fry the patties: Measure the mixture by ½-cup increments and place them on a plate or tray. Lightly press the mixture with your moist (from water or oil) fingers to form patties. Heat a large skillet over medium heat and add the 1 or 2 tablespoons of extra virgin olive oil. Transfer patties into the heated skillet and sauté on medium to medium-low heat, until the first side is brown and patties are starting to firm up. Watch them closely, as they can easily get overly browned.  Flip the patties over and continue cooking until both sides are browned and the patties are firm to the touch. They may take about 30 minutes to cook, since they do better at lower heat so they don’t burn. They may be flipped more than once, if needed.

The patties are excellent served with ketchup, salsa, kimchi, or any sauce of your choice, like garlic herb tahini sauce, Sriracha tahini sauce, tomato sauce, yogurt sauce, mustard sauce, or any other sauce you enjoy with a veggie burger.

Store extra patties in a covered container in the refrigerator. Use within 5 days. Patties may be frozen individually then transferred to a freezer container for later use. Use frozen patties within 6 months.

* If using raw vegetables, choose something that cooks quickly like zucchini, yellow squash or spinach. Place the raw vegetables in the food processor and pulse until finely chopped. When using frozen vegetables, place them in a colander under running water to thaw them out. Allow them to drain well, then add them to the food processor. If using already cooked vegetables, drain off any extra water before adding them to the food processor.

Some suggested vegetables that work well in this recipe would be raw zucchini, yellow squash, bell peppers, and/or spinach or baby greens. Already cooked vegetables that would work well include carrots, cabbage, cauliflower, parsnips, stir-fry blends, California blend, mixed vegetables, green beans, kale, or other cooked vegetables or blends that you enjoy. Just about any frozen and thawed vegetable or vegetable blend would work well as long as it can be eaten in the blanched state that it was in before being frozen. Frozen potatoes or other such vegetables that should not be eaten unless thoroughly cooked should not be used as a frozen and thawed item (unless you cook it before using it in the recipe).

About Judi

Julia W. Klee (Judi) began her journey enjoying “all things food” in elementary school when she started preparing meals for her family. That love of food blossomed into a quest to learn more and more about health and wellness as related to nutrition. She went on to earn a BS Degree in Food and Nutrition, then an MS Degree in Nutrition. She has taught nutrition and related courses at the college level to pre-nursing and exercise science students. Her hunger to learn didn’t stop upon graduation from college. She continues to research on a regular basis about nutrition as it relates to health. Her hope is to help as many people as possible to enjoy foods that promote health and wellness.