Navy Beans 101 – The Basics
About Navy Beans
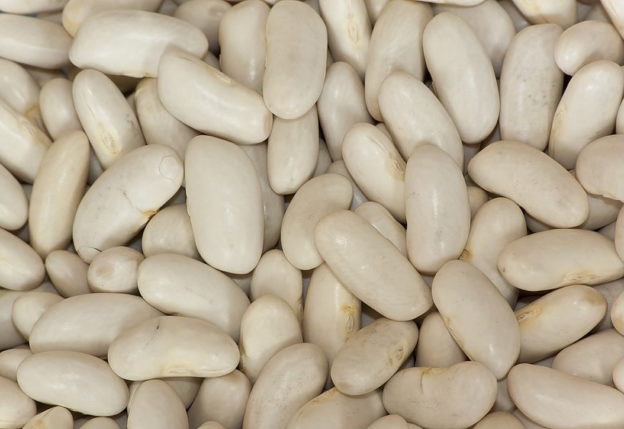
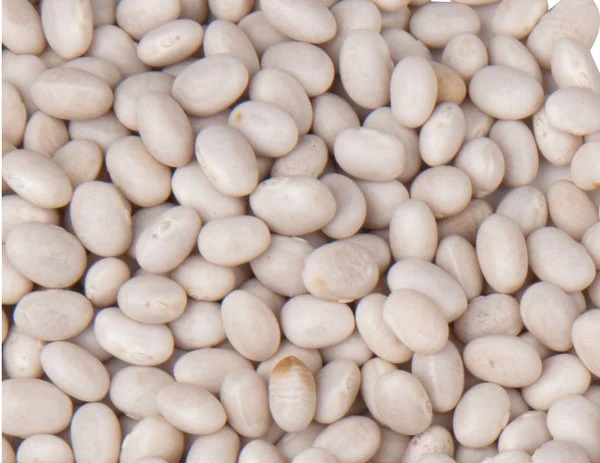
Navy beans are small, pea-sized white beans that are closely related to other white beans, such as cannellini and great northern beans. Because of their size, navy beans are sometimes called pea beans. They may also be called Boston beans, Yankee beans, and haricot beans. They have a fairly mild flavor with a dense texture. When cooked, navy beans become creamy and are often pureed and added to soups, stews, and dips as a thickener. They are most often used in baked beans. Navy beans are the second most popular bean in America, following pinto beans. Navy beans are rarely sold fresh, so they can be found dried, canned or jarred in most American grocery stores year-round. All forms are reasonably priced, so they should be a pantry staple for everyone.
Navy beans originated in Peru several thousand years ago. Their current name stems from their use in the U.S. Navy in the early 1900s. Their long shelf life, low cost, and high nutritional value led them to become a standard food for sailors on Navy ships. There is a long tradition of serving Senate Bean Soup, which features navy beans, in the restaurant of the U.S. Senate in Washington, D.C. since 1903!
Nutrition and Health Benefits
Navy beans are high in nutritional value. They are rich in protein, fiber, folate, thiamin (Vitamin B1), riboflavin (Vitamin B2), niacin (Vitamin B3), pantothenic acid, pyridoxine (Vitamin B6), iron, potassium, magnesium, copper, phosphorus, manganese, zinc, and selenium. They are so high in fiber content, that a 1 cup serving of cooked navy beans has 19 grams of fiber. That’s 91% of the Daily Recommended Intake of fiber! There are about 255 calories in one cup of cooked navy beans.
Metabolic Syndrome. Metabolic syndrome is a combination of conditions that increase your risk of heart disease, stroke, and Type 2 diabetes. These conditions include increased blood pressure, high blood sugar, excess body fat around the waist, and abnormal cholesterol or triglyceride levels. Having one of these conditions doe not mean you have metabolic syndrome. However, when you have several of them together, you have a greater risk of serious disease. Up to one-third of American adults have metabolic syndrome.
Research studies have shown that navy beans appear to help reduce symptoms of metabolic syndrome. Scientists speculate this effect may be due to the high fiber content of the beans. In a study reported in the March 2015 issue of the Canadian Journal of Dietetic Practice and Research, researchers studied 14 adults who were overweight or obese. The subjects ate 5 cups of navy beans a week for four weeks and experienced reduced waist circumference and reduced total and LDL (low-density lipoprotein) cholesterol levels when compared to baseline.
In another study reported in the February 2017 issue of Global Pediatric Health, researchers fed 38 children who had abnormal blood cholesterol levels a muffin or smoothie containing 17.5 grams of navy bean powder daily for four weeks. By the end of the study, subjects had higher levels of the healthy HDL (high-density lipoprotein) cholesterol when compared to a control group.
Reduced Risk of Heart Attack. As reported in the July 1999 issue of the European Journal of Epidemiology, researchers examined food intake patterns and risk of death from coronary heart disease among over 16,000 men in seven countries for 25 years. Those countries included the United States, Finland, The Netherlands, Italy, former Yugoslavia, Greece, and Japan. Typical food patterns were: higher dairy products (Northern Europe), higher meat consumption (United States), higher consumption of vegetables, legumes, fish, and wine (Southern Europe), and higher consumption of cereals, soy products, and fish (Japan). When all the final data were analyzed, comparing the risk of death from heart disease vs dietary pattern, researchers found that higher legume consumption was associated with 82% reduction in heart attack risk! Surely, it can only help in positive ways to have more legumes in your diet, including navy beans.
Navy beans contain a high amount of various nutrients that contribute to heart health, including fiber, folate, and magnesium. Folate helps to lower levels of homocysteine, an amino acid that plays a role in the methylation cycle. High levels of homocysteine are a risk factor for heart attack, stroke, and peripheral vascular disease, and are found in 20 to 30 percent of patients with heart disease. It is estimated that consuming 100% of the daily value of folate would, in itself, reduce the number of heart attacks in America annually by 10 percent. Only one cup of cooked navy beans provides almost 64% of the recommended daily intake of folate. So including navy beans in your diet on a regular basis can surely help to ward off heart disease.
Navy beans are also high in magnesium, which serves as nature’s calcium channel blocker. Ample magnesium helps to improve the flow of blood, oxygen, and nutrients throughout the body. Research has shown that a magnesium deficiency is associated with heart attack and free radical damage immediately following a heart attack.
Potassium, another element found in good supply in navy beans is important in nerve transmission and muscle contractions, including the heart. It also plays an important role in maintaining normal blood pressure. One cup of cooked navy beans offers over 700 mg of potassium, over one-fourth of our daily needs. Including navy beans in your meals when possible can help to protect against high blood pressure and atherosclerosis.
Stabilized Blood Sugar. Researchers have learned that the fiber in navy beans helps to stabilize blood sugar levels, especially in those with insulin resistance, hypoglycemia, and diabetes. Studies have shown that high fiber diets help to balance blood sugar levels by providing steady, slow-burning energy. Researchers have shown that those who consume about 50 grams of fiber a day had lower levels of blood glucose and insulin. The high fiber group also had lower total cholesterol, triglycerides, and VLDL (very low density lipoprotein) cholesterol. Navy beans are considered to be a low glycemic index food, with a rating of 29. If you suffer from blood sugar issues and/or dyslipidemia, including more beans, such as navy beans, into your diet would be advantageous to your health.
Reduced Risk of Iron Deficiency. A one cup serving of navy beans provides over 4 mg of iron, which is substantial. If you are at risk of developing iron deficiency, eating navy beans on a regular basis can help to boost your stores of iron, preventing or reducing the risk of iron deficiency. Unlike red meat, another source of dietary iron, navy beans are low in calories and are virtually fat-free. So, consuming navy beans for the sake of dietary iron is a healthier choice than red meat. Pregnant and lactating women, growing children, and adolescents all have increased needs for iron. Including navy beans in meals on a regular basis can help to meet those needs.
Energy Production and Antioxidant Protection. Navy beans are a very good source of manganese and a good source of copper. Both minerals are essential cofactors on the oxidative enzyme superoxide dismutase. This enzyme is critical because it disarms free radical molecules produced in the mitochondria (the energy production organelles within our cells).
Copper is needed for the activity of the enzyme, lysyl oxidase, which is important in linking collagen and elastin. Both substances are critical in providing flexibility in blood vessels, bones, and joints.
The production of hemoglobin relies on copper. Without copper, iron cannot be utilized properly in red blood cells. Iron is critical in hemoglobin for carrying and releasing oxygen throughout the body. Navy beans provide manganese, copper, and iron, all critical for energy production and protection from free radicals in the body.
Memory Protection. Thiamin (Vitamin B1) plays a role in enzyme reactions critical to energy production and brain cell/cognitive function. Thiamin is used in the making of acetylcholine, an important neurotransmitter that is essential for memory. Lack of acetylcholine has been shown to be a significant contributing factor in age-related impairment of mental function (senility) and Alzheimer’s disease. It has been well established that those with Alzheimer’s disease have a decrease in acetylcholine levels. One cup of cooked navy beans provides almost 40% of the recommended daily needs of thiamin.
Protein. If you’re wondering where people get protein when following a plant-based diet, wonder no more! Navy beans are a good source of protein (as are other beans), with a one cup serving providing about 42 percent (15 grams) of the recommended daily intake of protein. Furthermore, navy beans provide the blood sugar stabilizing and heart health benefits of soluble fiber, which meat does not offer.
How to Select Navy Beans
Dried Navy Beans. Dried beans are very inexpensive and have a long shelf life. When buying dried navy beans, examine the color and texture of the beans. They should have a cream color and smooth skin, without holes, cracks, or wrinkles on the surface. Also check the “Best by” date. A date further into the future indicates they have recently been processed and packaged. Whereas the sooner “best by” date indicates somewhat older beans. Older beans are perfectly edible, but take longer to cook, so it is to your advantage to choose bags with the date farthest into the future as possible.
Canned or Jarred Navy Beans. Canned (or jarred) beans are more expensive than their dried counterparts. However, they are ready to eat without the need for soaking and cooking. It’s always wise to keep some canned or jarred beans in the pantry in case you need to prepare a meal in a hurry and don’t have time to soak and precook beans. In an emergency, when there is no electricity, you could simply open the can or jar and eat the beans, so they can be vital to have available when unexpected events occur. When buying canned beans, choose cans that are not dented, rusting, nor bulging, and that have a “Best by” date well into the future. Inspect jarred beans to be sure the jar is not cracked and that the safety seal is still intact.
How to Store Navy Beans
Dried Navy Beans. Store dried beans in a cool, dry place, out of direct sunlight. They may be stored in their original plastic bags if you intend to use them within a relatively short amount of time. But when storing them for an extended period of time, it’s best to transfer them to a food safe container with a tight-fitting lid, such as a glass mason jar. Placing an oxygen absorber inside the jar with the beans and removing as much air as possible will help to maintain the quality of your beans. Label your beans with the date packaged, and “Best by” date that was on the original bag, if possible. When stored this way, they will keep for years. It is helpful to know that the older the beans get, the longer they may take to cook. So allow for ample cooking time, if needed, depending upon the age of your beans.
Canned or Jarred Navy Beans. Store canned or jarred beans in a cool, dry, dark place such as your pantry. Arrange your beans according to the “Best by” date so that you will reach for the oldest can (with the nearest “Best by” date) first. Placing newest cans toward the back of a row of like-items will usually arrange them according to date. Then simply take the first can in line when you need them and your system should take care of itself.
Canned vs Cooked Dried Navy Beans
Canned navy beans can be found in most supermarkets. While canned vegetables have lost a lot of their nutritional value when compared with fresh vegetables, there is actually little difference in the nutritional value of canned navy beans and those that you cooked yourself from the dried version. Canning lowers vegetables’ nutritional value since the process involves long cooking time at a high temperature. Whereas, cooking fresh vegetables is often done quickly and often with little water and at a lower temperature. Contrarily, navy beans require a longer cooking time both in the canning process, and cooking (from dried) at home. If canned navy beans make life more convenient for you, there is nothing wrong with saving yourself some preparation time and opting for a can of beans rather than cooking them yourself. It is suggested that you read the ingredients label when shopping and choose those without added salt or other chemical additives. Also, check to be sure the can liner was made without BPA (Bisphenol A), a known health hazard that is gradually being removed from all canned goods.
How to Prepare and Freeze Dried Navy Beans
Cooking Dried Navy Beans. Rinse the dried beans well and inspect for any foreign debris, such as pebbles, then drain. Place the rinsed and drained beans in a large pot and cover with at least two inches of fresh, cool water. There should be two to three times the amount of water as beans. Cover the pot and soak the beans for 6 to 8 hours or overnight. Drain off the soaking water and rinse the beans well. Fill the pot with fresh water, covering the beans with at least two inches of water, with about three times the amount of water as beans. Bring to a boil, then lower heat and simmer the beans until tender, usually for 1 to 2 hours, depending upon how old the beans are (the older they are, the longer they will take to cook). When they are very tender, drain them and use as desired. One and three-fourth (1-3/4) cups of cooked beans is about equivalent to one 15.5 ounce can of beans. Refrigerate any beans that you will not be using immediately, and use them within five days. If you cannot use them within that time, it’s best to transfer them to a freezer container or bag, label them with the date, and freezer them for later use.
Freezing Cooked Navy Beans. Freezing cooked beans is an excellent way to prepare them in advance that makes meal preparation with them faster, easier, and convenient. Furthermore, frozen prepared beans taste far better than canned varieties since there are no additives in them. To freeze your cooked beans, prepare your dried beans as detailed above. As soon as they are finished cooking, drain them well, then chill them quickly. This is easily done by draining your cooked beans in a colander, then immediately fill the cooking pot with fresh cold water. Transfer the hot beans into the pot of cold water and stir them to remove some of the heat from the beans. When the water warms up, drain them again, refill the pot with fresh cold water, and add the beans again to further cool them off. By that time, the beans should be cool enough to store. Drain them well, then transfer them to freezer containers or bags. Label them with the date frozen and place them in the freezer. Lay bags flat in the freezer so they will be easier to break apart when you want to use them. They may also be frozen on a tray then transferred to freezer containers or bags. This will make them easier to remove from the container or bag later (they won’t be frozen in a big clump). For best quality, use your frozen beans within 6 months. They will be edible beyond that, but the quality may start to deteriorate over time.
Quick Ideas and Tips for Using Navy Beans
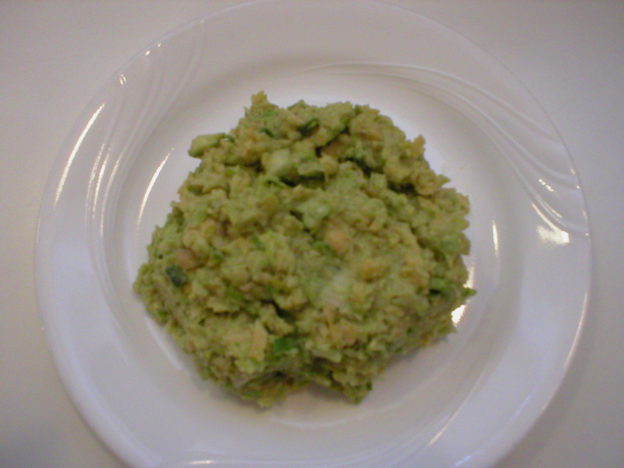
* Try making a sandwich spread or dip by blending cooked navy beans with your favorite herbs and spices. Add a little oil, water, or broth to make it creamy and spreadable.
* Mix cooked navy beans with a little olive oil, sage, and garlic to serve on bruschetta.
* Add some cooked navy beans to tomato soup. Stirring in blended beans will give the soup a creamy richness as well as a nutritional boost.
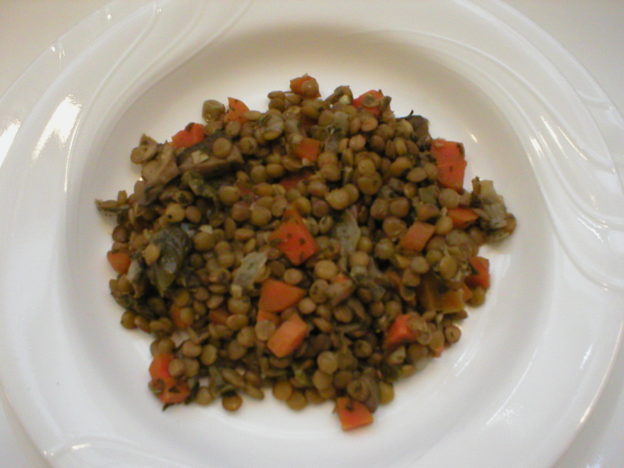
* Combine navy beans with cooked roasted buckwheat and sautéed onions and mushrooms for a hearty main dish.
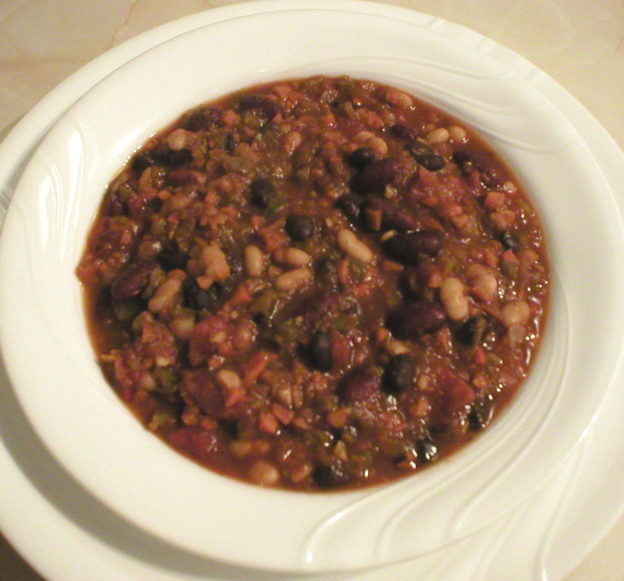
* Use navy beans to make a nutritious white chili.
* To give a rich, umami flavor to navy beans, try using dried mushrooms (porcini, cremini, shiitake, or oyster mushrooms would give the most flavor). Steep the dried mushrooms in boiling water to make a broth. The broth can be used to cook the beans separately, or added to a recipe as part or all of the cooking liquid. Chop the soaked mushrooms and add them to the recipe with the beans. If you don’t care for the texture of rehydrated mushrooms, grind the dried mushrooms to a powder and dissolve the powder in the pot of beans or your recipe liquid.
* Add cooked and cooled navy beans to a vegetable salad. Top the salad with a rosemary vinaigrette dressing.
* Try adding navy beans to a casserole for added protein and other nutrients.
* Try adding navy beans to vegetable bowls.
* Try making a bean spread, dip, or hummus with navy beans as the foundation. Here’s a recipe for Roasted Garlic and White Bean Dip as an example: https://www.alphafoodie.com/roasted-garlic-white-bean-dip/#recipe
* Add navy beans to pasta.
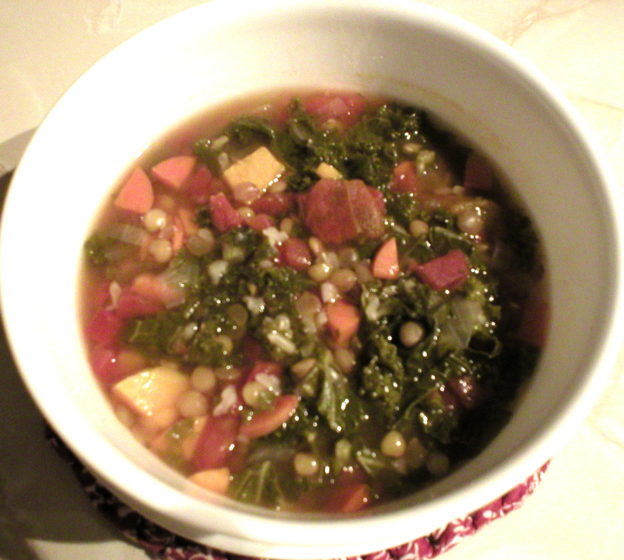
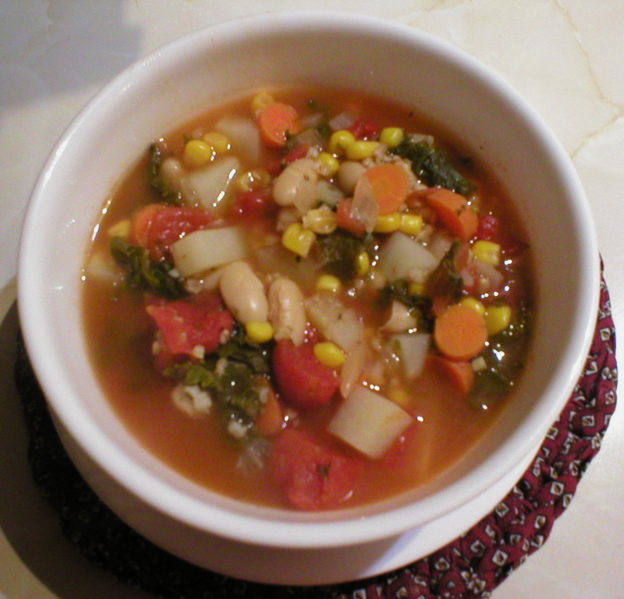
* Make a bean soup with navy beans.
* Make a plant-based veggie burger that includes navy beans.
* Add navy beans to tacos or quesadillas.
* Make a batch of your own baked beans (which typically use navy beans as the main ingredient).
* Include navy beans in any beans and rice dish.
* Try a British favorite by serving baked beans over a thick slice of crusty toasted bread. Top with Parmesan cheese, if desired.
* Mix up some cooked mashed navy beans with mashed potatoes for added nutrition and richness in your side dish.
* Try adding cooked navy beans in place of pasta, potatoes, or a grain in casseroles and soups.
* Navy beans cooked from dried can be somewhat bland until they are seasoned. To help season them along the way, you can add some seasonings during the initial cooking process. Try adding your choice of onion, garlic, celery, black pepper, and herbs of choice (such as rosemary, thyme, sage, parsley, cilantro, and/or bay leaves). You can add some salt for flavor, but wait until they have cooked at least 30 minutes before adding any salt. When salt is added early in the cooking process, it may cause the outer skin of the beans to become tough, making them hard to cook to a soft texture.
* If a recipe calls for navy beans and you don’t have enough available, you could substitute cannellini beans or great northern beans for the navy beans.
Herbs and Spices That Go Well with Navy Beans
Bay leaf, basil, cloves, coriander seeds, cumin, fennel seeds, garlic, mustard (dry or seeds), oregano, paprika (sweet) and smoked paprika, parsley, pepper (black), red pepper flakes, rosemary, salt, sage, savory, tarragon, thyme
Foods That Go Well with Navy Beans
Proteins, Legumes, Nuts, Seeds: Bacon, beans (other types, in general), chicken, ham, lamb, pork, sausage, toasted sesame seeds, turkey
Vegetables: Arugula, asparagus, beets, broccoli, broccoli rabe, cabbage (red and green), carrots, cauliflower, celery, celery root, chiles, cucumbers, fennel, leeks, mushrooms, onions, potatoes, shallots, summer squash, sweet potatoes, tomatoes and tomato paste
Fruits: Lemons, oranges
Grains and Grain Products: Barley, bread, corn, pasta, quinoa, rice, wheat
Dairy and Non-Dairy Products: Cheese (i.e., ricotta, Parmesan)
Other Foods: Ketchup, maple syrup, molasses, mustard (prepared), soy sauce, sugar, vinegar (esp. apple cider vinegar), Worcestershire sauce
Navy beans have been used in the following cuisines and dishes…
Baked beans, Boston cuisine, casseroles, chili (vegetarian), dips, pastas (i.e. pasta e fagioli), pilafs, purees, salads (i.e., tomato, vegetable), soups, spreads, stews
Suggested Food and Flavor Combos Using Navy Beans
Add navy beans to any of the following combinations…
Black Pepper + Maple Syrup + Mustard + Brown Sugar
Brown Sugar + Molasses + Vinegar
Recipe Links
Mom’s Navy Bean Recipe (and Video) https://keviniscooking.com/moms-navy-white-beans/#recipe
Three Bean Quesadillas https://www.pinterest.com/pin/351421577184162218/
Creamy Vegan White Bean Pasta https://www.thissavoryvegan.com/creamy-vegan-white-bean-pasta/#recipe
Navy Bean Falafel https://savoryspin.com/navy-bean-falafel-9/
Lunch Lady Baked Beans https://www.plainchicken.com/lunch-lady-baked-beans/
Artichoke, White Bean, and Quinoa Burgers https://www.thefullhelping.com/artichoke-white-bean-quinoa-burgers/#recipe
Southwestern 3-Bean Salad https://www.allrecipes.com/recipe/228263/southwestern-3-bean-salad/
Lemony White Bean Dip [Note that this recipe uses cannellini beans, but navy beans could easily be used instead] https://rainbowplantlife.com/lemony-white-bean-dip/#wprm-recipe-container-20542
Pasta Bean Soup https://www.allrecipes.com/recipe/230587/pasta-bean-soup/
Boston Baked Beans https://www.allrecipes.com/recipe/18255/boston-baked-beans/
Capitol Hill Bean Soup https://www.myrecipes.com/recipe/capitol-hill-bean-soup
Vegetable Beef Soup https://www.myrecipes.com/ingredients/recipes-with-navy-beans?slide=a2b9dab1-a74f-44a5-96ea-97fdb54db8ef#a2b9dab1-a74f-44a5-96ea-97fdb54db8ef
White Beans with Sorrel Pesto https://www.myrecipes.com/recipe/white-beans-sorrel-pesto
Vegetarian Navy Bean Soup Recipe https://www.aspicyperspective.com/vegetarian-navy-bean-soup-recipe/
Vegetarian Tuscan Kale and Navy Bean Soup https://www.northcoast.coop/recipes/recipe/vegetarian-tuscan-kale-and-navy-bean-soup
Smoky Navy Bean Soup https://www.connoisseurusveg.com/navy-bean-soup/
Navy Bean Soup https://www.contentednesscooking.com/navy-bean-soup/
British Baked Beans and Toast Recipe https://tipbuzz.com/baked-beans-on-toast/#recipe
Navy Bean Falafel https://savoryspin.com/navy-bean-falafel-9/?utm_source=yummly&utm_medium=social&utm_campaign=social-pug&utm_campaign=yummly&utm_medium=yummly&utm_source=yummly
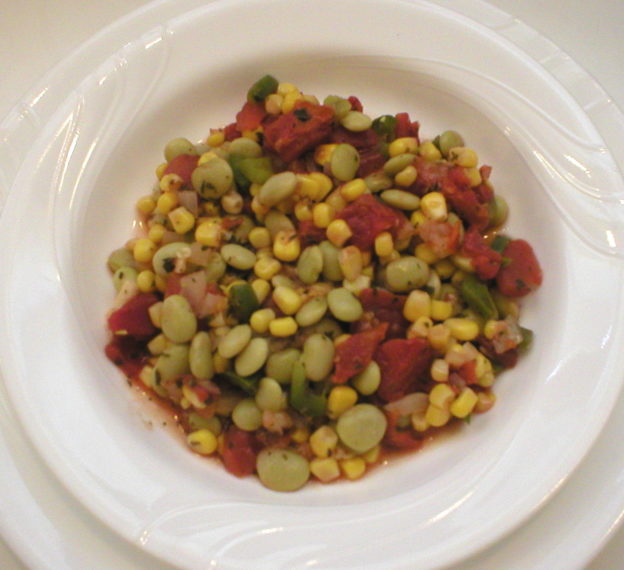
Navy Bean Salad https://www.camelliabrand.com/recipes/draft-corn-and-navy-bean-salad/?utm_campaign=yummly&utm_medium=yummly&utm_source=yummly
White Beans Recipe with Rosemary and Thyme https://thecozyapron.com/white-beans-recipe-with-rosemary-and-thyme/#recipe-bookmark
Herbed White Bean Soup Recipe https://www.thespruceeats.com/herbed-white-bean-soup-recipe-1375830
Resources
https://www.stilltasty.com/fooditems/index/17770
https://www.busycooks.net/beans-101/
https://www.instacart.com/company/ideas/navy-beans-all-you-need-to-know/
https://usdrybeans.com/wp-content/uploads/2016/11/suppliersguideUSDBC2015English1.pdf
https://www.mayoclinic.org/diseases-conditions/metabolic-syndrome/symptoms-causes/syc-20351916
https://pubmed.ncbi.nlm.nih.gov/26067245/
https://www.medicinenet.com/which_bean_is_the_healthiest/article.htm
https://www.alchemyacademybali.com/food.php?f=79
https://www.lark.com/resources/low-glycemic-foods-list
https://www.loveandlemons.com/how-to-cook-beans/
https://www.healthline.com/nutrition/easy-ways-to-use-beans#1.-Upgrade-your-casserole
https://www.thekitchn.com/flavor-combinations-beans-herb-75364
https://americasrestaurant.com/navy-beans-sides/
https://www.camelliabrand.com/secret-ingredients-adding-big-flavor-to-vegetarian-beans/
Joachim, David. (2010) The Food Substitutions Bible. 2nd Edition. Toronto, Ontario, Canada: Robert Rose, Inc.
Page, Karen. (2014) The Vegetarian Flavor Bible. New York, NY: Little, Brown and Company.
About Judi
Julia W. Klee (Judi) began her journey enjoying “all things food” in elementary school when she started preparing meals for her family. That love of food blossomed into a quest to learn more and more about health and wellness as related to nutrition. She went on to earn a BS Degree in Food and Nutrition, then an MS Degree in Nutrition. She has taught nutrition and related courses at the college level to pre-nursing and exercise science students. Her hunger to learn didn’t stop upon graduation from college. She continues to research on a regular basis about nutrition as it relates to health. Her hope is to help as many people as possible to enjoy foods that promote health and wellness.