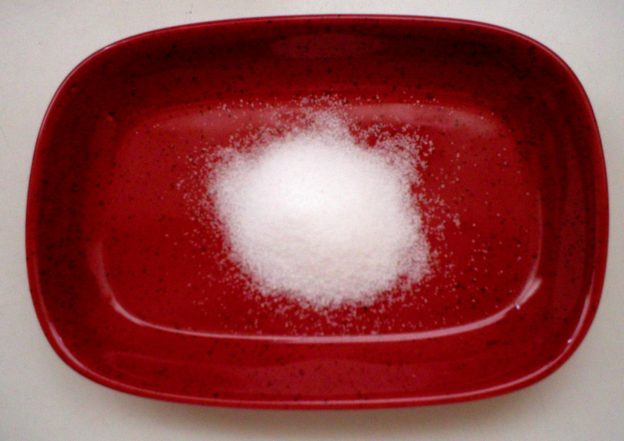
Salt

Ways to Reduce Your Salt Intake

The current 2015-2020 Dietary Guidelines for Americans recommend that Americans consume less than 2300 mg of sodium a day. That equates to less than one teaspoon of salt. Yet, many Americans still consume a lot more than that. Furthermore, recommendations are moving toward reducing that amount even more, to 1500 mg per day (about 2/3 of a teaspoon of salt, and this does not account for naturally-occurring sodium in our food). Where does all this sodium come from? In the average American diet, about 77% comes from processed foods or foods prepared outside the home (such as restaurant meals), 12% comes from natural sources (naturally occurring sodium in foods), 6% from salt added at the table while eating, and 5% added while cooking. When examining those percentages, it’s clear that most of the sodium in our diet comes from foods that we did not prepare ourselves.

We do need some sodium for our bodies to function normally, but the amount is far less than we consume. A mere 186 mg of sodium per day is all that’s truly needed, and that small amount can be found naturally occurring in whole, unadulterated foods. Furthermore, consuming whole, unadulterated plant foods such as fruits and vegetables, provides an abundance of potassium, helping to balance the potassium to sodium ratio in the body.

Many people need (or want) to slash their salt intake for numerous reasons and struggle to do so. The following are some suggestions on how to reduce your sodium intake, balance the sodium to potassium ratio, and yet still enjoy the flavor of our foods.

Prepare Your Own Foods at Home
This may hard to do all the time, especially if you travel a lot in your career, have odd working hours or a lot of responsibilities with little time to spend in the kitchen. You’re forgiven! However, it’s up to you to work out a way to squeeze a little valuable time for yourself to prepare some of your own foods to take along with you so you can reduce your need for restaurant foods.

Here are some ideas for easy food preparation at home…
* Try overnight oats for a ready-to-go breakfast in the morning. Recipes are all over the internet!

* Take time on a day off to prepare foods ahead for the coming week. Many people spend time on the weekend making a lot of food for the coming week’s lunches. Pack them in individual serving containers so you can just grab one and put it into a travel bag with an ice pack on your way out the door. It’ll be ready when you are. If need be, they could be stored in the freezer and placed in the refrigerator the night before you need it so it can thaw safely.

* Plan on having a large salad once a day, or at least as often as you can. Lettuce can be washed in advanced, drained, and then stored in the refrigerator in a covered container between layers of paper towels. It will stay crisp and will be ready when needed. Other vegetables can also be washed and cut in advance and stored in a similar way. Just be sure they’re not stored overly wet, or sitting in a puddle of water, which could cause them to spoil.

* Make a large pot of soup on a day off. Chill it down well, then store it in the refrigerator, either in a large container, or in individual containers. It can also be frozen in individual serving size containers for an easy lunch or supper when needed. If you remember, transfer a container (for the next day) in the refrigerator the night before so it can thaw (or at least start to thaw). Warm the soup on the stove or in the microwave for a fast meal.

* Make sandwich filling of some sort on a day off. Homemade hummus, nut butter and fruit spread, or (if you’re an omnivore) cooked meat or a meat combo if you prefer, are all possible sandwich fillings where you can control what’s in them. Store the filling in a covered container in the refrigerator and sandwiches will be easy to make when you need them.

* Make a large casserole on your day off. Like the soup, salads, and sandwich fillings, making a large casserole ahead of time gives you a nice option of your own foods made to your liking that you can enjoy during the week and have ready when you are. Individual portions can be stored in the refrigerator or frozen until needed. Warming it in a microwave or even toaster oven is an option, as long as your container is appropriate for those methods.

* Put supper in the crock pot/slow cooker in the morning before you leave for work. This may not work for everyone, since it involves extra time in the morning. But if you can get up a little earlier or work it out, a nice, hot, homemade supper will be ready for you when you get home. How convenient is that?

Season Foods with Herbs or Spices Instead of Salt
Sometimes a little added salt goes a long way in making food palatable, and that should be OK as long as we don’t overdo it (or have a medical issue requiring a salt-free diet). However, seasoning our own food with plenty of herbs and spices can reduce our need for added salt. Try some of the following options to flavor your foods instead of salt…

Proteins, Beans, Legumes, and Marinades: Basil, chiles/cayenne, chives, cilantro, coriander, dill (weed), ginger, nutmeg, oregano, paprika, pepper, rosemary, sage, tarragon, thyme, turmeric

Vegetables, Stir-Fries, Salads: Basil, chiles/cayenne, chives, cinnamon, cilantro, coriander, dill (weed), ginger, mint, nutmeg, oregano, paprika, pepper, rosemary, sage, tarragon, thyme, turmeric

Fruits: Cardamom, cinnamon, coriander, ginger, mint, nutmeg, pepper, rosemary, tarragon (esp. with lemon), thyme (esp. with citrus)

Grains, Grain Products, and Grain Dishes: Basil, cardamom, cinnamon, cloves, chiles/cayenne, coriander, ginger, mint, nutmeg, oregano, paprika, rosemary, sage, tarragon, thyme, turmeric

Dairy and Non-Dairy: Cardamom, chives, dill (weed), mint, nutmeg, rosemary, sage, thyme (esp. with cheese)

Casseroles, Sauces, Soups, Stews: Basil, cardamom, chiles/cayenne, chives, cinnamon, cilantro, coriander, dill (weed), ginger, nutmeg, oregano, paprika, pepper, rosemary, tarragon, thyme, turmeric

About some specific herbs/spices used to replace salt…
* Basil. Basil is sweet yet peppery. Fresh basil has more flavor than that of dried. Basil is excellent in pesto, marinades, dressings, sauces, sandwiches, soups, and salads. It is often used in Mediterranean dishes, especially tomato-based sauces and pizzas. There are different varieties of basil, giving different flavors to this herb.

* Cardamom. Cardamom is a warm, aromatic spice. Whole cardamom pods can be used, or the seeds (which are inside the pods) can be used whole or ground. Cardamom is commonly added to Asian spice mixes and curry pastes. It works well in baked goods and sweet breads along with cloves and cinnamon.

* Chiles/Cayenne. Chile peppers vary a lot in their heat, so always add a little at first if you’re not sure. Cayenne is a specific type of Chile pepper. Chile peppers are available fresh, dried, flaked, ground into powder, and made into hot sauce. Hot sauce may be high in sugar and/or salt, so do read labels if you’re on a salt-restricted plan. Opting for fresh hot peppers gives you more control over the sodium content of your food. Chiles work well in most foods, including vegetable and seafood dishes. A pinch of chili pepper with mustard can help you reduce the amount of cheese needed in a cheese sauce (thereby reducing sodium in the sauce, since cheese is high in sodium). Chiles combine well with cumin, coriander seeds, and turmeric. Cayenne pairs well with meats, grains, soups, and vegetables.

* Chives. Chives have an onion-like flavor but are milder than onions. Add chives to hot dishes at the end of cooking to preserve the flavor. Chives are excellent in mashed potatoes, baked potatoes, casseroles, salads, cream cheese, fish and poultry.

* Cinnamon. Cinnamon is most often used in sweet treats and baked goods like cakes, quick breads, and fruit crisps. But cinnamon also works in some savory dishes too. In Turkish and Middle Eastern cuisines, cinnamon is used to flavor chicken and lamb. It can also be used to add a special flavor to curries, tagines, casseroles, roast vegetables, Bolognese sauce, and stewed fruit.

* Coriander/Cilantro. In the United States, we refer to the seeds of this plant as coriander, whereas the leaves are called cilantro. The cilantro leaves have an earthy yet citrusy flavor. The coriander seeds have a warm, spicy, citrus flavor. Cilantro can be used raw or added to hot foods at the end of cooking time to preserve their flavor. The leaves are excellent in salads, soups (esp. carrot and coriander soup), salsas, curries, fish, and chicken dishes. It is often combined with lime and chiles in stir-fry dishes. Coriander seeds are commonly used in Indian cuisine.

* Cumin. The flavor of cumin is earthy and smoky. Cumin is the second most popular spice in the world (whereas black pepper is the first). Cumin pairs well with many foods, but especially chicken, beef, lamb, game, beans and rice. For a Mexican flare, combine cumin with oregano and chili. For a taste of India, combine cumin with cardamom, coriander, and turmeric.

* Dill. Dill seeds and dill weed (the leaves) are both used in a variety of dishes. Their flavor is very different. Dill seeds have a flavor of fennel, star anise, and celery combined. They are what gives dill pickles their characteristic flavor. The leaves (dill weed) have a fresh, bright flavor that add hints of lemon anise. Dill weed blends well with cottage cheese, cream cheese, omelets, seafood, steak, potato salad, and cucumber salads.

* Ginger. Ginger has a sharp aroma and flavor of pepper and lemon. It can be purchased fresh or dried and ground. Ginger enhances both sweet and savory dishes. Grated fresh ginger can be added to stir-fries, rice, curries, and meats. It can be added to salad dressings and even stewed fruit.

* Mint. This refreshing herb works well in both sweet and savory dishes. Try this with salads, pasta or couscous. Mint also goes well with carrots, cucumber, rice, melon, tomato, yogurt, and peas.

* Nutmeg. Nutmeg is sweet yet pungent at the same time. Most people prefer the flavor of freshly grated nutmeg rather than that of dried nutmeg, but use whatever you have on-hand. It works well in baked goods with cinnamon and cloves. Nutmeg plus black pepper complement each other in white sauces and cheese sauces. Nutmeg also adds a natural “warmth” when added to homemade potato, cauliflower, and cabbage soups.

* Oregano. Oregano has a warm, aromatic, and slightly bitter flavor with a strong aroma. It is commonly used in Greek and Mediterranean cuisines. It can be used in meat, poultry and seafood marinades. Use it also in egg dishes, breads, casseroles, and salads. It’s an essential ingredient in spaghetti sauce and gives pizza its classic flavor.

* Paprika. Paprika is made from dried and ground sweet peppers and hot peppers. It is milder and sweeter than cayenne pepper. Paprika can be paired with caraway, coriander, cinnamon and dill for a Hungarian flare. Combine paprika with garlic for a Spanish twist. Paprika also goes well with chicken, lamb and fish, on baked sweet potatoes, in beans, and with scrambled eggs.

* Parsley. Parsley has a mildly bitter, grassy flavor that blends well with other flavors, but does not overpower them. Flat-leaf parsley is preferred by chefs because its flavor holds up well when heated. Curly parsley is often used as a garnish. Parsley goes well with roast lamb, grilled steak, fish, chicken, vegetables, potatoes, omelets, stuffing, soft cheese, marinades, dressing, sauces and soups.

* Peppercorns. Peppercorns are not only the common black variety, but can also be red, green, yellow, and white. Each color has its own flavor. Some are sweet, some are bitter, while others are hot. Try a blend of different colored peppercorns for a warm flavor twist to your dishes.

* Rosemary. Rosemary is an aromatic herb with a pine-like fragrance. Use rosemary sparingly, as it can overpower other flavors. Use rosemary fresh or dried, but crush the dried rosemary first to release its essential oils and flavors. Rosemary can be added to meats, breads, pizza, tomato sauce, beans, potatoes and egg dishes. Roast whole springs of fresh rosemary with root vegetables such as carrots, parsnips, and sweet potatoes.

* Sage. Sage is similar in flavor to rosemary, but with more lemon and eucalyptus flavor. Sage retains its flavor with prolonged cooking, which is unlike many herbs. Sage is often used in Italian and French cuisines where it is added to meats, poultry, and stuffing. Chopped sage is often added to pasta and gnocchi.

* Spice/herb blends. There are a number of spice/herb blends on the market that have no salt added to them. These can make cooking easy for you if you’re in a hurry or don’t want to spend time researching what to season a food with. When shopping for a spice blend, look for “Salt-Free” on the label, or carefully read the ingredients list to be sure there is no added salt in the mix.

* Tarragon. Tarragon has a distinct licorice-like flavor with a star anise aroma. To preserve its flavor, add it near the end of cooking time. Tarragon is often used in French cuisine and goes well with fish, poultry, eggs, beef, and vegetable soups. It can also be added to salad dressings.

* Thyme. Thyme has a strong earthy, slightly minty flavor. Unlike many herbs, the flavor of thyme improves and is released with prolonged cooking. Whole thyme sprigs are often added to dishes early on to release their full flavor. Whole sprigs are often added to slow-cooked meals and casseroles, and removed at the end. Thyme pairs well with rosemary, parsley, sage, savory and oregano. It is used to flavor meats, chicken, game, and roasted vegetables. Thyme pairs well with paprika, oregano, and cayenne in Cajun cuisine. It also pairs well with cinnamon, nutmeg, and cayenne pepper in Caribbean cuisine. Lemon thyme goes well in soups and vegetable dishes.

* Turmeric. Turmeric is a common ingredient in curry and is often used in South Asian dishes. North Africans often use turmeric with ginger in flavoring meats, vegetables, and rice. A little turmeric goes a long way, as its flavor intensifies with cooking.

Foods That Can be Used to Season Dishes Without Added Salt
In addition to specific herbs and spices being used to replace added salt, some foods can be used as ingredients to replace added salt by adding another flavor dimension to a dish. Here are some examples…

Proteins, Beans, Legumes, and Marinades: Balsamic vinegar, beverages (beer, wine, coffee), celery, garlic, kelp granules, lemon, mushrooms, nutritional yeast, onions, salsa/chutney, vinegar (in general)

Vegetables, Stir-Fries, Salads: Balsamic vinegar, celery, garlic, kelp granules, lemon, mushrooms, nutritional yeast, onions, salsa/chutney, vinegar (in general)

Fruits: Balsamic vinegar, celery, lemon, vinegar (in general)

Grains, Grain Products, and Grain Dishes: Balsamic vinegar, celery, garlic, kelp granules, lemon, mushrooms, nutritional yeast, onions, salsa/chutney, vinegar (in general)

Dairy, Non-Dairy, Cheese: Balsamic vinegar, celery, lemon, mushrooms, nutritional yeast, onions, salsa/chutney

Casseroles, Sauces, Soups, Stews: Balsamic vinegar, beverages (beer, wine, coffee), celery, garlic, kelp granules, lemon, mushrooms, nutritional yeast, onions, vinegar (in general)

More about specific foods used to replace salt…
* Balsamic vinegar. Balsamic vinegar can be used far beyond salads. It comes in a variety of flavors that helps it to pair well with many foods. Some balsamic flavors include lemon, cherry, espresso, chocolate, garlic, apple, and more. The flavors enable balsamic vinegar to pair with many foods. It can add a sweet, fruity flavor to ice cream, yogurt, and beverages. It can be used to marinade red meats. Garlic and lemon balsamic vinegars can be used to flavor poultry, seafood and vegetables.

* Beverages (esp. beer, wine, coffee). Assorted beverages have been used to flavor foods in lieu of salt. Beer, wine, and even coffee have been used to flavor stews, soups, chili, pasta sauces, and braised dishes. These liquids can be used on their own or combined with broth. [Note! Beware of commercially prepared broth, as it may be high in sodium. Read the label to be sure it meets your needs regarding sodium intake.]

* Celery. For someone on a highly sodium-restricted diet, eating celery may be questionable. But for the rest of us, the unique flavor of celery can add a salty flare to otherwise bland foods. One stalk of celery naturally contains 32 mg of sodium, which is not a lot. But, since celery is mostly water, that sodium flavor seems to be accentuated in celery. So if you’re mixing up some food of whatever sort and you are missing a salty component, rather than reaching for the salt shaker, try adding a stalk or two of celery. Hopefully it will do the trick.

* Garlic. Garlic is an excellent alternative to salt. We’re all familiar with it and most likely have some in the kitchen, whether fresh or dried. Raw garlic adds a pungent zest to foods while roasted garlic adds a delicious sweet, nutty flavor. Add garlic to chicken, fish, meats, vegetables, salads, breads, and stir-fries…almost anything!

* Kelp granules. This option may be new to some people even though kelp has been available as a food for quite a white. Kelp granules are what they say…dried granules of kelp. It is salt-free, but NOT sodium-free. Along with other nutrients, kelp does contain iodine, a needed element that is added to table salt. Kelp granules do contain some naturally-occurring sodium from growing in the salty sea water. (One teaspoon generally contains about 100 mg of sodium.) However, it is far less than what you would find in table salt. (One teaspoon of table salt contains 2,325 mg of sodium.) This can serve as a good food source of iodine if you’re on a low-sodium or salt-restricted diet. However, it’s important to read the nutrition facts label first to be sure it meets your needs regarding sodium restriction. Also, don’t overdose on kelp because that could lead to an iodine overload!

* Lemon zest/lemon juice (or any citrus zest/juice). Lemon (or any citrus fruit) brightens flavors and pairs with most foods, from appetizers, to main dishes and vegetables, to salads, breads, and desserts. It can be added to marinades to bring flavor to foods without a lot of salt. The zest of the fruit brings out an even stronger flavor than the juice, so add it when you want a more pronounced citrus flavor to foods.

* Mushrooms. Mushrooms can add a subtle umami flavor to foods without adding extra salt to the dish. A mixture of caramelized onions, garlic, and mushrooms with a dash of balsamic vinegar may be all you need to flavor a specific food.

* Nutritional yeast. Nutritional yeast is deactivated (killed) yeast that comes in powder or flakes. It is an excellent source of an array of vitamins and minerals, with only 5 mg of sodium in two tablespoons of nutritional yeast flakes. It is described as having a nutty, cheesy, savory flavor. Nutritional yeast is often used as a vegan cheese substitute. If you’re not used to eating nutritional yeast, it’s best to slowly add it to your diet. Adding it too quickly may cause some unpleasant side effects. (1) Nutritional yeast has a lot of fiber, with about 5 grams in just 2 tablespoons. Adding too much too fast may cause gas, cramps, or even diarrhea. Drinking plenty of liquids with nutritional yeast may help to prevent this. (2) Some yeast products may trigger migraine headaches in some people. This is due to tyramine, a compound the body makes from the amino acid tyrosine contained in yeast products. (3) Nutritional yeast contains high amounts of the B-vitamin niacin, which can cause a flushing reaction in some people. This is like a facial to full-body hot flash, with reddening of the skin followed by burning and itching. It can last for ten to twenty minutes. The condition is uncomfortable, but not harmful. (4) Some individuals with irritable bowel disease are sensitive to yeast products. Nutritional yeast may trigger an immune response, worsening symptoms in some individuals with such conditions.

* Onions. Onions add a deep umami flavor to foods, especially when paired with garlic. Onions are used to flavor many foods including stews, soups, any braised or roasted dish, tomato based sauces, burgers, meatloaf, casseroles, pizza, salads, and more. When caramelized, onions add a sweetness to many foods including vegetarian and vegan dishes.

* Salsa and chutney. Salsas and chutneys add a fresh flavor to meats, fish, omelets, vegan/vegetarian dishes, appetizers, cheeses, chips and crudités. Homemade versions would be ideal for those on a reduced salt plan since you can control the ingredients. When purchasing store-bought varieties, read the nutrition facts panel and ingredients list to be sure it meets your needs.

* Vinegar (in general). When the flavor of a dish seems “flat” and bland, add a touch of acid to brighten it up. Vinegar (or even citrus juice) will enhance the flavors in sauces, salads, green vegetables, marinades, salsas, and chutney. There are many flavors of vinegars which vary from extremely to mildly acidic and very sour to sweet, so experiment with enhancing the flavors of foods with different vinegars rather than added salt.

Foods to Avoid When on a Low-Sodium Diet
* Canned soups. Canned soups are usually very high in salt content, so avoid them if you are on a reduced sodium diet. If you see a low-sodium option, also read the label before purchasing it to be sure it meets your needs, because they may also have too much sodium for some people.

* Bouillon cubes and commercially made broths. Traditional bouillon cubes and prepared broths can be extremely high in added salt. Be sure to read the nutrition facts panel and ingredients list, even if it is labeled as low-sodium. It still may have too much sodium for some people who are on a sodium-restricted diet.

* Chips and salted snacks. This one almost goes without saying. Commercially prepared chips and salted snacks like nuts, pretzels, popcorn, and pork rinds are laden with added salt. If you’re on a salt-restricted plan, such items will be off your list unless you opt for an unsalted or low-sodium version. (They ARE out there!) Always check the label first.

* Milk and cheese products. Cow’s milk has some naturally-occurring sodium (about 105 mg per cup). When milk is made into cheese, the sodium content is concentrated, resulting in products that are often higher in sodium. Furthermore, most cheeses are high in sodium since salt is added during the cheese-making process. Therefore, cheese may be off your list if you’re on a low-sodium diet. Be sure to read the Nutrition Facts panel on all milk products to be sure they meet your needs.

* Salted butter and margarines. These foods can be a source of sodium that we often don’t think about, but when combined with the sodium in other foods, it can add up. Opt for unsalted or low-salt versions when possible.

* Flavorings and condiments with added salt. The list can be long here, but this includes all herb/spice blends with added salt, such as garlic salt, celery salt, onion salt, and seasoning salt. Meat tenderizers, barbeque sauce, soy sauce, ketchup, mustard, teriyaki sauce, oyster sauce, salad dressings, tamari, Worcestershire sauce, pickles and pickle relish, sauerkraut, bacon bits, and even croutons will likely contain added salt. When in doubt, read the label!

* Food mixes. Prepared food mixes are often high in added salt. Such items include gravy mixes, boxed pasta/vegetable/rice mixes with seasonings, instant pudding mixes, Ramen noodles and other instant soups, and all other instant or convenience foods. Even dried bean mixes with seasoning packets are something to beware of when on a sodium-restricted plan. Always check the label to be sure it meets your needs.

* Frozen dinners and prepared frozen foods. These foods are usually laden with added salt used as a flavoring and even preservative. This also includes frozen pizzas. When in doubt, read the label for the sodium content on the Nutrition Facts panel to see if it meets your needs.

* Processed meats. Processed meats such as bacon, lunchmeats, ham, corned beef, hot dogs, salt pork, and sausages, are often very high in salt content. Avoid these unless they are a low-sodium option that actually meets your nutritional needs (check the label).

* Poultry. Many poultry items (such as Thanksgiving turkeys) are injected with broth for moisture and flavoring. This can greatly increase the sodium content of these foods, possibly raising it above your limits. Check the label or ask the meat department manager in your store about the sodium content of what you’re considering.

* Some bread products. Salt is normally added to yeast bread dough because it helps to control the growth of the yeast during the bread baking process. Read the label to be sure any bread you purchase meets your needs.

* Some canned foods. When on a reduced-sodium diet, another way to lower sodium intake is to choose salt-free canned foods rather than “regular” canned options. This includes canned vegetables, beans, sauces, gravies, salsa, and soups. More and more foods are being packed with salt-free options, so the choices are increasing. When on a sodium-restricted plan, reading canned food labels is a must-do.

* Bottled vegetable juice. Many tomato-based vegetable juices are high in sodium. However, some varieties are labeled as being “reduced-sodium.” Read the Nutrition Facts panel to be sure it meets your needs.

* Restaurant foods. Many of these same principles apply when dining at a restaurant. When in doubt, ask the server which menu options are low-sodium.

* Beware of softened water. Softened water is “softened” with added sodium. This should be avoided when on a sodium-restricted plan. Softened water should not be used for food preparation nor drinking when sodium intake needs to be low.

Resources
https://www.cdc.gov/salt/index.htm

https://health.gov/dietaryguidelines/2015/guidelines/

https://www.google.com/url?sa=t&rct=j&q=&esrc=s&source=web&cd=10&ved=2ahUKEwiBn9zxz4_mAhUSEawKHY–AMIQFjAJegQIAxAC&url=https%3A%2F%2Fwww.heart.org%2F-%2Fmedia%2Ffiles%2Fabout-us%2Fpolicy-research%2Ffact-sheets%2Faccess-to-healthy-food%2Freducing-sodium-in-the-us-diet-fact-sheet-2019.pdf%3Fla%3Den%26hash%3DD86A882315B2BA51D74F104EF00B74DCCF41C980&usg=AOvVaw1WLawWhm8kk_JELArmKMMo

https://www.healthline.com/nutrition/sodium-per-day#recommendations

https://www.bhf.org.uk/informationsupport/heart-matters-magazine/nutrition/herbs-and-spices

https://www.savoryspiceshop.com/dill-weed

https://foodinsight.org/cutting-down-on-sodium-6-alternatives-to-salt/

https://shescookin.com/10-naturally-delicious-sodium-substitutes/

https://nutritionovereasy.com/2011/02/is-kelp-high-in-sodium/

https://nutritiondata.self.com/facts/custom/1323565/2

https://www.healthline.com/nutrition/nutritional-yeast-dangers#1

https://my.clevelandclinic.org/health/articles/15426-sodium-controlled-diet

https://www.ucsfhealth.org/education/guidelines-for-a-low-sodium-diet

https://healthfinder.gov/healthtopics/category/health-conditions-and-diseases/heart-health/low-sodium-foods-shopping-list

Page, Karen. (2014) The Vegetarian Flavor Bible. New York, NY: Little, Brown and Company.

About Judi
Julia W. Klee (Judi) began her journey enjoying “all things food” in elementary school when she started preparing meals for her family. That love of food blossomed into a quest to learn more and more about health and wellness as related to nutrition. She went on to earn a BS Degree in Food and Nutrition, then an MS Degree in Nutrition. She has taught nutrition and related courses at the college level to pre-nursing and exercise science students. Her hunger to learn didn’t stop upon graduation from college. She continues to research on a regular basis about nutrition as it relates to health. Her hope is to help as many people as possible to enjoy foods that promote health and wellness.

Orange Balsamic Dressing Over Spring Mix Salad

Orange Balsamic Dressing on Spring Mix Salad

Here’s a really easy salad to put together that can be used as a side salad for any number of people (it can easily be increased), or used as a meal salad with the simple addition of a protein food of your choice.

Below is a video demonstration of making the dressing and salad. The written recipe follows the video link.

Enjoy!
Judi


Orange Balsamic Salad Dressing
Makes 1 (Meal-Size) Serving or 2 (Side Salad) Servings

This dressing goes well over any green salad, but would also blend well with a citrus salad. This recipe makes enough dressing for one large meal salad, or two side salads.

2 Tbsp Extra virgin olive oil
1 Tbsp Balsamic vinegar
1 Tbsp Frozen orange juice concentrate*
½ tsp Dijon mustard
½ tsp Honey
¼ tsp Salt
¼ tsp Onion powder
1/8 tsp Garlic powder

Combine all ingredients in a small bowl and stir well. Drizzle over salad greens and enjoy!


Orange Balsamic Salad Dressing

Makes 4 (Meal-Size) Servings

½ cup Extra virgin olive oil
¼ cup Balsamic vinegar
¼ cup Frozen orange juice concentrate*
2 tsp Dijon mustard
2 tsp Honey
1 tsp Salt
1 tsp Onion powder
½ tsp Garlic powder

Combine all ingredients in a small mason jar. Cover with a tight lid and shake well. Drizzle over salad greens and enjoy! Store any extra in the refrigerator and use within 4 days.

* If you want a slightly less tart dressing, use 2 teaspoons orange juice concentrate for 1 serving, or 2 tablespoons plus 2 teaspoons orange juice concentrate for 4 servings. With this ratio, the flavors all blend and they are balanced so no one flavor stands out.


Spring Mix Salad

1 (5.5 oz) tub of Spring Mix, or any Spring Mix blend
1 or 2 Clementine oranges, peeled and sectioned
1 serving of Orange Balsamic Salad Dressing, or more if desired
1 avocado, cut into bite-size pieces
Protein food of choice, if using this as a meal salad

Place the Spring Mix greens into a large bowl. Add the orange slices and the dressing. Toss lightly to coat the greens. Top with avocado pieces and serve.

If desired, you can easily transform this into a meal salad by adding a protein food of your choice.

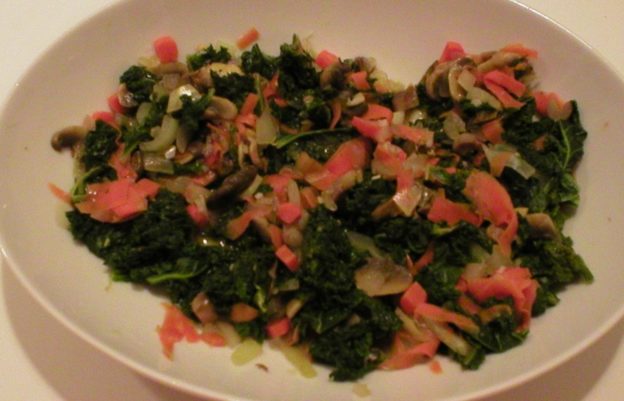
Kale, Carrot, and Mushroom Combo

Kale, Carrot, and Mushroom Combo

If you’re looking for something different to do with kale other than making kale chips, here’s a delicious veggie combo to try. It’s quick and easy to make and can easily be adjusted to your flavor preferences.

Below is a video where I demonstrate how to make this dish. The written recipe is below the video.

Enjoy!
Judi

Kale, Carrot, and Mushroom Combo
Makes 3 to 4 Side Servings

1 Tbsp extra virgin olive oil*
1/2 cup chopped yellow onion
1 carrot, finely chopped or cut into ribbons with a vegetable peeler
2 cloves garlic, finely chopped
4 to 8 oz mushrooms of choice, sliced
1 bunch (about 8 oz) fresh kale, large stems removed and leaves cut into medium size pieces
About 1/2 cup of water…as needed
Salt and pepper to taste
About 1-1/2 Tbsp fresh lemon juice or red wine vinegar

Heat a large pot over slightly above medium heat. Add the olive oil and allow it to heat up very briefly. Add the onion and carrot; sauté until they just start to soften. Add the garlic and mushrooms and sauté briefly just until the mushrooms start to release juices. Add the kale. Sprinkle salt and pepper on the vegetables and lightly stir them. Add a small amount of water. Cover the pan and allow vegetables to steam until tender to your liking, about 5 to 15 minutes. IMPORTANT…Stir often and monitor the water level, adding a little water at a time to prevent the pan from becoming dry and the vegetables from burning.

When the vegetables are as tender as you like, remove them from the heat and stir in the lemon juice or red wine vinegar. Enjoy!

*If you prefer, the oil can be omitted and the vegetables can be sautéed in water or stock of choice.

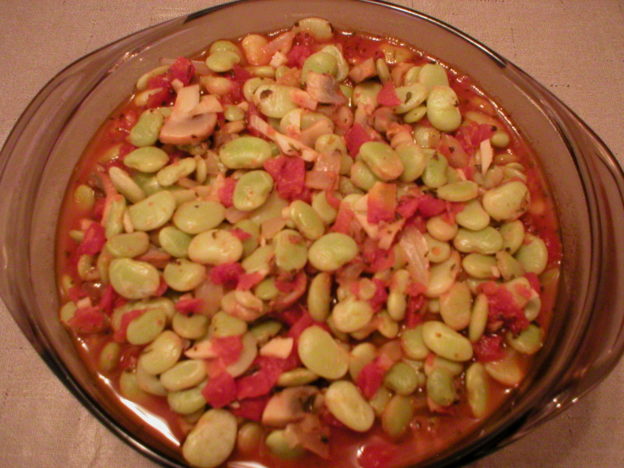
Lima Beans with Mushrooms and Tomatoes

Lima Beans with Mushrooms and Tomatoes

Here’s an easy and delicious way to serve lima beans. This recipe calls for frozen limas, so it truly is fast…no soaking or pre-boiling the beans! This is delicious as it is, but is also great served over rice or another grain of choice, mashed potatoes, or even pasta. Try it sometime!

A link to a video demonstration is below, with the written recipe following that.

Enjoy!
Judi

Lima Beans with Mushrooms and Tomatoes
Makes 6 Servings

1 Tbsp extra virgin olive oil (or 2-3 Tbsp vegetable broth or water, if preferred)
1/3 cup diced yellow onion
4 cloves garlic (or 2 large cloves), minced
1 (8 oz) pkg mushrooms of choice, sliced
1 (16 oz) pkg frozen lima beans
¾ cup vegetable broth or water
1 (14.5 oz) can diced tomatoes with juice
1 tsp dried basil
1 tsp dried thyme
½ tsp dried oregano
Pinch of red pepper flakes
Salt to taste
Parmesan cheese, optional topping

In a medium to large saucepan with a lid, heat the oil over medium heat. Add onion and sauté for a minute or two, until the onions start to cook. Add the garlic and mushrooms and sauté another minute or two, until the mushrooms start to soften and cook. Add the remaining ingredients, except the optional topping of Parmesan cheese, if using it. Stir to combine and cover the pot. Raise the heat and bring the mixture to a boil. Lower the heat and allow it to simmer, stirring occasionally, until the lima beans are as tender as you like (use the lima bean package directions as your guideline as to how long to cook the mixture). Remove from heat and serve. This mixture is excellent served over rice or another grain of choice, mashed potatoes, or pasta.

Easy Brussels Sprouts with Garlic and Lemon

Easy Brussels Sprouts with Garlic and Lemon

Here’s a fast and easy way to cook Brussels sprouts. They are not mushy this way, nor are they bitter. Below is a video demonstration of cooking sauteed Brussels sprouts, followed by the written recipe. I hope this helps!

Enjoy,
Judi

Easy Brussels Sprouts with Garlic and Lemon
Makes About 5 Servings

1 Tbsp extra virgin olive oil
2 large cloves garlic (or 4 medium cloves), chopped
1 lb fresh Brussels sprouts
Salt to taste
About 1/3 cup water, or more if needed
Juice of 1 lemon (about 4 tablespoons)

Wash the Brussels sprouts and remove any damaged leaves. Trim a small slice off the stem end, and cut them in half or into fourths, if large; set aside.

Warm a skillet that has a lid, over medium heat. Add the oil then the chopped garlic. Sauté the garlic about 1 minute. Add the prepared Brussels sprouts. Sprinkle with salt, as desired. Sauté the vegetables briefly. Add water, 1 or 2 tablespoons at a time, then cover and allow them to steam. Stir them often to prevent burning and monitor the liquid, adding more water as needed. Reduce heat to medium-low if needed to keep the vegetables from burning. About half way through the cooking time (after about 5 minutes), add the juice of one-half of a lemon, about 2 tablespoons. Continue cooking, stirring often, and steaming with the lid on, until the sprouts start to brown and are crisp-tender, about 10 minutes, or until they are as tender as you want. When finished, remove them from the heat and drizzle with the remaining lemon juice, about another 2 tablespoons. Serve.

Cinnamon

Cinnamon 101 – The Basics

Cinnamon is a common spice that we’re all familiar with and most of us have a jar in the pantry. We love it and use it in many ways, yet many of us don’t know a lot about this delicious spice. And some things about cinnamon are VERY important to know, especially if you’re on blood thinning medications. Check out the article below to learn more about this wonderful spice from what it is, to its health benefits, to different ways to use it.

Enjoy!
Judi

Cinnamon 101 – The Basics

About Cinnamon
Cinnamon is an ancient spice that has been used for thousands of years, even with mention of it in the Bible. It was often used as a fragrance to bury the dead, in religious ceremonies, and as a component of holy oil. It comes from the inner bark of different species of Cinnamomum species of evergreen trees. The peels are left to dry, when they curl up naturally, forming what we know as cinnamon sticks. The sticks can then be ground into powder, processed to extract the oil, or made into other products.

Cinnamon was very popular in Europe in the Middle Ages and was used as a status symbol among the elite. Cinnamon is one of the reasons why Christopher Columbus was looking for an alternate route to the East Indies.

There are two types of cinnamon: “true” cinnamon, which is Cinnamomum verum, and “regular” cinnamon, also known as “Chinese cinnamon” or “cassia” cinnamon, which is Cinnamomum cassia. Cinnamon may also be harvested from other species within the Cinnamomum family. True cinnamon is native to Ceylon and Southern India, whereas cassia cinnamon is native to the Eastern Himalayan Mountains and Southeast Asia. Both are derived from the inner bark of different members of the Laurel family, and are similar in flavor. Cassia cinnamon is the most common variety found in the United States, whereas most of the world believes it is inferior to the other variety, “true” or Ceylon cinnamon. Both varieties may be sold as “cinnamon” in the United States, so it can be hard to distinguish between the two.

Cassia cinnamon has a stronger flavor than that of Ceylon cinnamon, which is more subtle. The characteristic flavor and aroma of cinnamon is due to the cinnamaldehyde which is found in its oil.

Health Benefits of Cinnamon
Although we eat very little cinnamon at one time, it does have some nutritional value. A mere one teaspoon of ground cinnamon has 6 calories, along with fiber, calcium, potassium, magnesium, phosphorus, Vitamin K and Vitamin A. More notably, cinnamon has some health benefits beyond its nutritional elements. Cinnamon has been shown to have antioxidant, anti-inflammatory, antibacterial, and antimicrobial properties.

Antioxidants and Anti-Inflammatory Effects: Cinnamon has been found to have a lot of polyphenol antioxidants known to protect the body from harmful free radical molecules. The antioxidants in cinnamon have also been shown to have anti-inflammatory effects which can help to lower our risk of disease.

Protection from Heart Disease: Subjects with type 2 diabetes who ate 1/2 teaspoon of cinnamon a day were found to have improved total cholesterol, LDL, HDL and triglyceride levels. Animal studies showed that cinnamon also can reduce blood pressure. These studies show that cinnamon may reduce our risk for heart disease.

Anti-Diabetic Effects: Cinnamon has also been found to reduce insulin resistance, making it helpful on controlling blood sugar levels. Also, cinnamon has been shown to reduce the amount of glucose that enters the bloodstream after a meal, further increasing its anti-diabetic effects.

Anti-Cancer Effects: Animal studies have found that compounds in cinnamon have also been found to reduce the growth of cancer cells and angiogenesis (the formation of blood vessels that feed tumors).

Antimicrobial Protection: Cinnamaldehyde found in cinnamon oil has been shown to have antimicrobial properties. Cinnamon oil has been found to successfully treat respiratory tract fungal infections. It can also inhibit the growth of some harmful bacteria, including Listeria and Salmonella. The antimicrobial effects of cinnamon oil may also reduce tooth decay and remedy bad breath. Laboratory tests have also found that cinnamon oil may be effective in combating HIV-1, the most common strain of virus causing HIV in humans.

Brain Protection: Researchers believe that Ceylon cinnamon appears to help protect the brain from Alzheimer’s disease. It appears to improve the brain’s response to insulin, protecting the brain from hyperglycemia, preventing cognitive decline.

Do not eat cinnamon dry! Despite cinnamon’s healthful and flavorful benefits, it’s important not to take it dry (like the “cinnamon challenge” in recent years). This can cause choking, vomiting, and breathing issues.

Ceylon vs Cassia Cinnamon (The Issue of Coumarin): Cassia cinnamon (not Ceylon cinnamon) contains a relatively high amount of coumarin, a naturally occurring substance that some plants use as a defense mechanism against predators. A derivative of coumarin is the major component of the drug Warfarin, an anticoagulant that inhibits the activity of Vitamin K in the clotting of blood. Eating a relatively small amount of cassia cinnamon is safe. Ceylon cinnamon contains only trace amounts of coumarin, but it too contains other compounds that may have potentially harmful effects when taken in large amounts. Therefore, the maximum recommended amount of cinnamon per day for an adult is under 1 teaspoon. The dosage for children would be less. Use cinnamon for flavoring as a spice, but not as a separate food or indulgence.

Supplements: Most cinnamon supplements in the United States are made with cassia cinnamon. If you elect to take cinnamon supplements, it is advisable to seek out Ceylon cinnamon rather than taking cassia cinnamon, because of the possibilities of ingesting too much coumarin. If necessary, call the maker of the supplement to be sure.

A little cinnamon is good; just don’t overindulge! Because of its coumarin content along with other compounds, eating large amounts of cassia cinnamon can put you at risk for liver toxicity and damage, some types of cancer (lung, liver and kidney), mouth sores in people who are allergic to the cinnamaldehyde in cinnamon oil (when eating a lot of cinnamon flavoring agents), low blood sugar (especially in those taking medications for diabetes), and it may interfere with some medications (for diabetes, heart disease, and liver disease).

Selecting Cinnamon: Cassia vs Ceylon
In the United States, both cassia and Ceylon cinnamons can be labeled as “cinnamon.” Unless the label clearly states that a bottle contains Ceylon cinnamon, it can be hard to tell which you’re getting. If you’re wondering what type of cinnamon you’re getting when you buy cinnamon sticks, notice the shape of the stick. Ceylon cinnamon sticks are curled, but form a telescope-like shape when dried, and curl from one side. Cassia cinnamon sticks curl inward from both sides, like a scroll.

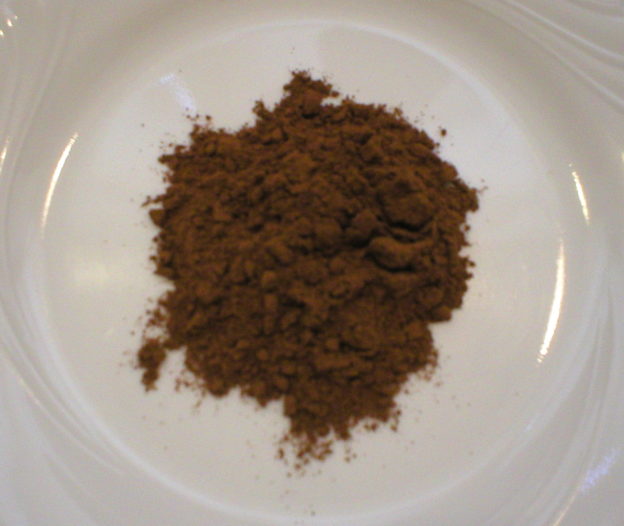
Regarding appearance and flavor…Ceylon cinnamon is tan with a delicate, sweet flavor. Cassia cinnamon is reddish brown, coarser in texture, and has a more pungent flavor and aroma.

How to Store Cinnamon
To preserve the freshness of cinnamon, store it in a cool, dark place in an airtight container. Ground cinnamon will keep fresh for about six months. The sticks will retain their freshness for about a year. Storing cinnamon in the refrigerator can help to extend its shelf life. If your cinnamon does not have its characteristic aroma, it has become stale and should be replaced.

Quick Tips and Ideas for Using Cinnamon
Cinnamon is a versatile spice that is usually used in sweet breads and desserts. But it can also be used in savory applications too, as is commonly done in Indian, Vietnamese, and Chinese cuisines. Below are some simple ways to include cinnamon in foods.

* Use cinnamon to add a sweet-spicy flavor to cakes, pies, cookies, cobblers, puddings, and other desserts.

* Sprinkle cinnamon over an apple pie or crisp.

* Combine cinnamon with sugar and have it available to sprinkle on desserts, cereals, toast, breads, muffins, or anywhere you want a sweet cinnamon flavor.

* Cinnamon can be added as a flavoring in marinades for beef, venison, or lamb.

* Add some cinnamon to hot chocolate, which is commonly done in Mexico.

* Add a cinnamon stick to a cup of hot tea, cocoa, cider or coffee to add a cinnamon flavor to your beverage.

* Add cinnamon sticks or essential oil to room fresheners and sachets.

* Sprinkle cinnamon on a fruit salad.

* Add some cinnamon into pudding or other desserts.

* Add some cinnamon in a curry recipe.

* Add some cinnamon to pancake batter.

* Add some cinnamon to your morning smoothie.

* Add some cinnamon and honey to roasted sweet potatoes.

* Sprinkle roasted butternut squash with cinnamon.

* Boost your morning oatmeal by adding in some cooked sweet potato and sprinkle with cinnamon.

* Make a sweet potato smoothie by blending cooked sweet potato, banana (or another fruit like a peach), almond milk, and a little cinnamon.

Herbs/Spices That Go Well with Cinnamon
Cloves, curry powder, garam masala, ginger, nutmeg, vanilla

Foods That Go Well with Cinnamon
Proteins, Nuts, Seeds: Almonds, beans, halibut, lamb, nuts (in general), pork, poultry

Vegetables: Beets, carrots, cauliflower, chiles, onions, rhubarb, sweet potatoes, tomatoes

Fruit: Apples, apple cider, apple juice, bananas, blueberries, coconut, dates, fruits (in general), grapefruit, grapes, lemon, oranges, peaches, pears, raisins

Grains and Grain Products: Baked goods, cereals, corn, couscous, oatmeal, popcorn, rice

Dairy and Non-Dairy: Butter, ice cream, milk (dairy and non-dairy), yogurt

Other: Chocolate and cocoa, coffee and espresso, honey, maple syrup, rose water, sugar, wine

Cinnamon has been used in the following foods and cuisines:
Baked goods (i.e. breads, cakes, cookies, muffins, pastries, pies), beverages (i.e. cocoa, eggnog, hot chocolate), breakfast/brunch (i.e. coffee cake, French toast, pancakes), cereals (hot breakfast), chili (vegetarian), compotes (fruit), curries, custards, desserts (i.e. crisps, custards, puddings), fruit desserts, ice cream, Indian cuisine, Mediterranean cuisines, Mexican cuisines, Middle Eastern cuisines, Moroccan cuisine, sauces (i.e. chocolate), stews, stuffings, teas

Suggested Flavor Combos using Cinnamon
Add cinnamon to the following combos…

Almonds + grains (i.e. couscous, oats) + raisins
Almonds + rice
Chocolate + milk
Maple syrup + pecans

Recipe Links

Whole Baked Sweet Potatoes (with Cinnamon Sugar) https://www.thespruceeats.com/whole-baked-sweet-potatoes-3061582

Easy Butternut Squash Casserole with Maple and Cinnamon https://www.thespruceeats.com/easy-butternut-squash-casserole-3062209

Spiced Apple Fritters https://www.thespruceeats.com/spiced-apple-fritters-3056323

Healthy Pumpkin Apple Crisp (Gluten-Free) https://www.onceuponapumpkinrd.com/healthy-pumpkin-apple-crisp-gluten-free/

15 Recipes for People Obsessed with Cinnamon https://www.thekitchn.com/15-recipes-for-people-obsessed-with-cinnamon-235202

50 Ways to Bake with Cinnamon https://www.tasteofhome.com/collection/cinnamon-recipes/

20 Savory Cinnamon Recipes https://www.myrecipes.com/course/savory-cinnamon-recipes?

21 Charming Ways to Use Cinnamon https://www.cosmopolitan.com/food-cocktails/a29536/cinnamon-recipes/

Resources

https://www.everydayhealth.com/diet-nutrition/diet/cinnamon-nutrition-benefits-types-recipes/

https://www.thespruceeats.com/cinnamon-and-its-uses-3050519

https://en.wikipedia.org/wiki/Coumarin

https://www.healthline.com/nutrition/side-effects-of-cinnamon#3

https://www.drugs.com/drug-class/coumarins-and-indandiones.html

https://www.sciencedirect.com/topics/agricultural-and-biological-sciences/coumarin

https://www.swansonvitamins.com/blog/jenessa/sweet-perks-of-cinnamon

https://www.spicesinc.com/p-510-what-spices-go-with-what-meat.aspx

https://www.healthline.com/nutrition/10-proven-benefits-of-cinnamon

https://www.medicalnewstoday.com/articles/318386.php#forms_and_doses

Page, Karen. (2014) The Vegetarian Flavor Bible. New York, NY: Little, Brown and Company.

About Judi
Julia W. Klee (Judi) began her journey enjoying “all things food” in elementary school when she started preparing meals for her family. That love of food blossomed into a quest to learn more and more about health and wellness as related to nutrition. She went on to earn a BS Degree in Food and Nutrition, then an MS Degree in Nutrition. She has taught nutrition and related courses at the college level to pre-nursing and exercise science students. Her hunger to learn didn’t stop upon graduation from college. She continues to research on a regular basis about nutrition as it relates to health. Her hope is to help as many people as possible to enjoy foods that promote health and wellness.
Easy Saute-Steamed Bok Choy

Easy Saute-Steamed Bok Choy

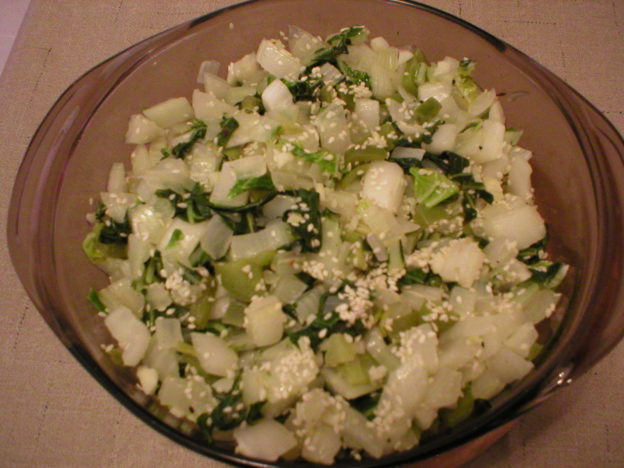
Bok choy is often used in stir-fried vegetables. It’s a delicious vegetable to use that way. But did you ever try it on its own? It’s good as a stand-alone vegetable too. Here’s a simple and fast way to cook bok choy without simply boiling it. The recipe is easy and very flexible, so it can be adjusted to whatever amount of the vegetable and seasonings you want to use.

Below is a video demonstration of cooking bok choy with a saute-steam method. The written recipe is below.

Enjoy!
Judi

Easy Sauté-Steamed Bok Choy
Makes About 4 Servings

1 Tbsp extra virgin olive oil*
1 cup chopped bell pepper
½ cup chopped yellow onion
4 cloves garlic, chopped
8 cups washed and chopped bok choy (about 1 medium head)
2 Tbsp vegetable broth or water
Pinch of dried chili pepper flakes, or to taste
Salt and pepper, to taste
Juice of ½ fresh lime
1 Tbsp sesame seeds, or amount as desired

Warm the olive oil* briefly over medium heat in a large pot that has a tight-fitting lid. Add the bell pepper and onion, and sauté for about 2 minutes. Add the garlic and sauté for 1 minute more. Add the chopped bok choy, stir to combine, and sauté briefly to combine the vegetables and coat the bok choy. Add the vegetable broth (or water), chili pepper flakes, salt, and pepper; stir to combine. Cover the pot and allow the vegetables to steam until the bok choy is as tender as you want, about 5 to 7 minutes for crisp-tender. Stir occasionally as it steams. Remove from heat and drizzle with lime juice, then sprinkle with sesame seeds. Enjoy!

*If preferred, you can omit the oil and use vegetable broth to sauté the vegetables. Since the broth would evaporate faster than oil, you may need to use 2 or 3 tablespoons of liquid in place of the oil.

Easy Maple Glazed Carrots with Dill

Easy Maple Glazed Carrots with Dill

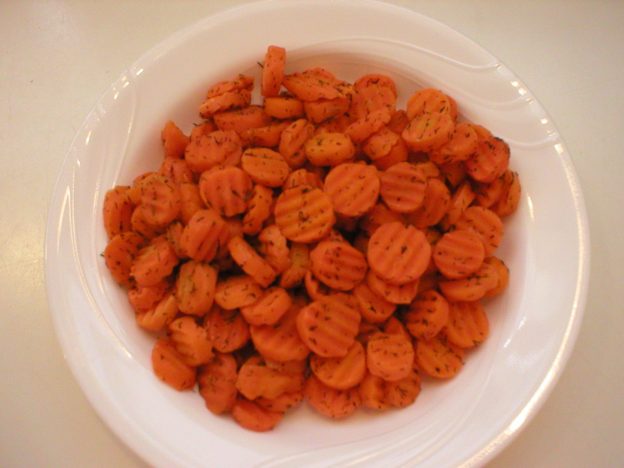
This is a delicious and very easy recipe using frozen carrots. You could easily use fresh carrots simply by adding a little more water as they cook. Below is a video demonstration of making this dish. The recipe is below the video.

Enjoy!
Judi

Easy Maple Glazed Carrots with Dill
Makes 4 Servings

1 (12 oz) pkg of frozen carrot slices
1 Tbsp butter*
1 Tbsp maple syrup**
1 to 2 tsp dried dill leaves OR 1-1/2 Tbsp chopped fresh dill, to taste
Salt and pepper, to taste
2 Tbsp water (see tip below)

Melt butter in a skillet over just above medium heat. Add the frozen carrot slices and drizzle with maple syrup. Sprinkle with dill, salt and pepper. Stir, then cover the skillet with the lid. Occasionally stir to break up the frozen lumps of carrot slices and return the lid to the pan. When the slices are thawed, add the water, cover and continue to cook until the carrots are almost as tender as you like them to be. Remove the lid and allow the remaining water to evaporate. Stir to coat the carrots with the remaining mixture and serve. The entire process takes no more than 5 minutes.

Tip: Make sure the pan does not get dry before the carrots or done, so they don’t burn. Add more water if needed.

* Add more butter if more richness is desired.

** If you prefer (or don’t have maple syrup available), use honey, brown sugar, or any sweetener you choose.

Chickpeas

Chickpeas 101 – The Basics

If you’re wondering about chickpeas, from what they are to how to use them, you’re in the right place! Below is a comprehensive article all about chickpeas!

Enjoy!
Judi

Chickpeas 101 – The Basics

About Chickpeas
Chickpeas are members of the Fabaceae plant family. They originated in the Middle East, where they are still widely used. Researchers have evidence that chickpeas were consumed as far as 7,000 years ago, with evidence that they were cultivated as far back as 3,000 BC. From the Middle East, chickpeas slowly made their way around the world. Today, the main commercial producers of chickpeas are India, Pakistan, Turkey, Ethiopia, and Mexico.

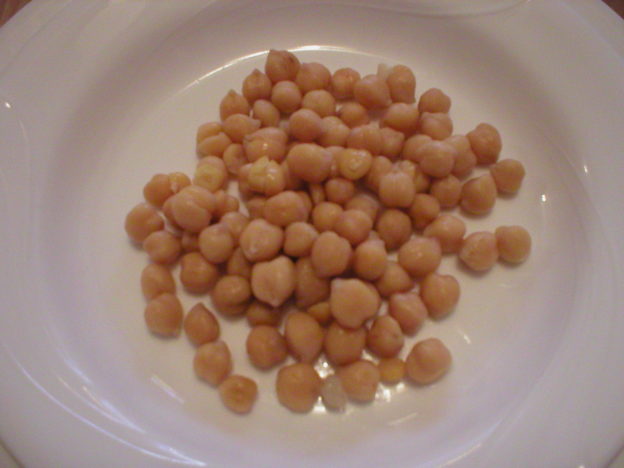
Chickpeas have developed many names around the world, including garbanzo beans, garbanzos, grams, Bengal grams, Egyptian peas, and besan (when ground into flour). There are different varieties of chickpeas commonly grown, with some being green, black, brown, red, or the very familiar tan color. “Kabuli” are large and beige with a thin skin. This is the type commonly found in American grocery stores. “Desi” chickpeas are small and dark with yellow interiors. The Desi type chickpeas are about half the size of the Kabuli chickpea that Americans are familiar with. This is the most popular type of chickpea worldwide. They have a thicker seed coat than the Kabuli type. “Green” chickpeas are younger and have a sweeter flavor than the other types. They are similar to green peas.

Chickpeas are the seeds of the plant, grown for their highly nutritious qualities, including an abundance of fiber, protein and other nutrients. They have a mild, nutty flavor and buttery texture. Chickpeas are naturally gluten-free.

Nutrition Tidbits and Health Benefits
Chickpeas contain a lot of antioxidants, protein, fiber and other nutrients too. Their antioxidants not only combat free-radicals in the body, but also appear to have anti-inflammatory effects. This alone makes them powerful foods to include in the diet.

Chickpeas also supply a lot of protein, with 1 cup of cooked chickpeas providing over 14 grams. That same cup of cooked chickpeas also provides over 12 grams of fiber, along with a lot of molybdenum, manganese, folate, copper, phosphorus, iron, zinc, and B-vitamins. One cup of cooked chickpeas has about 270 calories. They have a low glycemic index, so they are digested and absorbed slowly, without a large spike in blood sugar.

Selecting Chickpeas: Dried vs Canned
Dried: Chickpeas are sold dried or canned. Dried chickpeas are usually prepackaged but are sometimes sold in bulk bins. Make sure there is no sign of moisture or insect damage when selecting dried chickpeas. When purchasing from bulk bins, also make sure there is a good turnover of product in the bins so you can be assured they are as fresh as possible.

Canned: Most grocery stores carry canned chickpeas and they are a great staple food to keep in the pantry when time is short. They can simply be used from the can when needed for a salad or hummus, or heated briefly in cooked foods. Many people use the liquid from canned chickpeas (called aquafaba) as an egg white substitute and when making vegan meringues.

The nutritional value of canned chickpeas is good when compared to some other canned foods. The value of most nutrients is lowered by about 15% in canned chickpeas, with the exception of folate, which is lowered by 45% when compared to the folate level in dried chickpeas. There is some concern with the BPA content of canned goods. If you are avoiding BPA from canned foods, be sure to look for cans labeled as BPA-free. Also, some canned chickpeas may contain additives like salt and/or calcium chloride (a firming agent). If those additives are concerns for you, then dried chickpeas may be a better option. However, organic canned chickpeas should contain little to no additives with the exception of salt. Some brands may carry salt-free options in BPA-free cans.

Aquafaba
Aquafaba is what many people call the liquid in canned chickpeas. (Note that this does not apply to the liquid in other types of canned beans.) Due to its thick nature, this liquid can be used straight from the can as a substitute for egg whites in cooking. It can also be whipped into meringues and marshmallows.

Mix aquafaba with some cream of tartar and whip as you would egg whites. The fluff will hold together well and lighten quick breads and muffins. According to Bob’s Red Mill, use 1/8 teaspoon of cream of tartar with ½ cup (8 tablespoons) of aquafaba. For more information on how to use aquafaba as an egg replacer, please visit their site at https://www.bobsredmill.com/blog/featured-articles/a-guide-to-aquafaba/

To use aquafaba, it’s helpful to first shake the unopened can of chickpeas. Open and drain the can into a fine mesh strainer over a bowl, separating the canned peas from their liquid. Briefly whisk the liquid to blend the starches that may have settled on the bottom of the can, then measure it as needed for a recipe. Fresh aquafaba can be stored in a covered container in the refrigerator for up to 1 week.

Extra aquafaba can easily be frozen for later. Freeze it in 1 tablespoon increments in an ice cube tray. When frozen, transfer the cubes to a labeled freezer bag. It may easily be thawed in the microwave, if desired. Aquafaba will keep for about 2 months in the freezer.

See also: A Guide To Aquafaba at https://minimalistbaker.com/a-guide-to-aquafaba/

Chickpea Flour
Chickpea flour is available in some grocery stores, and can be purchased online. Most chickpea flour available is made from raw chickpeas. When using this type of flour, be sure it is used in a recipe where it is well-moistened and also cooked in some way. This will make it more digestible. Otherwise, the finished product may be hard to digest and could cause excessive gas. Because it is usually made from raw chickpeas, this type of flour should not be eaten raw.

How to Store Chickpeas
Dried chickpeas should be stored in an airtight container in a cool, dry, dark place. They will keep well for about a year. The longer they are stored, the drier they will become and may take longer to cook. It’s helpful to rotate your supply of dried chickpeas (like all foods), using the “first-in, first-out” method (cook your oldest chickpeas first). Once cooked, chickpeas should be stored in the refrigerator in a covered container and used within four days.

As with most, if not all canned foods, canned chickpeas should have a “best by” date stamped on the can. For best quality, use them before that date. Store cans in a cool, dry place.

How to Prepare Dried Chickpeas
Dried chickpeas should first be sorted and examined so you can remove any stones, debris, or damaged beans. Then they should be rinsed well and drained. Before actual cooking, chickpeas should be soaked which makes them more digestible. There are two methods for soaking chickpeas.

Quick-soak method: Place the sorted and rinsed beans in a large pot with about 2 to 3 parts of water to 1 part of chickpeas. Bring the contents to a boil. Cook, uncovered, for 2 minutes. Remove the pot from the heat, cover, and allow the chickpeas to soak for 2 hours. Then drain and rinse the chickpeas. Add fresh water to the pot and bring it to boil. Lower the heat and simmer until they are tender. The time will vary depending upon how dry the beans were. Drain, then use as planned.

Traditional soaking method: This method involves a longer soaking time, but may actually be preferred because it further reduces compounds in the chickpeas that may cause gas when they are eaten. After the peas are sorted, rinsed and drained, place them in a large pot with at least 3 to 4 parts of water per 1 part of chickpeas. Cover the pot and allow them to soak for at least 6 to 8 hours, up to 12 hours. Drain, then fill the pot with fresh water. Bring them to boil, lower heat and simmer gently until the chickpeas are tender. The time will depend upon how long they soaked and how dry they were initially. Some directions call for cooking up to 2 hours, but I have found that they usually cook faster than that. Drain, then use as planned.

Note! When cooking any type of dried pea or bean, be sure not to add any acid nor salt to the water early on when cooking the pea or bean. Doing so will make the outer shell tough which makes the dried pea or bean hard to cook, and they may not soften like you expect. If you want to salt the water or add an acid (like lemon juice or vinegar), only add it when the peas or beans are almost finished cooking and no sooner.

One cup of dried chickpeas yields about three cups cooked. Cooked chickpeas should be stored in a covered container in the refrigerator and used within four days.

Freezing Chickpeas
Sorted, rinsed and soaked, but uncooked chickpeas may be frozen in covered containers. After soaking, drain them well, then place them in an airtight freezer container. They will keep in the freezer for up to 1 year.

If you want to cook dried chickpeas in advance and have them whenever needed, simply drain your cooked chickpeas and place them in a labeled freezer bag. Flatten the bag, lay them down in the freezer and allow them to freeze. Frozen, cooked chickpeas will keep well for 1 year. However, some resources state that they should be used within 6 months for best quality.

Quick Tips and Ideas for Using Chickpeas
* Make an easy hummus by blending chickpeas with olive oil, fresh garlic, tahini and lemon juice.

* Add a nutritional punch to your salads by topping them with some chickpeas.

* Make an easy pasta dish by topping cooked pasta with chickpeas, olive oil, crumbled feta cheese and fresh oregano.

* Add some chickpeas to vegetable soup to enhance its flavor, texture and nutritional value.

* Add chickpeas to a roasted veggie and quinoa salad.

* Add chickpeas to your favorite stir-fry.

Herbs/Spices That Go Well With Chickpeas
Basil (and Thai basil), bay leaf, capers, cardamom, cayenne, cilantro, cinnamon, cloves, coriander, cumin, curry powder and spices, dill, garlic, ginger, mint, mustard seeds, oregano, paprika, parsley, pepper (black and white), rosemary, saffron, sage, salt, sumac, tarragon, thyme, turmeric

Foods That Go Well with Chickpeas
Proteins, Nuts, Seeds: Almonds, beef, cashews, chicken, lentils, pine nuts, pistachios, seeds (i.e. pumpkin, sesame), tahini, walnuts

Vegetables: Artichokes, bell peppers, cabbage, carrots, cauliflower, celery, chard (Swiss), chiles, cucumbers, eggplant, fennel, green beans, greens (bitter, like beet greens), greens (salad), kale, mushrooms, onions, potatoes, scallions, spinach, squash (summer), sweet potatoes, tomatoes, zucchini

Fruits: Apples, apple cider, apple juice, apricots (dried), avocados, citrus (lemon, lime, orange), coconut, currants, mangoes, olives, pumpkin, tamarind

Grains and Grain Products: Bread, bulgur, corn, couscous, farro, millet, pasta, polenta, quinoa, rice, tortillas, wheat berries

Dairy and Non-Dairy: Buttermilk, cheese (cheddar, feta, goat, Parmesan), coconut milk, yogurt

Other Foods: Mayonnaise, oil, soy sauce, tamari, vinegar

Chickpeas have been used in the following cuisines and foods:
North African cuisine, chana masala, chili (vegetarian), curries, dips, falafels, Greek cuisine, hummus, Indian cuisine, Italian cuisine, Mediterranean cuisines, Mexican cuisine, Middle Eastern cuisines, Moroccan cuisine, salad dressings, salads, soups (i.e. minestrone, tomato, vegetable), spreads, stews, tabbouleh, veggie burgers

Suggested Flavor Combos Using Chickpeas
Combine chickpeas with the following combos…
Apricots + pistachios + tahini
Basil + brown rice + curry
Basil + cucumbers + feta cheese + garlic + red onions
Bulgur + eggplant + mint + quinoa
Cayenne + feta cheese + garlic + spinach + tomatoes
Chiles + cilantro + lime
Coriander + cumin + mint + sesame seeds
Cumin + eggplant
Garlic + lemon + tahini
Mint + onions + yogurt
Potatoes + saffron + Thai basil
Spinach + sweet potatoes

Recipe Links
Garlic Dip http://www.whfoods.com/genpage.php?tname=recipe&dbid=223

Minted Garbanzo Bean Salad http://www.whfoods.com/genpage.php?tname=recipe&dbid=191

Healthy Veggie Salad http://www.whfoods.com/genpage.php?tname=recipe&dbid=311

Curried Mustard Greens and Garbanzo Beans with Sweet Potatoes http://www.whfoods.com/genpage.php?tname=recipe&dbid=41

Chickpea Soup https://www.thespruceeats.com/revithosoupa-chickpea-soup-1706136

Carrot Hummus https://www.thespruceeats.com/carrot-hummus-4772801

Honey Roasted Chickpea Butter https://www.thekitchn.com/recipe-honey-roasted-chickpea-butter-239671

How to Make Crispy Roasted Chickpeas in the Oven https://www.thekitchn.com/how-to-make-crispy-roasted-chickpeas-in-the-oven-cooking-lessons-from-the-kitchn-219753

Risotto with Caramelized Onions, Mushrooms, and Chickpeas https://fakeginger.com/risotto-with-caramelized-onions-mushrooms-and-chickpeas/

Crispy Roasted Chickpeas https://steamykitchen.com/10725-crispy-roasted-chickpeas-garbanzo-beans.html

Coconut Ginger Chickpea Soup https://www.bonappetit.com/recipe/coconut-ginger-chickpea-soup

Spiced Chickpeas and Greens Frittata https://www.bonappetit.com/recipe/spiced-chickpeas-and-greens-frittata

Shaved Brussels Sprouts Salad with Cauliflower Steaks and Crispy Chickpeas https://producemadesimple.ca/5-ingredient-recipe-shaved-brussels-sprouts-salad-with-cauliflower-steaks-and-crispy-chickpeas/

Mediterranean Avocado Chickpea Pasta Salad with Lemon Basil Vinaigrette https://www.ambitiouskitchen.com/mediterranean-avocado-chickpea-pasta-salad/

Chickpea Flour Chocolate Chip Cookies https://www.ambitiouskitchen.com/chickpea-flour-chocolate-chip-cookies/

20 Amazing Things You Can Do With Aquafaba https://www.vegansociety.com/whats-new/blog/20-amazing-things-you-can-do-aquafaba

19 Aquafaba Recipes That Prove Chickpea Water is Not as Gross as It Sounds https://greatist.com/eat/aquafaba-recipes

The 25 Best Vegan Aquafaba Recipes You Never Knew Could Be Vegan https://www.veganfoodandliving.com/the-25-best-vegan-aquafaba-recipes-you-never-knew-could-be-vegan/

Resources
https://bienasnacks.com/blogs/biena-blog/chickpeas-information-faqs

http://www.whfoods.com/genpage.php?tname=foodspice&dbid=58

https://www.liveeatlearn.com/chickpeas/

https://www.thespruceeats.com/using-dried-chickpeas-in-moroccan-cooking-2394969

https://www.americastestkitchen.com/guides/vegan/what-is-aquafaba

https://www.bobsredmill.com/blog/featured-articles/a-guide-to-aquafaba/

Page, Karen. (2014) The Vegetarian Flavor Bible. New York, NY: Little, Brown and Company.

About Judi
Julia W. Klee (Judi) began her journey enjoying “all things food” in elementary school when she started preparing meals for her family. That love of food blossomed into a quest to learn more and more about health and wellness as related to nutrition. She went on to earn a BS Degree in Food and Nutrition, then an MS Degree in Nutrition. She has taught nutrition and related courses at the college level to pre-nursing and exercise science students. Her hunger to learn didn’t stop upon graduation from college. She continues to research on a regular basis about nutrition as it relates to health. Her hope is to help as many people as possible to enjoy foods that promote health and wellness.

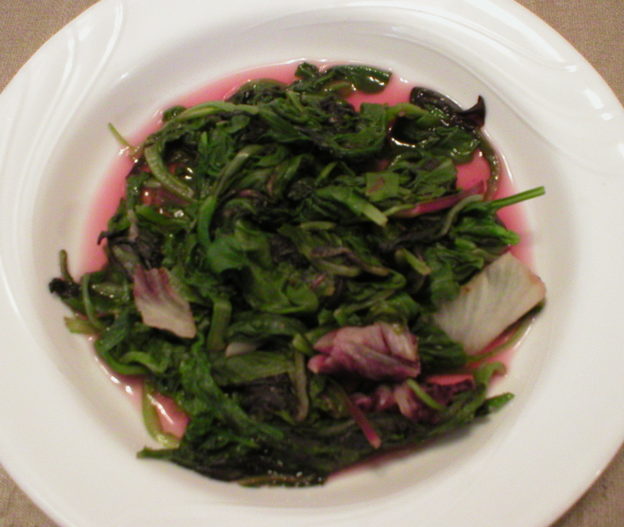
Easy and Fast Steamed Spring Mix

EASY and FAST Steamed Spring Mix

Spring mix is a delicious, healthful, and popular blend of baby greens. It can be found in many grocery stores and is often added to salads. But, did you know you can cook Spring mix? Below is a video demonstration, followed by the written recipe, of the absolute EASIEST and FASTEST way to steam Spring mix. No special equipment is required…just a pot big enough to hold your fresh greens, and a tight-fitting lid. This recipe can very easily be increased to include any amount of greens you want to cook. Give it a try and let me know how it works for you!

Enjoy!
Judi

EASIEST Steamed Spring Mix
Makes about 2 Servings

1 (5 oz) tub of Spring Mix (or Spring Mix blend)*
Garlic powder (or other seasonings of choice)
Salt and pepper
1 or 2 lemon wedges, or 2 teaspoons of vinegar of choice, optional

Wash the Spring Mix in a colander (even if it was already washed by the producer…this step is critical!). Allow the excess water to drain off the greens, but do not dry them with a towel…we need the little bit of water that is clinging to the greens.

Place the washed greens in a skillet or large pot with a tight-fitting lid. The pot should be cold (not preheated) and dry (not coated with oil, spray, nor anything else). Sprinkle desired seasonings on the greens and toss to combine. Place the lid on the pot and turn the burner onto HIGH.

Watch the pot carefully…do not walk away. As soon as you see steam coming out from under the lid, turn the burner off immediately. Allow the pot to stay on the hot burner for 1 minute to complete the steaming process (set a timer). Remove the lid and sprinkle with lemon juice or vinegar, if desired. Serve!

* This recipe is easily increased. Simply use whatever amount of Spring Mix you need to and increase seasonings accordingly. The cooking method will be the same.

About Judi
Julia W. Klee (Judi) began her journey enjoying “all things food” in elementary school when she started preparing meals for her family. That love of food blossomed into a quest to learn more and more about health and wellness as related to nutrition. She went on to earn a BS Degree in Food and Nutrition, then an MS Degree in Nutrition. She has taught nutrition and related courses at the college level to pre-nursing and exercise science students. Her hunger to learn didn’t stop upon graduation from college. She continues to research on a regular basis about nutrition as it relates to health. Her hope is to help as many people as possible to enjoy foods that promote health and wellness.