Easy Sauteed Cabbage

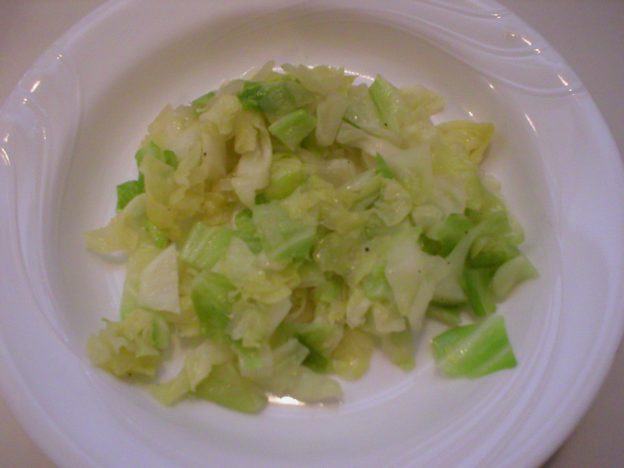
Easy Sauteed Cabbage (NOT Mushy!)

If you’re looking for an easy way to cook cabbage and not have it turn out mushy, you found it! This recipe is simple, so even novices in the kitchen can prepare this with ease. Below is a video demonstration of making the recipe. Following the video link is a scaled down recipe from what I made in the video. (The recipe can EASILY be increased or decreased.)

Enjoy!
Judi

Easy Sautéed Cabbage
Makes About 4 Servings

1 Tbsp Extra virgin olive oil*
½ cup chopped yellow onion
4 cups chopped green cabbage
1/3 cup vegetable broth or water
Salt and pepper, to taste

Briefly warm the extra virgin olive oil in a skillet that has a lid. Add the onions and sauté briefly until they start to soften, about 1 or 2 minutes. Add the chopped cabbage and stir to combine. Add the vegetable broth or water and sprinkle with salt and pepper to taste. Cover the skillet with a lid, and allow the vegetables to steam, stirring occasionally, until they are crisp tender, about 3 to 5 minutes. Remove from heat and serve.

*If preferred, a tablespoon or two of the vegetable stock can be used to sauté the onions in place of the oil.

About Judi
Julia W. Klee (Judi) began her journey enjoying “all things food” in elementary school when she started preparing meals for her family. That love of food blossomed into a quest to learn more and more about health and wellness as related to nutrition. She went on to earn a BS Degree in Food and Nutrition, then an MS Degree in Nutrition. She has taught nutrition and related courses at the college level to pre-nursing and exercise science students. Her hunger to learn didn’t stop upon graduation from college. She continues to research on a regular basis about nutrition as it relates to health. Her hope is to help as many people as possible to enjoy foods that promote health and wellness.

Carrot Pineapple Salad with Rainbow Carrots

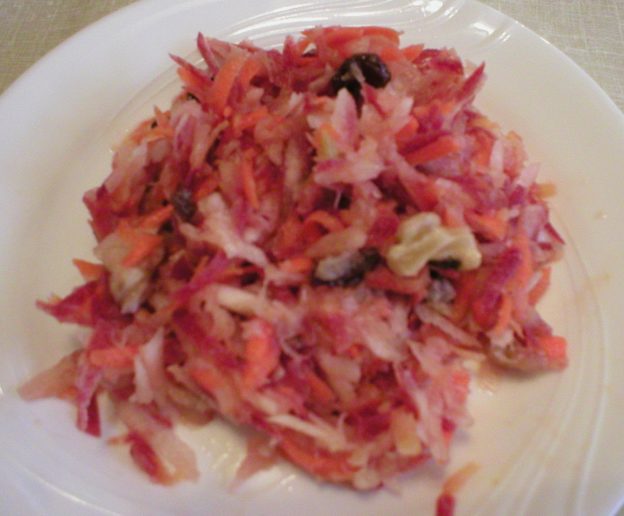
Carrot Pineapple Salad with Rainbow Carrots

Here’s a delicious Carrot Pineapple Salad recipe using rainbow carrots. Of course, if you can’t get rainbow carrots, regular carrots could also be used. It has only 5 ingredients and it’s super simple! Below is a video demonstration of making the recipe. The written recipe is below the video.

Enjoy!
Judi

Carrot Pineapple Salad
Makes 6 Generous Servings

3 cups shredded rainbow carrots*
1 (8 oz) can crushed pineapple or pineapple tidbits (NOT drained), packed in juice
1/3 cup chopped walnuts (optional)
¼ cup raisins
2 Tbsp frozen orange juice concentrate, thawed

Place all ingredients in a large bowl and stir to combine. Transfer salad to a container with a lid and place in the refrigerator for 4 hours or overnight to allow flavors to blend. Enjoy!

*If you can’t find rainbow carrots, simply use regular carrots instead.

Easy Steamed Asparagus

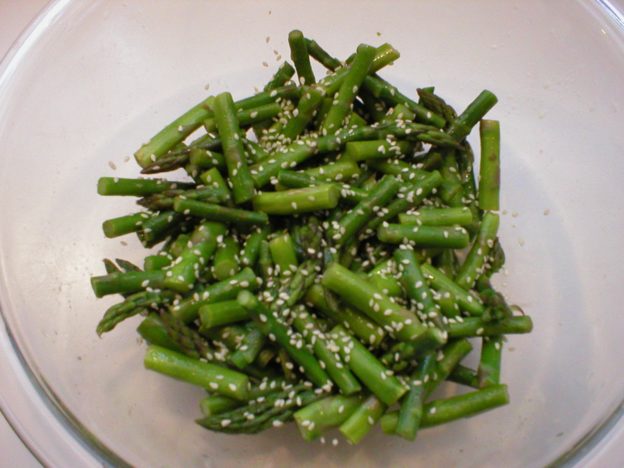
Easy Steamed Asparagus

Here’s a really simple way to serve asparagus AND dress it up a bit. Below is a video demonstration of making the dish. The written recipe follows the video link.

Enjoy!
Judi

Easy Steamed Asparagus
Makes About 4 Servings

1 bunch fresh asparagus
1 to 2 Tbsp extra virgin olive oil, butter, or ghee
1 or 2 lemon wedges, or to taste
Salt to taste
Sesame seeds, optional garnish*

Wash and trim the tough ends from the asparagus stalks. Cut them into bite-size pieces; set aside.

Place a steamer basket in a large pot with a tight-fitting lid. Add water to a level that comes below the basket. Bring the water to boil over high heat.

Place the prepared asparagus in the steamer basket and cover the pot. Steam for 3 to 5 minutes, until the asparagus is crisp-tender, or as tender as you prefer. Immediately transfer the asparagus to your serving bowl. Drizzle with oil, melted butter or ghee, the juice of 1 or 2 lemon wedges (or more if you want more lemon flavor), and salt to taste. Toss to combine. Sprinkle lightly with sesame seeds, if desired, and serve.

* If preferred, to enhance the flavor of the sesame seeds, they can be toasted in advance. Place them in a dry skillet over medium heat for 3 to 5 minutes, until lightly browned. Stir or shake the pan occasionally. Watch them carefully so they don’t burn. When lightly toasted, remove them from the hot pan and allow them to cool as you prepare the asparagus.

About Judi
Julia W. Klee (Judi) began her journey enjoying “all things food” in elementary school when she started preparing meals for her family. That love of food blossomed into a quest to learn more and more about health and wellness as related to nutrition. She went on to earn a BS Degree in Food and Nutrition, then an MS Degree in Nutrition. She has taught nutrition and related courses at the college level to pre-nursing and exercise science students. Her hunger to learn didn’t stop upon graduation from college. She continues to research on a regular basis about nutrition as it relates to health. Her hope is to help as many people as possible to enjoy foods that promote health and wellness.

Broccoli Cauliflower Orange Salad

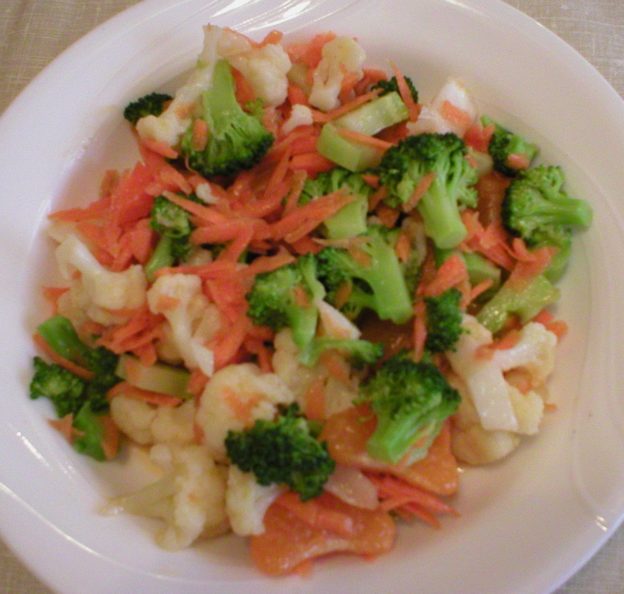
Broccoli Cauliflower Orange Salad

Here’s an easy and delicious salad recipe that’s a little different than the norm. It would go well with many meals and could also be used on a brunch buffet. The recipe can easily be expanded or made smaller, depending on your needs. Below is a video demonstration of making the salad. The written recipe is below the video link.

Enjoy!
Judi

Broccoli Cauliflower Orange Salad
Makes About 6 Servings

1-1/2 cups chopped fresh broccoli*
1-1/2 cups chopped fresh cauliflower*
1 cup shredded fresh carrots*
2 clementine oranges, peeled and sectioned
¼ cup slivered almonds, optional

Dressing
2 Tbsp extra virgin olive oil
2 Tbsp orange juice
1 Tbsp apple cider vinegar
2 tsp honey
1 tsp prepared Dijon mustard, or more to taste
½ tsp onion powder
¼ tsp garlic powder
½ tsp salt, or to taste

Place vegetables, orange sections and almonds (if using them) in a large bowl. Toss to combine and set aside.

Make the dressing: In a small bowl, combine dressing ingredients. Pour over vegetable mixture and toss to combine. Can be served right away, or covered and refrigerated for a while to allow flavors to blend.

*Cook’s notes: There are three options with this salad on how to offer the vegetables:

(1) They can be used raw in the salad.

(2) If you prefer softer vegetables or don’t have access to the fresh vegetables, you could opt for frozen broccoli, cauliflower, and carrots. Place frozen veggies in a colander under running water until thawed (this doesn’t take long). Allow to drain. Cut them into smaller pieces, if needed, then proceed with recipe.

(3) You could use raw vegetables and blanch them by placing them in boiling water, set the timer for 2 minutes. Remove from the hot water when the timer goes off and immediately cool them in ice water. Drain well, then proceed with the recipe.

Apple Raisin Salad with Cashew Cream

Apple Raisin Salad with Cashew Cream

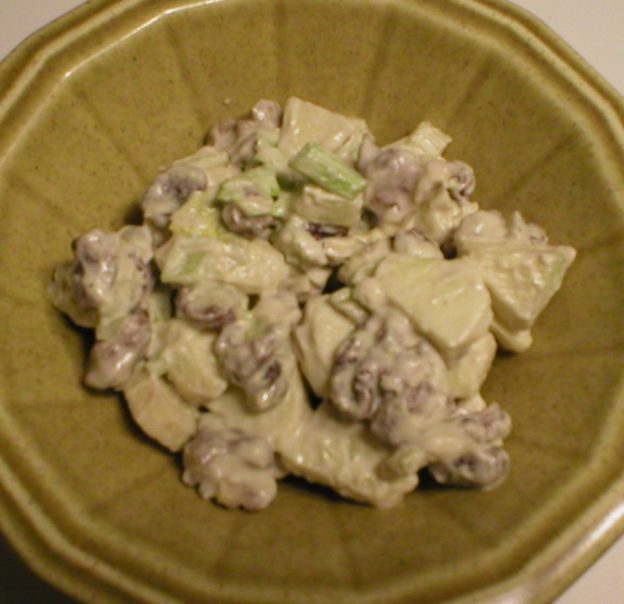
This is a new twist on the age-old familiar Apple Raisin Salad. Mayonnaise and traditional sour cream were replaced with freshly made cashew cream with a hint of orange in it. This salad is far better than the traditional one, with a rich and creamy dressing made from cashews. Below is a video demonstration of how the salad is made. The recipe is below the video.

Enjoy!
Judi

Apple Raisin Salad with Cashew Cream
Makes About 6 Servings

2 medium to large apples
1 cup chopped celery
1/3 cup chopped walnuts
¼ cup raisins

Cashew Cream:
1 cup raw cashews
2/3 cup filtered water
¼ tsp salt, or to taste
2 Tbsp fresh lemon juice, or to taste
1-1/2 to 2 Tbsp orange juice concentrate, or to taste (NOT diluted)

Make the Cashew Cream:
Place cashews in a bowl with enough water to cover them. Cover and place them in the refrigerator and allow them to soak overnight. Drain.

Place soaked and drained cashews in a blender with 2/3 cup water, and salt. Blend well, about 1 minute, until mixture is smooth and creamy. Add lemon juice and blend briefly to combine. Taste and add more salt and/or lemon juice, if needed. The mixture should taste like regular sour cream. Then stir in thawed orange juice concentrate (not diluted). This will give a fruitier flavor to the cream. Set it aside as you assemble the salad.

Make the salad:
Wash the apples and cut them into bite size pieces. Peeling the apples is optional. Add the celery, walnuts, and raisins. Toss to combine. Stir in the prepared cashew cream. (Use all the cream for a fully coated apple salad; use less for a less coated salad.) May be served right away, but for a sweeter and more “blended” flavor, place the salad in a covered container in the refrigerator for a few hours or overnight to allow the flavors to blend. Stir and enjoy!

Eggplant

Eggplant 101 – The Basics

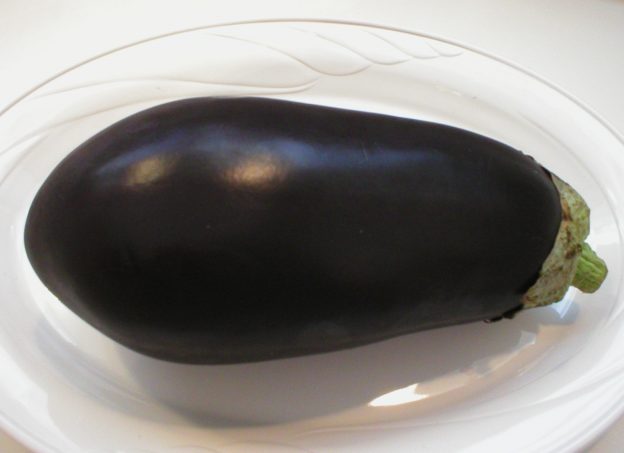
If eggplant is new to you and you’re just not sure what to do with it, you’re in the right place! If you’re familiar with eggplant and are just looking for something a little different to do with it, you too are in the right place! My Eggplant 101 notes below cover everything from what it is, to how to select, store, freeze, and prepare eggplants, to what herbs, spices and other foods go well with them, along with cooking tips, ideas, and suggested recipes using eggplant. Enjoy!

I hope this helps!
Judi

Eggplant 101 – The Basics

About Eggplant
Eggplants are members of the nightshade (or Solanaceae) family, so they are cousins with tomatoes, bell peppers, and potatoes. They grow in a similar manner as tomatoes, on long vines producing hanging fruit. The flesh is glossy and usually deep purple in color, although other varieties can be lavender, jade green, orange, and yellow-white. The sizes of the different varieties can range from that of a small tomato, to a large, long zucchini, to a large oval teardrop, which is what we see most commonly in American grocery stores. The different varieties tend to have somewhat different textures and flavors when cooked ranging from very soft and creamy with a slight sweet flavor, to more meaty texture with a slight bitter flavor.

It appears that eggplant first grew wild in India, with cultivation beginning in China around 500 BC. From there it spread to Africa, then Italy, then eventually around the world. Because of its bitter nature, it was originally thought that eggplant caused insanity, leprosy and cancer. When it was first introduced to Europe, eggplant was used more as a decorative plant then as food. When newer varieties were cultivated with less bitterness, eggplant caught on more as a culinary delight. It is now an esteemed inclusion in the cuisines of Italy, Greece, Turkey, France, and beyond.

Nutrition Tidbits
Eggplant is noteworthy for its array of B-vitamins, fiber, copper, manganese, magnesium, potassium, folate, and Vitamin K. One cup of raw eggplant has only 20 calories.

Eggplants are high in the antioxidant nasunin, a type of anthocyanin, which is known to protect cells from harmful free radical damage. Some studies suggest that the antioxidants in eggplant may help to reduce our risk for heart disease by lowering LDL cholesterol and triglycerides. The fiber in eggplant may help to control blood sugar by slowing the rate of absorption. Limited research has shown that some of the compounds in eggplant may have cancer-fighting benefits.

How to Select Eggplant
Look for an eggplant that is firm and heavy for its size. The skin should be smooth, shiny, and have a deep color. Scars, bruises, and discoloration indicate older eggplants that may be decayed on the inside. If you gently press an indentation in the eggplant with your thumb and it springs back, the eggplant is ripe. If the indentation does not spring back, it is not ripe.

How to Store Eggplant
Eggplants are quite perishable. The optimal temperature for storing eggplant is 50-54°F. If you have someplace in your home at that temperature range, store it there. If your home is warmer than that (which is usually the case), store your eggplant loosely wrapped in a plastic bag (allowing some air to flow in and out) or crisper drawer in the refrigerator. Be sure to keep it away from ethylene-producing produce (such as apples, melons, avocados, bananas, and nectarines). Do not cut it until you are ready to use it.

How to Freeze Eggplant
Eggplant can be frozen, but the texture will be very soft when it is thawed. This would be fine if using it for dips, sauces or soups. For this purpose, eggplant can be water blanched in the traditional method. Wash and peel your eggplant and slice it or cut it into desired size pieces. Add ½ cup of lemon juice to 1 gallon of water. Bring to a boil and add the eggplant. Boil for 4 minutes, drain, then cool in ice water. Drain and place in air-tight freezer bags or containers.

Roasted eggplant can also be frozen. Wash the eggplant and poke some holes in it with a fork. Roast at 400°F until it collapses. Remove from oven and allow it to cool so it can be handled. Scoop out the pulp and place it in an air-tight freezer container to freeze.

If you plan to fry eggplant after removing it from the freezer, slice and blanch the eggplant. Then batter or bread it as if it were fresh. Freeze slices separately on a tray, then transfer them to air-tight freezer containers, separating layers with waxed paper.

Completely cooked dishes using eggplant can also be frozen. Freeze them in serving-size portions in appropriate air-tight containers.

Properly prepared eggplant can keep in the freezer for 6 to 8 months.

How to Prepare Eggplant
First wash the eggplant, then cut the ends off. Eggplant will turn dark quickly after being cut. To help prevent that or at least slow it down, sprinkle it with a little lemon juice.

Many people eat eggplant with the skin left on, while others opt to peel it first. Note that the skin of larger specimens and those with white skin will be tougher, so it is advisable to peel those. Slice or cut the eggplant into desired size pieces. To help reduce bitterness, salt both sides of cut slices and allow them to sit and “sweat” for about 20 minutes. Then rinse well and proceed with recipe. Note: Use salt sparingly in recipes when preparing eggplant that has been salted to sweat out the bitterness, in case not all of the salt was rinsed off. More salt can always be added later, but removing too much is a different story! Taste it along the way to be sure.

Cooking/Serving Ideas and Tips
Eggplant can be baked, roasted, steamed, fried, stuffed, grilled, pureed, used in casseroles and soups, and incorporated into a variety of ethnic cuisines.

Quick ideas and tips for using eggplant:

* Puree roasted eggplant with garlic, tahini, lemon juice, cumin, and olive oil for homemade Baba Ganoush, a Middle Eastern thick sauce or spread. (See link below for recipe.)

* Eggplant may be roasted whole. To do this, do not peel the eggplant. Pierce the skin several times with a fork to make vent holes to allow steam to escape. Bake at 400°F for 15 to 25 minutes, depending on its size. It is done when you can easily poke a fork or sharp knife in it, or when it collapses.

* Combine baked eggplant cubes with peppers, lentils, onions, and garlic then top with a balsamic vinaigrette.

* Eggplant is like a sponge, so it absorbs oil very quickly when pan-frying. To help minimize this, salt the cubed eggplant and let it rest in a colander for 30 minutes. Rinse well, then squeeze dry between two sheets of paper towel. Salting the eggplant will remove its moisture and pressing it will compact the eggplant making it meatier and less absorbent.

* The longer the eggplant is cooked, the softer it will become.

* To grill eggplant, cut off the stem end, then cut in 1½ inch-thick wedges. Grill until streaked with brown and tender when pierced (12 to 15 minutes).

Herbs/Spices That Go Well With Eggplant
Basil, bay leaf, capers, cardamom, chervil, cilantro, cinnamon, coriander, cumin, curry powder, dill, fennel seeds, fenugreek, garlic, ginger, lemongrass, mace, marjoram, mint, nutmeg, orange, oregano, paprika and smoked paprika, parsley, pepper, rosemary, saffron, sage, salt, savory, tarragon, thyme, and turmeric

Other Foods That Go Well With Eggplant
Proteins, Nuts, Seeds: Anchovies, beans, beef, cashews, chicken, chickpeas, eggs, lamb, lentils, nuts, peanuts and peanut sauce, pine nuts, pork, sausage, seitan, sesame seeds, shrimp, tahini, tofu, and walnuts

Vegetables: Artichoke hearts, arugula, bell peppers, bok choy, carrots, celery, chard, chiles, kohlrabi, mushrooms, olives, onions, potatoes, radicchio, scallions, shallots, spinach, sprouts, tomatoes, and zucchini

Fruit: Coconut, lemon, lime, orange, pomegranate, and raisins

Grains: Bread crumbs, bulgur, couscous, millet, noodles, pasta, polenta, quinoa, and rice

Dairy and Non-Dairy: Cheese (esp. mozzarella, Parmesan, ricotta), coconut milk, cream, milk, and yogurt

Other: Hoisin, honey, miso, oil (esp. olive, sesame), pesto, sake, soy sauce, stock (vegetable), tamari, and vinegar

Eggplant has been used in: African cuisines, Asian cuisines, Baba Ganoush, caponata, casseroles, Chinese cuisine, curries, eggplant Parmesan, eggplant rollatini, stuffed eggplant, French cuisine, gratins, Indian cuisine, Italian cuisine, Japanese cuisine, Mediterranean cuisines, Middle Eastern cuisines, Moroccan cuisine, moussaka, pasta dishes, pesto, pizza, ratatouille, risotto, salads, sandwiches, Southeast Asian cuisines, spreads, stews, stir-fries, tagines, and Thai cuisine

Suggested Flavor Combos:
Combine eggplant with…
Balsamic vinegar + basil + oregano
Balsamic vinegar + tomatoes + zucchini
Basil + ricotta + tomatoes
Bell peppers + garlic
Bell peppers + onions + tomatoes + zucchini
Cheese (mozzarella, Parmesan, ricotta) + tomatoes
Chickpeas + tomatoes + pomegranate molasses
Cucumbers + garlic + mint + yogurt
Dill + walnuts + yogurt
Feta cheese + mint
Garlic + ginger + scallions + sesame + sesame oil + soy sauce
Garlic + lemon + olive oil + tahini
Garlic + Parmesan cheese + parsley + ricotta + tomatoes
Garlic + tomatoes + zucchini
Herbs + lemon juice + olive oil
Pasta + pesto + ricotta + walnuts

Recipe Links
The Original Arabic Moutabal (Baba Ganoush) https://maninio.com/the-original-arabic-moutabal-baba-ganoush-middle-east-vegan/

Vegetarian Baked Eggplant “Meatballs”
https://thefreerangelife.com/baked-eggplant-balls/

50+ Delicious Eggplant Recipes for Every Taste https://thefreerangelife.com/eggplant-recipes/

Spicy Garlic Oven Roasted Eggplant Slices https://www.melaniecooks.com/spicy-garlic-roasted-eggplant/

12 Eggplant Recipes That Prove There is Life Beyond Eggplant Parm https://www.thekitchn.com/12-eggplant-recipes-that-prove-there-is-life-beyond-eggplant-parm-232650

18 of the Easiest-Ever Eggplant Recipes https://www.realsimple.com/food-recipes/recipe-collections-favorites/popular-ingredients/easy-eggplant-recipes

Eggplant and Black Bean Casserole https://producemadesimple.ca/eggplant-and-black-bean-casserole/

Eggplant Dip (Baba Ganoush) https://producemadesimple.ca/eggplant-dip-baba-ganoush/

Eggplant Stackers https://producemadesimple.ca/eggplant-stackers/

Resources
http://www.whfoods.com/genpage.php?tname=foodspice&dbid=22

https://www.healthline.com/nutrition/eggplant-benefits

https://thefreerangelife.com/how-to-store-eggplant/

https://www.hgtv.com/outdoors/gardens/garden-to-table/freezing-eggplant

https://producemadesimple.ca/eggplant/

Page, Karen. (2014) The Vegetarian Flavor Bible. New York, NY: Little, Brown and Company.

Cashew Cream

If you’re dairy intolerant or are trying to cut back on animal fats, cashew cream is an excellent substitute for dairy sour cream. It’s easy to make, tastes just like dairy sour cream, and can be used any way regular sour cream can be used. If you haven’t tried it, give it a try! It’s well worth a taste!

Below is a video where I demonstrate how to make cashew cream. The recipe is below the video.

Enjoy!
Judi

Cashew Cream
Makes ½ to 2/3 cup of a Sour Cream Substitute

½ cup raw cashews
1/3 cup filtered water
1/8 tsp salt, or to taste
1 Tbsp fresh lemon juice, or to taste

Place cashews in a small bowl with enough water to cover them. Cover and place them in the refrigerator and allow them to soak overnight. Drain.

Place soaked and drained cashews in a blender with water, and a small amount of salt (only a pinch or two). Blend well, about 1 minute, until mixture is smooth and creamy. Add lemon juice and blend briefly to combine. Taste and add more salt and/or lemon juice, if needed. The mixture should taste like regular sour cream.

Use as you would any sour cream. Store any leftover in a covered container in the refrigerator, and use within 2 days. If you need more cashew cream, the recipe can easily be doubled.

Note: If you want a thicker cream, simply use less water. Use more water if you want a thinner cream.

Package of Lundberg Wild Blend Rice

Review of Lundberg Wild Blend Rice

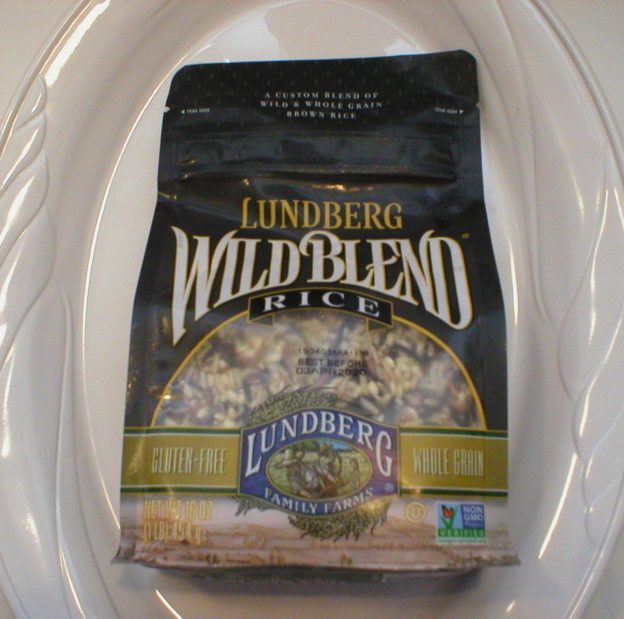
I did an unbiased review of Lundberg Family Farms’ Wild Blend Rice. It’s a combination of long grain brown rice, sweet brown rice, wild rice, Wehani red rice, and black rice. It’s 100 percent whole grain with nothing else added. I spotted this on one trip to the grocery store and decided to give it a try. The video below is my first encounter with this special blend of grains. My notes on the review follow the video link.

If you have not tried this blend of rice, let me encourage you to give it a try. It’s different than plain rice, with a bit of an “earthy” flavor from the wild rice in the mix.

I hope this helps!
Judi

Review of Lundberg Wild Blend Rice

Note: I have no official ties with Lundberg Family Farms. I purchased the rice package with my own funds and have not been prompted in any way by the company to do a review of this nor any of their products. This is an unbiased review.

A package of Lundberg Wild Blend Rice was purchased. One cup of the blend, plus one tablespoon of butter (a suggested optional ingredient in the instructions) was cooked according to package directions, with 1-3/4 cups of water. The following are the results.

Cooking Time: The package directions state to bring everything to a boil, then lower the heat, and cook the blend at a simmer for 45 minutes in a pot with a tight-fitting lid. The package directions state to use either water or broth. I opted for water so I would have no added flavoring which might skew my taste perception of the blend. I added the amount of water called for in the recipe, which was 1-3/4 cups. At 35 minutes into the cooking time, I noticed that the water was all absorbed. I tasted the rice for texture and it was a little chewy, but done enough for me (I don’t want my rice to be mushy). The package directions state that if the rice is not soft enough when the cooking time is up, to add one or two tablespoons more of the liquid and continue cooking. I opted to not do this. At the 35 minute mark, I removed the pot from the heat and allowed the rice to finish the “steaming” process for another 10 minutes, as per the instructions.

Cooked Lundberg Wild Blend Rice

Cooked Lundberg Wild Blend Rice

When finished, the rice was slightly chewy and cooked enough (it was not hard inside). Again, it was cooked enough for me. It was not mushy, which I prefer.

Options and Comments: I could have added a little more liquid at the 35 minute point, or even added a couple tablespoons more liquid in the beginning. In all fairness to Lundberg, I have an electric stove and it took a little while for the temperature to lower from a hard boil to a slow simmer. This may have caused extra water to evaporate that may have been needed in the cooking process. Bear this in mind if you use an electric range. The heat on a gas range would have been lowered much faster, possibly resulting in needing the full cooking time without extra liquid, as per the instructions.

Flavor: The rice blend had a good flavor; but as rice can be, it was a little bland. The wild rice in the blend gave it a bit of an “earthy” flavor. I can see where the flavor would have been enhanced by some salt being added in the beginning, OR by using a vegetable broth instead of the water. Either option would have enhanced the flavor just enough to make it a very tasty side dish on its own.

Options and Comments: After tasting the rice blend without added flavorings, I could easily see how some added onions, garlic, bell pepper, and seasonings would make it an absolutely delicious side dish that would pair well with many foods. I will be doing some experimenting with this blend, keeping these things in mind!

When I cook the blend in the future, I will add a little salt into the cooking water, if not using vegetable stock with salt already in it. This should help to bring out the natural nutty flavor of the various grains in the blend.

Would I recommend this product? Yes. If you enjoy rice and are looking for something a little different than plain rice, this would be a fine option. I suggest you flavor it any way you would normally flavor rice that you enjoy. The addition of the wild rice in this blend gives it a little different flavor than that of plain rice.

Stove Drip Pans

Test Comparison – Two Ways to Clean Stove Drip Pans

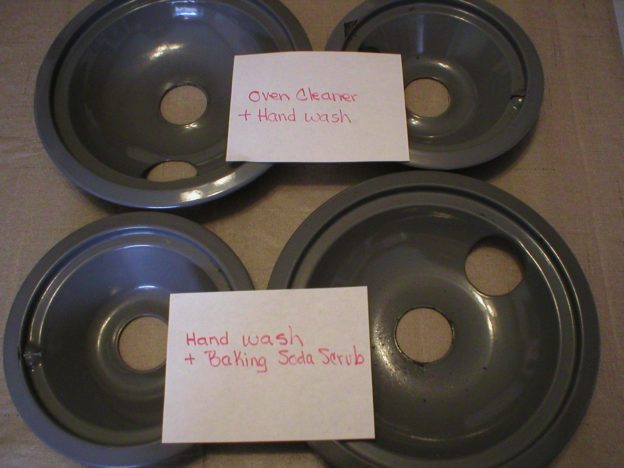
I conducted a comparison test of two different ways to clean electric range burner drip pans. One method used no-heat-needed oven cleaner. The other method was washing with baking soda and a blue scrub sponge. Below is a video demonstration of the test. The test notes, including pros and cons of each method, are below the video link. I hope this helps you decide which method is right for you.

Enjoy!
Judi

Comparison Test: Two Ways to Clean Stove Drip Pans

The following covers details of a comparison test I conducted of two ways to clean electric stove drip pans.

Method 1: Scrub with baking soda and blue scrub sponge

Two electric stove drip pans were washed with dish detergent in warm water to remove any loose debris. They were then sprinkled liberally with baking soda and scrubbed with the rough side of a damp blue scrub sponge. The pans were rewashed in soapy water and dried with a towel.

Results: Most, but not all, of the food debris was removed with some effort of using the scrub sponge and a toothbrush in the tight crevices of the pans. It was difficult, if not impossible, to remove all of the debris that was in the tight folds of the drip pans.

To test if the oven cleaner would further remove residue that the baking soda would not, the one pan that still had some residue on it was sprayed with oven cleaner and returned to the garage. It was allowed to treat for 5-1/2 hours. (Note: The instructions on the can say to allow the spray to treat the oven cavity for 2 hours or overnight, so this timeframe was in between the recommended treatment times.)

Result: The oven cleaner did remove the small amount of remaining food stains from the tight crevices of the drip pan. The pan was cleaned in the same manner as in Method #2 below. No effort was needed to remove the remaining stains from the drip pan when the oven cleaner was used.

Pros:
* No harsh chemicals were involved.
* The baking soda and scrub sponge removed all of the residue from the drip pans, except where scrubbing was extremely difficult, in the tight crevices of the pan.
* Baking soda is safe and effective.
* This method is very inexpensive.
* This method involves something already available (baking soda and a scrub sponge) in most kitchens.

Cons:
* It took some scrubbing action to remove the debris, so there is some work involved.
* It takes a little time to clean the pans this way, depending upon how dirty the drip pans are.
* This method may not remove everything from the pans, especially in tight crevices.
* It is very hard to scrub in crevices of the drip pans. The toothbrush worked a little better than the sponge since the bristles reached into the folds of the pan, but still did not remove everything. Perhaps another type of brush or tool would have done a better job.

Method 2: Spraying drip pans with no-heat-needed oven cleaner

Two electric stove drip pans were sprayed with no-heat-needed oven cleaner. They were placed on newspaper and left overnight in a garage. The next day, they were rinsed with warm water and lightly scrubbed with the rough side of a damp blue scrub sponge. The pans were then washed in warm soapy water and dried with a towel.

Results: All of the food debris rinsed off the drip pans with little to no scrubbing effort needed. Other than chips and mars in the finish of the drip pans, they looked as clean as if they were new.

Pros:
* This method is extremely easy. Just spray and let the pans sit overnight, followed by a light scrubbing the next day.
* This removed all residue from the pans.
* Very little effort was needed to clean the pans.
* This method required very little time.
* No hard scrubbing was needed to remove the food debris.

Cons:
* This method involves a harsh, potentially harmful chemical.
* To be safe, it’s helpful to spray and leave the drip pans in a garage or on a porch (outside of the house).
* Gloves may be needed with this method if you have sensitive skin.
* You may need to take precautions not to breathe in the fumes.
* The oven cleaner may not be something you have readily available.
* The oven cleaner releases harmful chemicals into the environment.
* This method is a bit more costly than Method #1.

Conclusion
Both methods produced very satisfactory results. The use of the oven cleaner provided the easiest and most effective way to remove food debris from the drip pans with little effort. However, the downside of using harsh chemicals may not make it the best choice for all people.

The baking soda method offers a very effective alternative, with a cost-savings advantage plus a less harmful chemical being used in the process. If using the baking soda method, to prevent buildup in the tight crevices of the drip pans, it would be advantageous to clean the drip pans on a regular basis, helping to prevent permanent staining and hard crusting of debris on the pans. With that, the cleaning results would be excellent and even more comparable to that of using the oven cleaner.

Overall winner on effectiveness and ease of use: Method #2, No-heat-needed oven cleaner

A VERY close runner-up: Method #1, Scrubbing with baking soda and the scratchy side of a blue scrub sponge.

Meatless Burgers

Meatless Burgers

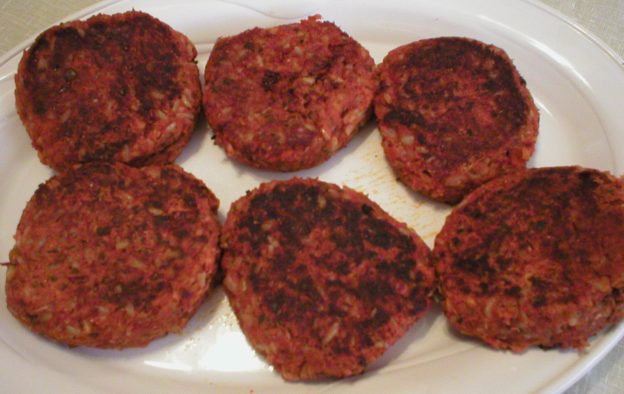
Here’s a recipe for a meatless burger than I’ve been making for years. It’s flavorful and a very flexible recipe. You can use any type of bean or legume you want and the flavorings are easy to adjust to your preferences. Give it a try! The recipe is below the video demonstration. Enjoy!

I hope this helps!
Judi

Meatless Burgers
Makes about 6 Patties

2 cups COOKED beans of choice* (or 1 (15 oz) can of beans of choice, rinsed and drained)
½ cup quick oats (dry, not cooked)**
2 tsp garlic powder (or 8 small cloves of fresh garlic)
1-1/2 Tbsp dried parsley flakes
1 tsp dried oregano
1-1/2 to 2 Tbsp dried minced onion (or ¾ to 1 cup diced fresh onion)
¼ tsp black pepper
½ tsp salt
1 cup cooked rice of choice
1 small can (6 oz) tomato paste
¼ cup + 2 Tbsp water, or as needed
1 to 2 Tbsp extra virgin olive oil

Place cooked beans in a food processor and process until the beans are somewhat broken up (it does not need to be perfectly smooth like hummus); set aside.

Place the oats, garlic, parsley, oregano, onion, pepper and salt in a large bowl; stir to combine. Add the cooked rice and stir to combine. Stir in the processed beans and the tomato paste; combine well. Add water as needed to make the mixture the texture and thickness of a raw ground beef mixture, and ingredients are moist and hold well together, but not soggy wet. If needed, add a little water (1 or 2 tablespoons at a time) to help the mixture to blend better. It needs to be moist enough to hold together, while being a little soft, but not so wet that patties won’t hold together or are sticky to handle. If the mixture is too moist, add a little more oats to the mixture and allow it to rest a few minutes so the oats can soak up the extra moisture.

Divide the mixture into ½ cup portions and form patties. If there is a little extra, just add it to the patties already made if it’s not enough for a whole patty.

Heat a large skillet over medium heat. Add 1 to 2 Tbsp extra virgin olive oil and allow it to heat briefly. Carefully place the patties in the skillet. Lower the heat to medium-low and allow them to brown on the first side as they begin to firm up on the inside. If they are browning too fast where the inside is still very soft and the outside is too brown, reduce the heat on the stove a little more. When the patties are golden brown on the first side, carefully turn them and allow the second side to brown. The patties are done when they feel firm to the touch and both sides are browned, about 20 to 30 minutes depending upon how hot the skillet is. It is fine to flip the burgers more than once if needed. Serve immediately as you would any burger patty. Store extra patties covered in the refrigerator and use within 4 or 5 days.

* Literally any bean or legume (or any combination) can work in this recipe. Whatever you have on hand and want to use is fine. Canned, freshly cooked, or cooked and frozen can all be used in this recipe. If you have cooked and frozen beans, be sure to thaw them first.

** Old fashioned rolled oats can also be used, but place them in a food processor and pulse it a few times to break the oats up before using them.

About Judi
Julia W. Klee (Judi) began her journey enjoying “all things food” in elementary school when she started preparing meals for her family. That love of food blossomed into a quest to learn more and more about health and wellness as related to nutrition. She went on to earn a BS Degree in Food and Nutrition, then an MS Degree in Nutrition. She has taught nutrition and related courses at the college level to pre-nursing and exercise science students. Her hunger to learn didn’t stop upon graduation from college. She continues to research on a regular basis about nutrition as it relates to health. Her hope is to help as many people as possible to enjoy foods that promote health and wellness.