Plantains

Plantains 101 – The Basics

Plantains are commonly used in many ethnic cuisines and are found year-round in many grocery stores. If you’ve never eaten them and are just not sure what to do with them, check out the information below. Everything is covered from what they are and their nutritional aspects, to how to freeze them, how to cook with them, what goes well with them, and more. Enjoy!

I hope this helps,
Judi

Plantains 101 – The Basics

About Plantains
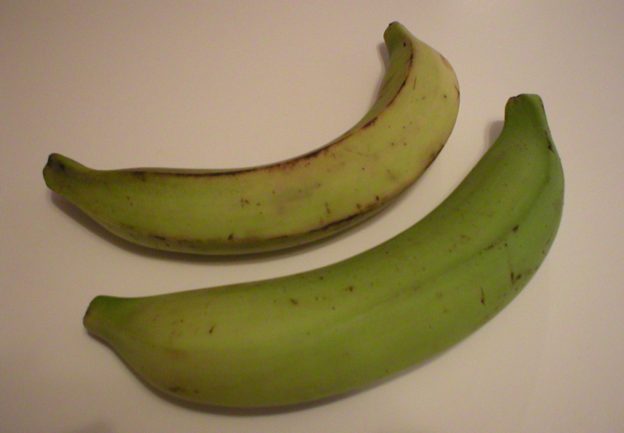
Plantains are fruits in the banana family. They look like large banana and even smell like the common banana. However, the fruit of the plantain has more starch and less sugar than the common banana and should be cooked before being eaten. It is usually eaten more like a vegetable than a fruit. It is believed to have originated in Southeast Asia. Plantains can be cooked at any stage of ripeness, but it is usually boiled or fried while green, when it contains the most starch.

Nutrition Tidbits
Since plantains are plants, they contain no cholesterol. They are low in fat and sodium, and are good sources of carbohydrates, fiber, potassium, magnesium, Vitamin C, and Vitamin B6. One-half cup of cooked plantains has about 80 to 90 calories.

The abundant potassium in plantains makes them an important addition to your diet when needing to control high blood pressure. The potassium also helps with smooth muscle contraction, which helps in heart function and lowers the risk of stroke and kidney disease.

The high fiber content of plantains helps to regulate bowel function warding off bowel diseases. The Vitamin C in plantains helps fight free radical damage in the body and promote tissue repair. The Vitamins A and C give our immune system a boost. The Vitamin B6 helps with brain function and hormones balanced keeping our moods stable and regulate our body’s clock. Most Americans are deficient in magnesium, a mineral that affects calcium absorption and helps to regulate insulin and blood sugar levels. If all this isn’t enough to convince you to at least TRY plantains, I’m not sure what will!

How to Select Plantains
Select those with the fewest blemishes, and avoid any plantains that are cracked or moldy.

How to Store Plantains
Plantains will ripen when left at room temperature and out of direct sunlight. The length of time to ripen will depend upon how ripe they are when purchased. The ripening process can be sped up by placing the plantains in a closed paper bag left at room temperature. Refrigerating plantains will stop the ripening process.

How to Preserve Plantains
Plantains may be frozen and will keep for 8 to 12 months in the freezer. Cut both ends off the plantains and remove the peel. Mash the pulp in a bowl with a fork or potato masher, with 1 teaspoon of lemon juice per fruit. Place the mashed plantain/lemon mixture into an air-tight container and store in the freezer.

How is it usually eaten…raw or cooked?
Unlike their banana cousins, plantains should be cooked before being eaten. However, some people do eat very ripe raw plantains.

How to Prepare Plantains
When preparing plantains, first wash them. With a sharp knife, cut off both ends. Slice the skin lengthwise along the ridges and remove strips of the peel with the knife. Remove any peel that remains on the pulp. From there, the plantain can be cut as needed for the intended use.

Cooking/Serving Ideas
Plantains can be baked, boiled, grilled, roasted or fried. They can be mashed or chopped and added to soups and stews. They can be steamed until soft and pureed for infants or the elderly. They can be dried and ground down into flour. Plantains are often deep-fried into chips. They are also made into curries.

Green plantains have a somewhat hard pulp and the green peel may need to be removed with a knife. At this stage, they are starchy and similar to a potato. This stage is usually used like a potato and is excellent for preparing plantain chips. Green plantains pair well with assertive flavors and fatty meats.

Yellow plantains are slightly sweeter than the green variety. At this stage, they have enough sugar to caramelize a little, but enough firmness to still hold their shape. This stage has some sweet yet savory notes, and pairs well with ingredients that may have both properties, like onions and garlic. A little acid (like lemon, lime, or sour cream) is often applied to or used with yellow plantains. This variety is often fried, boiled, or grilled.

Black plantains are still quite good to eat. They are at their sweetest and softest point when the peel is black. Black plantains are usually baked and incorporated into some type of dessert. Once a plantain ripens to this point, it will quickly decay, like a black banana.

To boil green plantains: Wash and cut off ends. Keep skin on and cut into 1 inch disks, then boil over medium heat for about 20-30 minutes until the slices are fork tender and the color is an even yellow. Remove from heat and let cool enough to remove the peel, which should be released easily. These are eaten on their own or can be served with butter, oil and salt, sprinkled with cheese, or served with avocado based dips, salsas or in place of potatoes or sweet potatoes in meals. Boiled mashed green plantains are often served for breakfast with eggs.

To fry plantains: Wash and peel. Remove ends and cut into ½ inch to one inch pieces. Using enough vegetable oil to lightly cover the pan, fry over medium heat using tongs to avoid being splashed by hot oil with turning. Cook until golden about 4-6 minutes, and serve with either salt or cinnamon.

To bake or roast: Peel and bake whole in 400°F oven for 30-40 minutes until fork tender.

Plantains are also often dried and ground into a flour also known as banana flour. Where plantains are commonly enjoyed, this flour is mixed with milk and served as a first food for infants.

Tips for Using Plantains
* Plantains take longer to ripen than regular bananas, but the good news is that there are many ways of cooking them at each stage of ripening – meaning you will never be left with one that is unusable.

* Plantains are an excellent source of fiber. They are also low in fat, gluten free and cholesterol free.

* When deep-fried, ripe plantains, are enjoyed as chips and are a popular snack all over the world.

* Plantains can be fried, boiled, grilled or baked/roasted in the oven.

* When a plantain fully ripens, it quickly decays, similar to a banana.

What Goes Well With Green Plantains
Herbs/Spices: Cardamom, chili powder, cilantro, cinnamon, cloves, coriander, cumin, curry, garam masala, garlic, ginger, paprika, black pepper, salt, thyme

Foods: Avocados, bacon, beans (ie black and pinto beans), butter, cheese, chicken, chickpeas, chiles, coconut and coconut cream, eggs, tropical fruits, lime, molasses, mole sauces, oils, onions, pork, rice, salsa, scallions, shallots, tomatoes, yogurt

Cuisines: African, Caribbean, Central American, Mexican, Puerto Rican

Specific Dishes: Chips, soups, stews, Tostones (fried plantains)

What Goes Well With Sweet (Yellow or Brown) Plantains
Herbs/Spices: Allspice, butter and browned butter, cardamom, chocolate, cilantro, cinnamon, cloves, garlic, ginger, black pepper, salt, scallions, star anise, vanilla

Foods: Black beans, bell peppers, coconut milk, dairy, tropical fruits, honey, ice cream, lemon, lime, molasses, olive oil, red onions, orange, raisins, rice, rum, scallions, sugar

Cuisines: African, Central American, Cuban (especially desserts), Mexican

Specific Dishes: Desserts and puddings, soups, vegetable stews

Recipe Links
Fried Plantain Chips (Chifles) https://www.thespruceeats.com/chifles-fried-plantain-chips-3028864

Plantain and Coconut Pancakes https://thehealthyfoodie.com/plantain-coconut-pancakes/

Fried Plantains https://www.epicurious.com/recipes/food/views/fried-plantains-10024

Plantain Soup https://www.foodnetwork.com/recipes/ingrid-hoffmann/plantain-soup-recipe-1949968

Tostones: Twice Fried Green Plantains https://producemadesimple.ca/?s=plantains

Spicy Plantain Curry https://blog.hellofresh.co.uk/plantain-curry-recipe/

Chapo (A Ripe Plantain Peruvian Beverage) http://pink-apron.com/recipes/ripe-plantain-drink/

Plantain Recipes http://www.muchogusto.com/index.php?page=plantain-recipes

Three Tasty Ways to Eat Ripe Plantains https://patijinich.com/three_ways_to_eat_ripe_plantains/

How to Cook Plantains: Two Simple and Delicious Ways https://shop.mybluprint.com/cooking/article/how-to-cook-plantains/

About Judi
Julia W. Klee (Judi) began her journey enjoying “all things food” in elementary school when she started preparing meals for her family. That love of food blossomed into a quest to learn more and more about health and wellness as related to nutrition. She went on to earn a BS Degree in Food and Nutrition, then an MS Degree in Nutrition. She has taught nutrition and related courses at the college level to pre-nursing and exercise science students. Her hunger to learn didn’t stop upon graduation from college. She continues to research on a regular basis about nutrition as it relates to health. Her hope is to help as many people as possible to enjoy foods that promote health and wellness.

Resources
https://www.thespruceeats.com/introduction-to-plantains-2137973

https://www.britannica.com/plant/plantain

https://draxe.com/plantains/

https://www.quora.com/How-do-you-preserve-plantain

https://producemadesimple.ca/plantain/

Page, Karen. (2014) The Vegetarian Flavor Bible. New York, NY: Little, Brown and Company.

https://www.finecooking.com/ingredient/plantains

https://healthyeating.sfgate.com/plantain-benefits-5583.html
Sweet and Savory Lentils

Sweet and Savory Lentils

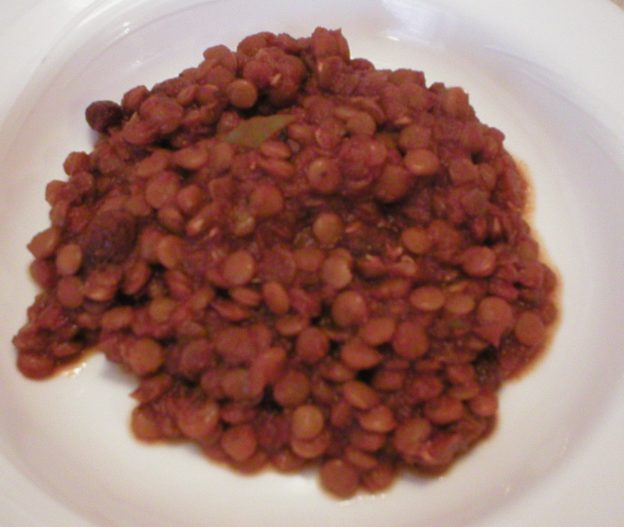
If you’ve never tried lentils, this is a great recipe to start with! It’s delicious, easy to make (just dump everything into the pot, stir and cook), versatile, and can be adjusted to your taste preferences (regarding “heat”). Give it a try and let me know how you like it! The recipe is below the video demonstration. Enjoy!

I hope this helps!
Judi

Sweet and Savory Lentils
Makes About 8 Servings

1-1/2 cups dried lentils, rinsed and drained
1/4 cup raisins
4 cups water (or more, if needed)
1/3 cup chopped bell pepper of choice
1 tsp garlic powder (or 4 cloves fresh garlic, minced)
Pinch dried hot red pepper flakes, or more to taste
1 Tbsp chili powder
1/2 tsp cumin powder
½ tsp dried basil
2 tsp blackstrap molasses
1 (6 oz) can tomato paste

Place all ingredients in a large saucepan. Stir to combine. Bring to a boil then lower heat to medium-low and simmer until the lentils are tender, about 30 to 45 minutes. Stir occasionally, and add more water if the mixture becomes too thick before the lentils are tender. It is helpful to lower the heat as the mixture thickens, so it won’t burn and to keep it from splashing on you as it bubbles.

Serving suggestions: This can be topped with shredded cheddar cheese and served over brown rice or used as a taco or burrito filling in place of a meat mixture. It’s also wonderful topped with cheese and served with chips. Some folks even enjoy this over cooked noodles or pasta. Enjoy!

About Judi
Julia W. Klee (Judi) began her journey enjoying “all things food” in elementary school when she started preparing meals for her family. That love of food blossomed into a quest to learn more and more about health and wellness as related to nutrition. She went on to earn a BS Degree in Food and Nutrition, then an MS Degree in Nutrition. She has taught nutrition and related courses at the college level to pre-nursing and exercise science students. Her hunger to learn didn’t stop upon graduation from college. She continues to research on a regular basis about nutrition as it relates to health. Her hope is to help as many people as possible to enjoy foods that promote health and wellness.

Amaranth

Amaranth 101 – The Basics

Amaranth is a gluten-free seed that we usually treat as a grain. It has been used throughout the ages in many cultures and is increasing in popularity, especially as the need for gluten-free foods is increasing. If you’re not sure if amaranth is right for you, check the information below. Hopefully your questions will be answered!

Enjoy!
Judi

Amaranth 101 – The Basics

About Amaranth
Amaranth is among 60 different species of plants belonging to the amaranthus family. These plants are very tall with broad green leaves and brightly colored purple, red, or gold flowers. Three species are commonly grown for their edible seeds. Amaranth is a “pseudo cereal” meaning it’s not technically a cereal grain like wheat or oats, since it is in a different botanical family. However, it does have a similar nutritional profile, and the flowers of the amaranth plant have tiny grain-like starchy edible buds or seeds, which is why it is often treated as a grain.

Amaranth has been cultivated for 6,000 to 8,000 years and was a dietary mainstay for the ancient Inca, Mya, and Aztec civilizations. It has a long history in Mexico and is now grown around the world. Its flavor is described as earthy, nutty flavor, and peppery and it blends well in many dishes including cereals, breads, muffins, and pancakes. When ground into a flour, amaranth is usually blended with a grain to lighten its texture (the flour is very dense when used alone).

Nutrition Tidbits
Amaranth is gluten-free and rich in protein, fiber, antioxidants and nutrients, particularly manganese, magnesium, phosphorus, calcium, selenium, and iron. One cup of cooked amaranth has 250 calories with about 9 grams of protein, more protein then is typically found in other grains. Also, amaranth is considered to be a complete protein because it contains the amino acid lysine, which is usually in short supply in grains.

Research has shown that people with coronary heart disease and hypertension, who were given amaranth had a significant drop in their total cholesterol, triglycerides and LDL cholesterol.

How to Select Amaranth
Amaranth is sold dried and prepackaged like rice. If purchasing amaranth from a bulk bin, the seeds should have a faintly sweet aroma or no aroma at all. If it smells musty or oily, it is old and should not be purchased.

How to Store Amaranth
When stored dry in an air-tight container, whole grain amaranth will keep for about 4 months on a cool, dry pantry shelf, and about 8 months when frozen.

Amaranth flour should be stored in a dry, air-tight container. When kept on a cool, dry pantry shelf, it will last about 2 months. In the freezer, it will keep for about 4 months.

How to Prepare Amaranth
After reviewing a lot of resources, it’s evident that some people rinse and sometimes soak amaranth before cooking it. However, rinsing and/or soaking amaranth before cooking is not mandatory. Furthermore, some resources state to bring water to a boil first, then add the seeds. Conversely, other resources state to add the seeds to the water first, then bring it to a boil. So, apparently there are a number of ways to prepare amaranth, and there is no hard and fast rule on how to cook it. However, the texture of the seeds after being cooked may differ between the various methods. Usually the inner portion of the seed will become soft with cooking, while the outer shell will remain crunchy.

Cooking/Serving Methods and Ideas
Amaranth can be popped for a crunchy snack, simmered, sprouted or steamed. The results can be quite different depending on how it is cooked, ranging from smooth and creamy to crunchy like popcorn.

Depending upon the desired outcome, the amount of water called for in a recipe will vary. To achieve an outcome where the cooked seed is more like quinoa or rice, use a LOT of water. To achieve a thick, gelatinous porridge, use less water, or as called for in the recipe.

The instructions on the container of amaranth that I purchased are as follows: In a medium sized pot, combine 1 cup of amaranth with 3 cups of water. Bring to a boil, cover, reduce heat and simmer for 15 to 20 minutes. Let the amaranth rest for 5 to 10 minutes before serving. All the moisture should be absorbed. This makes about 2 cups of cooked amaranth. Note: This results in a cooked seed with a bit of a crunch on the outside.

Amaranth can be cooked in a similar way as pasta. Bring a lot of water to boil (ie 6 cups water to 1 cup amaranth), then add the amaranth to it. Cook and stir for 15 to 20 minutes. Do not overcook amaranth or it will become gummy. Rinse, drain and enjoy. A lot of water is suggested because the cooking water will thicken from starch released during the cooking process. Cooked amaranth softens in the inside yet maintains some crunch on the outside.

Amaranth can be used as a thickener for sauces, soups and stews, or enjoyed as a creamy breakfast porridge. Amaranth can be used as a side dish in place of rice, couscous, risotto, or orzo pasta.

Here are some suggested ways to use amaranth, provided by https://www.thekitchn.com/how-to-cook-amaranth-64211

As a breakfast cereal. Simmered just right, amaranth has a sweetness and porridge-like consistency that makes it a delicious cereal. Use a ratio of 1-1/2 cups liquid to 1/2 cup amaranth. (Yield: 1-1/2 cups cooked.) Place amaranth and water or apple juice in a small saucepan. Bring to a boil, then reduce heat and simmer, uncovered, until water is absorbed, about 20 minutes. Keep a close eye on it towards the end and then serve it right away, as it will turn gummy and congeal if overcooked or left to sit. Add fruit, nuts, cinnamon, and/or sweetener.

Popped. Toast a tablespoon of amaranth seeds at a time in a hot, dry skillet. Continually shake or stir until the seeds pop. Eat them as a snack or use them to top soups, salads, and vegetable dishes. Popped amaranth can be used to bread tofu or meat.

Combined with other grains. When cooked with another grain, such as brown rice, amaranth doesn’t overwhelm with its sticky consistency but adds a nutty sweetness. Use a ratio of 1/4 cup amaranth to 3/4 cup other grain and cook as usual.

Added to soups and stews. Take advantage of amaranth’s gelatinous quality and use it to thicken soup. A couple of tablespoons added while the soup is cooking is usually sufficient.

Herbs/Spices That Go Well With Amaranth
Cardamom, chili, cinnamon, garlic, ginger, parsley, soy sauce, tamari

Other Foods That Go Well With Amaranth
Fruits and Sweets: Apples and apple juice, blueberries, chocolate, dried fruits, honey, lemon, maple syrup, orange, persimmons, raisins

Proteins, Nuts, Seeds: Almonds, beans (ie black, cannellini, pinto), chickpeas, pistachios, walnuts

Grains: Buckwheat, bulgur, corn, millet, quinoa, rice, wild rice

Vegetables: Bell peppers, cabbage, corn, greens, onions, scallions, spinach, sweet potatoes, tomatoes

Dairy: Milk, yogurt

Other: Oil (ie olive)

Suggested Flavor Combinations
Amaranth + almonds + bulgur + herbs
Amaranth + apples + walnuts
Amaranth + black beans + sweet potatoes
Amaranth + cinnamon + maple syrup
Amaranth + corn + pinto beans + scallions
Amaranth + lemon + olive oil
Amaranth + quinoa + wild rice
Amaranth + raisins + milk

Amaranth goes particularly well in:
Baked goods (ie breads, cookies), casseroles, cereals, dishes mixed with other grains, Mexican cuisine, porridges, puddings, soups, South American cuisines, stews, veggie burgers

Recipe Links
Amaranth Polenta with Wild Mushrooms https://wholegrainscouncil.org/recipes/amaranth-polenta-wild-mushrooms

Oat and Amaranth-Crusted Ham and Cheese Quiche https://wholegrainscouncil.org/recipes/oat-and-amaranth-crusted-ham-and-cheese-quiche

Popped Amaranth Crunch https://wholegrainscouncil.org/recipes/popped-amaranth-crunch

Creamy Cannellini Bean and Amaranth Soup https://wholegrainscouncil.org/recipes/creamy-cannellini-bean-and-amaranth-soup

Amaranth Recipes https://www.foodandwine.com/grains/amaranth/amaranth-recipes#3

Amaranth Porridge with Caramelized Bananas and Pecans https://naturallyella.com/banana-pecan-amaranth-porridge/

Coriander Cauliflower Amaranth Salad https://naturallyella.com/amaranth-salad/

Amaranth Pudding with Coconut and Raisins https://www.foodandwine.com/recipes/amaranth-pudding-coconut-and-raisins

Chocolate Amaranth Pudding https://cook.nourishevolution.com/2011/04/chocolate-amaranth-pudding/

Savory Amaranth Fritters https://www.bobsredmill.com/recipes/how-to-make/savory-amaranth-fritters/

About Judi
Julia W. Klee (Judi) began her journey enjoying “all things food” in elementary school when she started preparing meals for her family. That love of food blossomed into a quest to learn more and more about health and wellness as related to nutrition. She went on to earn a BS Degree in Food and Nutrition, then an MS Degree in Nutrition. She has taught nutrition and related courses at the college level to pre-nursing and exercise science students. Her hunger to learn didn’t stop upon graduation from college. She continues to research on a regular basis about nutrition as it relates to health. Her hope is to help as many people as possible to enjoy foods that promote health and wellness.

Resources
https://www.healthline.com/nutrition/amaranth-health-benefits#section1

https://foodfacts.mercola.com/amaranth.html

https://wholegrainscouncil.org/whole-grains-101/grain-month-calendar/amaranth-may-grain-month

https://nutritiondata.self.com/facts/cereal-grains-and-pasta/10640/2

https://wholegrainscouncil.org/recipes/cooking-whole-grains/storing-whole-grains

Page, Karen. (2014) The Vegetarian Flavor Bible. New York, NY: Little, Brown and Company.

Honey Glazed Carrots (Using Frozen Carrot Slices)

Honey Glazed Carrots (Using Frozen Carrot Slices)

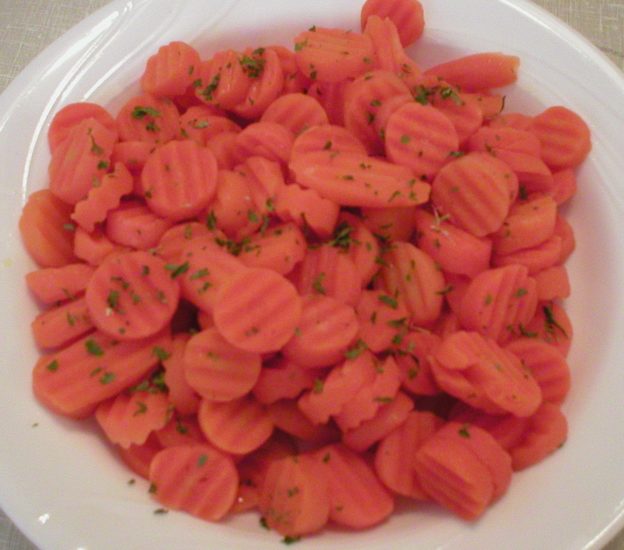
Cooking with frozen vegetables is a great way to shave some time off of food preparation. No washing, chopping, nor blanching needed! Here’s a really simple way to make honey glazed carrots using frozen carrot slices. The recipe is below the video demonstration. Enjoy!

I hope this helps!
Judi

Honey Glazed Carrots (Using Frozen Carrots)
Makes 4 Servings

1 (12 oz or 1 lb) bag of frozen carrot slices
2 Tbsp butter*
2 Tbsp honey*
1 Tbsp lemon juice*
Parsley flakes, optional garnish

Heat a skillet over medium heat. Add the butter and allow it to melt, then add the frozen (not thawed) carrots. Add three tablespoons of water and cover the pan. Allow the carrots to thaw and come to a boil (turning heat up if needed), then lower the heat to a simmer.

Drizzle the carrots with the honey; stir to combine. Cover the pan and allow the carrots to cook until almost as tender as you want them to be, adding more water by the tablespoon, if needed. When they are almost as tender as you like, remove the lid from the skillet and allow the glaze to form and coat the carrots, while stirring often. When the liquid is reduced and they are glazed and cooked to your liking, remove the pan from the heat and drizzle the carrots with the lemon juice. It takes about 7 or 8 minutes total time for the carrots to become crisp-tender. Sprinkle with dried or fresh parsley flakes, if desired. Serve.

*For a lighter, less sweet glaze, use 1 tablespoon of butter and 1 tablespoon of honey. Also, reduce the lemon juice to ½ tablespoon, if desired.

Ginger Root

Ginger 101 – The Basics

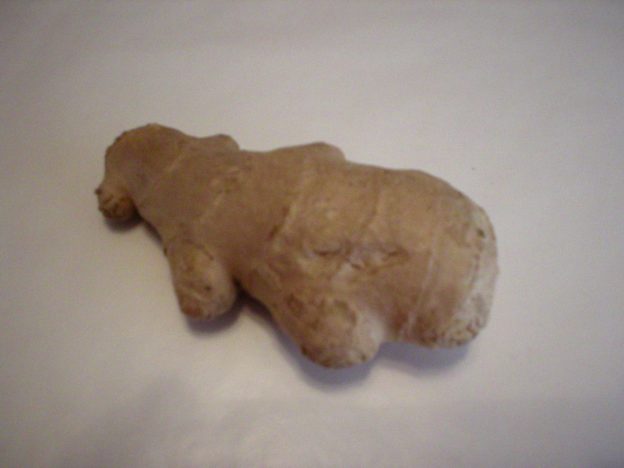
Ginger root has been used for thousands of years for its culinary and medicinal properties. Fresh ginger knobs can be intimidating if you don’t know what to do with them. In the video below, I cover a wide array of information about ginger from what it is, to its medicinal properties, to how to cook with it, and more. My video notes are below for your personal use. Enjoy!

I hope this helps!
Judi

Ginger 101 – The Basics

About Ginger
Ginger is a rhizome (Zingiber officinale) that is related to turmeric. It has a thick underground stem that produces roots and shoots. The plant can grow up to three feet high and produce from two to five sections that can be harvested year-round. After the sections are washed and dried in the sun, they can be used for culinary or medicinal purposes. Ginger grows well in a warm, damp climate, with most of the world’s ginger being grown in China, India, Australia, and Jamaica. The flesh of ginger can be yellow, white or red, depending on the variety, and has a pungent and spicy aroma and flavor.

Medicinal Properties
Ginger originated in Southeast Asia, where it has been used by Chinese and Indian healers for thousands of years. It is still used today for both its culinary and medicinal benefits. Consuming ginger may help to reduce muscle soreness, inflammation, and relieve arthritis pain in a similar, yet more comprehensive way than NSAIDS (non-steroidal anti-inflammatory drugs, such as ibuprofen and acetaminophen). And, when taken in normal amounts, ginger does not appear to harm the stomach nor kidneys, like NSAIDS can.

Ginger may also help to reduce nausea, improve digestion and sooth upset stomachs, control high blood pressure, improve blood cholesterol levels, fight cancer, destroy harmful pathogens in the digestive tract, relieve migraine headaches, and clear skin blemishes.

Precautionary advice: Large amounts of ginger taken at one time (such as eating a whole knob at one time) may interfere with calcium channel blockers and drugs that lower blood sugar. Eating such a large amount at once may also cause heartburn, diarrhea, and mouth irritation.

Nutrition Tidbits
Ginger has an array of vitamins and minerals in trace amounts. So, with regard to essential nutrients, it doesn’t have much to offer. However, its value as a spice and its extensive medicinal properties far outweigh its nutritional value.

How to Select Fresh Ginger
Choose pieces that look fresh with smooth skin with no blemishes, and feel heavy for their size. Avoid pieces that are soft, wrinkled, or moldy.

How to Store Ginger
Store unpeeled ginger tightly wrapped in plastic (or in a zip-lock bag with the air removed) and in the refrigerator. Be sure it is completely dry before wrapping it, or that will invite mold. It should last about a month in the refrigerator when stored properly. Throw it out if it develops mold.

How to Preserve Ginger
Ginger is found fresh, dried, crystallized, and even pickled.

Peeled fresh ginger can be stored for weeks in a glass jar covered with vodka or some other alcoholic beverage.

Fresh ginger can be stored in the freezer. Simply peel then grate the ginger. Put it on a parchment-lined baking tray in increments you plan to use it (ie in one teaspoon mounds). Freeze until solid, then transfer the mounds to an air-tight container and return them to the freezer. They should keep for about 6 months. It can be used frozen or will quickly thaw when needed.

Ginger can also be frozen by simply cutting the unpeeled root into one-inch chunks. Place chunks on a plate or baking sheet and freeze. Transfer to freezer bags and return them to the freezer.

To dry fresh ginger, peel and cut it into small pieces, then follow manufacturer’s directions for drying.

How to Prepare Ginger
Fresh ginger needs to be peeled before eaten. It can be peeled with a knife or scraped with the tip of a teaspoon.

Cooking/Serving Methods
Use ginger anywhere you want its sharp spicy flavor. This includes dipping sauces, dressings, rubs, pesto, teas, and even smoothies. To convert a recipe from dried ginger, use 6 parts fresh grated ginger for 1 part of dried ground ginger.

Serving ideas
Drink it! Try ginger tea with lemon for a comforting drink, especially if you have a sore throat. It’s also a great addition to cocktails and mixed drinks!

Add ginger to juices and smoothies.

Add ginger to a raw beet salad.

Ginger, carrots, and sweet potato are a flavorful combo for soup.

Winter holidays just aren’t right without ginger: Ginger biscotti or cookies, and gingerbread.

Herbs/Spices That Go With Ginger
Basil, chili, cilantro, cumin, curry, garam masala, lemongrass, mint, miso, turmeric, wasabi

Foods That Go Well With Ginger
Produce: apples, apricots, asparagus, bell peppers, blueberries, bok choy, carrot, cauliflower, celery, cherries, collard greens, cranberries, edamame, eggplant, fennel, figs, garlic, kiwi, lemon, lime, melon, mushrooms, onion, orange, peaches, pear, plums, potatoes, pumpkin, scallions, spinach, squash, sweet potatoes, tamarind, watercress, zucchini

Savory: poultry, fish, beef, seafood, oats, rice, tofu, almonds, tahini, seitan, chickpeas, grains, and lentils

Other: sesame oil, soy sauce, tamari, sake, rum, seaweed, honey, cream, and yogurt

Suggested Flavor Combinations
Ginger + Cream + Honey
Ginger + Cilantro + Scallions + Garlic
Ginger + Beef + Broccoli + Soy Sauce
Ginger + Celery + Carrot + Garlic
Ginger + Carrot
Ginger + Soy Sauce

Recipe Links
29 Ginger Recipes That Will Spice Up Your Life https://www.buzzfeed.com/rachelysanders/ginger-recipes

Ginger Tea With Honey and Lemon https://producemadesimple.ca/ginger-tea-lemon-honey/

Ginger Sweet Potato Soup with Toasted Curry Croutons https://www.climbinggriermountain.com/2015/11/ginger-sweet-potato-soup-with-toasted-curry-croutons.html

Gingerbread Cookies https://www.canadianliving.com/food/recipe/gingerbread-cookies-4

Gingerbread Chess Pie https://www.canadianliving.com/food/recipe/gingerbread-cookies-4

101 Ways to Cook With Ginger https://www.cookinglight.com/food/recipe-finder/ginger-recipes?

20 Sweet Ginger Desserts https://www.foodnetwork.ca/baking/photos/sweet-ginger-dessert-recipes/#!ina-garten-pumpkin-roulade-with-ginger-buttercream

53 Ginger Recipes That Are Just The Right Amount of Spicy https://www.bonappetit.com/recipes/slideshow/13-recipes-make-want-linger-ginger

About Judi
Julia W. Klee (Judi) began her journey enjoying “all things food” in elementary school when she started preparing meals for her family. That love of food blossomed into a quest to learn more and more about health and wellness as related to nutrition. She went on to earn a BS Degree in Food and Nutrition, then an MS Degree in Nutrition. She has taught nutrition and related courses at the college level to pre-nursing and exercise science students. Her hunger to learn didn’t stop upon graduation from college. She continues to research on a regular basis about nutrition as it relates to health. Her hope is to help as many people as possible to enjoy foods that promote health and wellness.

Resources
https://www.precisionnutrition.com/all-about-ginger

http://www.whfoods.com/genpage.php?tname=foodspice&dbid=72

https://www.everydayhealth.com/diet-nutrition/diet/ginger-nutrition-facts-health-benefits-alternative-uses-more/

https://nutritiondata.self.com/facts/spices-and-herbs/191/2

https://www.thekitchn.com/heres-the-best-way-to-store-fresh-ginger-tips-from-the-kitchn-214681

https://www.finecooking.com/article/whats-the-best-way-to-store-ginger

https://www.thekitchn.com/store-grated-ginger-in-the-freezer-to-make-it-last-longer-tips-from-the-kitchn-186709

https://producemadesimple.ca/goes-well-ginger/

Carrots and Parsnips with Orange, Honey and Ginger

Carrots and Parsnips with Orange, Honey and Ginger

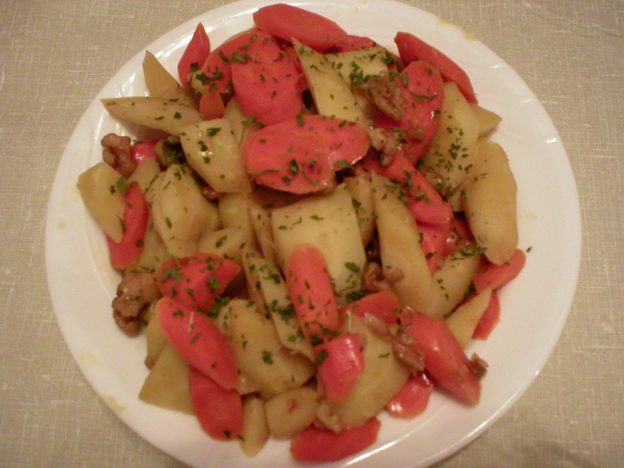
Carrots and parsnips seem to be a classic combo. Here’s an easy and delicious way to cook them on the stove with very little effort. AND it beats making the house hot with the oven (roasting vegetables) on a hot summer day! The recipe is below the video demonstration. Enjoy!

I hope this helps!
Judi

Carrots and Parsnips with Orange, Honey and Ginger
Makes About 5 Servings

2 cups carrot slices, cut diagonally*
2 cups parsnip slices, cut diagonally
1 Tbsp butter
1 cup orange juice
1 (½-inch x ½-inch) slice of ginger, peeled (left whole, not grated)
1 Tbsp honey
1/3 cup walnuts, coarsely chopped, optional
Parsley flakes, optional garnish

Peel the parsnips and carrots, and cut into bite-size diagonal slices. Cut the carrot slices a little smaller than the parsnip slices, so they will cook at the same rate.

In a skillet, melt the butter then add the prepared carrots and parsnips. Stir to coat them with the butter. Add the slice of ginger then the orange juice. Cover the pan and bring the liquid to a boil. Reduce heat, cock the lid, and simmer until the vegetables are about half-way done, about 8 to 10 minutes into the cooking process. Remove the lid and add the honey. Stir to combine. Continue cooking without the lid, allowing remaining liquid to reduce and thicken, stirring occasionally to coat the vegetables.** When they are almost fork-tender, add the chopped walnuts to allow them to soften slightly and warm up. After about 20 minutes (total cooking time), the vegetables should be fork-tender, and the glaze should be reduced and very flavorful. Remove the slice of ginger. Transfer the vegetables to a serving bowl and sprinkle with parsley flakes, if desired. Serve.

* Tip! Cut the carrots a little smaller than the parsnips. This will help them to cook at about the same rate.

** If your juice thickens and reduces too fast while the vegetables are not cooked to your liking, simply add a little more orange juice for the vegetables to absorb as they finish cooking.

About Judi
Julia W. Klee (Judi) began her journey enjoying “all things food” in elementary school when she started preparing meals for her family. That love of food blossomed into a quest to learn more and more about health and wellness as related to nutrition. She went on to earn a BS Degree in Food and Nutrition, then an MS Degree in Nutrition. She has taught nutrition and related courses at the college level to pre-nursing and exercise science students. Her hunger to learn didn’t stop upon graduation from college. She continues to research on a regular basis about nutrition as it relates to health. Her hope is to help as many people as possible to enjoy foods that promote health and wellness.

Quick and Easy Soup for One or a Crowd

Quick and Easy Soup for One or a Crowd

If you’re looking for a fast, easy and flexible soup recipe, you found it! This simple recipe can be made for one or two people and enlarged to make enough for a crowd. The ingredients can easily be changed to meet your needs and taste preferences. Below is a video demonstration. The recipe is below the video. Enjoy!

Judi

Quick and Easy Soup for One or a Crowd
(That’s Not Out of a Can)
Makes 2 Servings

This truly is an easy and fast soup to make. It’s ready in the time it takes to cook pasta!

The recipe can easily be adjusted to serve from 1 up to a crowd.

4 cups vegetable broth
2 cups frozen vegetables of choice (ie California blend-cauliflower, broccoli, carrots)
½ cup frozen corn*
1 cup cooked beans of choice**
½ cup uncooked Rotini pasta, or any shape you have available
1 tsp dried thyme
1 tsp dried parsley flakes
2 cloves garlic, minced (¼ tsp garlic powder)
1/3 cup chopped fresh onion (or 1 Tbsp dried minced onion or 1 tsp onion powder)
½ tsp salt, or to taste
1/8 tsp ground black pepper, or to taste
1/8 tsp dried hot pepper flakes, or to taste

Place everything except the uncooked pasta in a medium size pot. Bring to a boil, reduce heat and add pasta. Cook uncovered until the pasta is tender, according to the time recommended on the pasta box. Enjoy!

* If you don’t have corn on hand, you could substitute one small potato, peeled and diced, or add another starchy vegetable of choice.

** If you prefer meat instead of beans, add 1 cup cooked, chopped meat of choice. Beef, chicken, turkey or sausage would work well in this soup.

Easy Way to Liquefy Crystallized Honey

Raw honey will crystallize at some point in time. This is a very natural process and should be expected. There are a number of ways to liquefy it again, but some of the ways will destroy the raw properties and eventually degrade the quality of the honey. Here’s an easy and effective way of removing the sugar crystals without destroying the raw properties of the honey. Note, that honey will crystallize again over time because of the unstable nature of the sugar to water ratio within the honey.

To learn about why the sugar crystals form in honey and what to do about it, see the following videos. Instructions for a simple and effective way of removing the crystals is below the video links.

I hope this helps!
Judi

To decrystallize honey using an electric range or a gas range without a constantly lit pilot light:
Place the jar of honey on the rack in the middle of the oven away from the light bulb. Turn on the light, but do NOT turn on the oven. Leave it there and eventually it will liquefy. The heat from the light bulb will gently warm the honey, while keeping the temperature within a safe range so the raw properties of the honey (ie. enzymes) are not destroyed. This will take hours, with the actual length of time unknown. It depends on how much honey is in the jar and the type, size, and amount of sugar crystals that were formed. This process could easily be accomplished overnight, or while you’re away at work during the day.

If you have a range with a constantly lit pilot light:
In this case, your oven may already be warm. It’s advisable to take the temperature inside the oven, measuring the heat generated only from the pilot light. If it’s between 80F and 110F, it may be enough to bring the honey back into its liquid form without the added heat of the light bulb. Simply place the jar of honey on the rack in the middle of the oven and leave it there for an extended period of time, usually overnight or while you’re away at work during the day. The length of time it takes will depend upon the actual temperature of the oven and the type and amount of sugar crystals in the honey.

Is Crystallized Honey OK?

Have you ever wondered what happened to your honey when you found chunks of sugar in it? Is it safe to eat? Can you restore it back to the liquid state? I answered these questions and others in the video below. To see my notes and resources on this topic, see below the video link. Enjoy!

I hope this helps!
Judi

Is Crystallized Honey OK?

Why does honey crystallize?
Raw honey tends to crystallize because the water in the honey is supersaturated with sugar…it has more sugar molecules in it than it can naturally hold, making it unstable. The sugar naturally separates and forms crystals, making the water more stable molecularly. This is a natural process and nature’s way of stabilizing the liquid. It is not spoiled, nor moldy.

Not all honey will crystallize in the same way. Some will crystallize uniformly with fine crystals throughout, while others will form large, gritty crystals. How the crystals are formed and how fast they form depends on the type of nectar used to make the honey, the temperature at which it was stored, and whether or not it was filtered by the processor (raw, unfiltered honey will crystallize more readily than filtered honey).

Is it safe to eat honey that has crystallized?
Crystallization can affect the color and texture of honey. Crystallized honey tends to be lighter in color. But these are natural processes and the honey is perfectly safe to eat. Some people prefer crystallized honey as it will spread easier on toast and not drip off.

How can you restore honey to the liquid state?
To remove the crystals and liquefy the honey, place your honey jar in a bowl of warm water and allow it to slowly warm up. To preserve the enzymes and nutrients in raw honey, use a food thermometer and place the honey jar in water no hotter than 110F. A yogurt maker (if you have one) will maintain this temperature as long as needed to liquefy the honey. Placing the jar of honey in a slow cooker on low setting, half way filled with water, may also work. However, if you’re concerned with maintaining the raw qualities of the honey, use a quick-read thermometer to monitor the temperature, making sure it does not go over 110F. Another resource suggests using a crockpot as a water bath, turning in on high for one hour, then either turning it off or turning in on low until the honey is liquefied. Again, using a quick-read thermometer and making sure the water temperature does not go over 110F will maintain the raw state of the honey.

If your honey is in a plastic jar, do not place it in a pot of boiling or very hot water on the stove. The high heat may melt or warp the plastic bottle, leaching chemicals into the honey.
Some sources recommend briefly microwaving honey to liquefy it. However, that can cause it to heat up too quickly and unevenly, and may scorch the honey. Microwaving honey is not recommended by those who produce honey and keep bees. Repeated microwaving will eventually reduce the quality of the honey and will also destroy the valued properties (ie enzymes) that were in the raw honey.

According to https://AshevilleBeeCharmer.com, it’s best to only liquefy what honey you need at one time. Liquefying it numerous times can degrade the quality of the honey.

Can you prevent crystallization?
Raw, unfiltered honey will naturally tend to crystallize. To slow down the crystallization process, store your honey in a warm (but not hot) location. This will not stop the process, but will slow it down. According to https://CarolinaHoneyBees.com the best temperature for storing honey is between 70 and 80F. This will slow the process, but not stop it. They also suggest that honey never be stored in the refrigerator, as the colder temperature will cause the honey to thicken and invite crystallization.

It is also suggested that honey be stored in a glass jar with a tight-fitting lid and a wide mouth, so it can easily be scooped out when needed, crystallized or not. The glass jar can withstand any heat it is subjected to (during reliquification) without leaching any chemicals or other factors into the honey during the process. The tight-fitting lid will prevent any evaporation during storage.

If you really don’t want to see your honey crystallize, purchased processed honey. That will not crystallize.

Resources
https://blog.beeraw.com/real-raw-honey-crystal

https://honeypedia.info/why-does-honey-crystallize

https://ashevillebeecharmer.com/honey-tips/keep-raw-honey-from-crystallizing/

https://www.wired.com/2014/03/crystalized-honey/

http://www.beehacker.com/wp/?p=1079

https://ashevillebeecharmer.com/honey-tips/how-to-decrystallize-raw-honey/

https://carolinahoneybees.com/how-to-store-raw-honey/

About Judi
Julia W. Klee (Judi) began her journey enjoying “all things food” in elementary school when she started preparing meals for her family. That love of food blossomed into a quest to learn more and more about health and wellness as related to nutrition. She went on to earn a BS Degree in Food and Nutrition, then an MS Degree in Nutrition. She has taught nutrition and related courses at the college level to pre-nursing and exercise science students. Her hunger to learn didn’t stop upon graduation from college. She continues to research on a regular basis about nutrition as it relates to health. Her hope is to help as many people as possible to enjoy foods that promote health and wellness.

Easy Green Beans (from frozen)

Easy Green Beans with Garlic and Lemon (Using Frozen Beans)

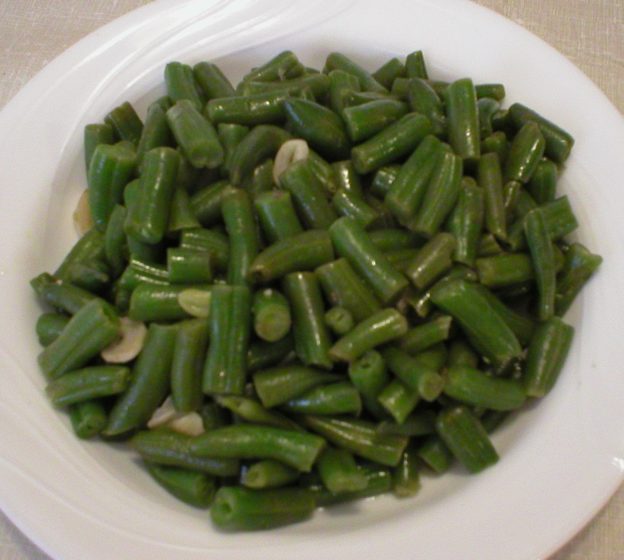
Here’s a fast and easy way to cook frozen beans without them being mushy. This is a flexible recipe allowing you to adjust flavorings your way. Here is a video demonstration showing just how easy and fast it is to cook frozen green beans. The recipe is below the video link. Enjoy!

I hope this helps!
Judi

Easy Green Beans with Garlic and Lemon (Using Frozen Beans)
Makes About 4 Servings

½ Tbsp extra virgin olive oil
½ Tbsp butter
2 cloves garlic, minced*
1 (12 oz) bag of frozen cut green beans (This will also work just as well with a one pound bag)
Water
Salt and pepper, to taste
Wedge or two of fresh lemon

Heat a large skillet (that has a lid) on medium heat. Add the oil and butter and allow the butter to melt. Add the minced garlic and sauté it briefly, just until aromatic. Add the frozen green beans and sauté briefly to coat with the oil and butter. Add a small amount of water (2 or 3 tablespoons) then cover the pan. Allow the beans to thaw then cook to your desired degree of tenderness. Stir and monitor the water level often. Do not allow it to go completely dry to avoid burning the beans. If more water is needed, add 1 or 2 tablespoons at a time until they are cooked to your liking. The process takes about 5 minutes to bring the beans to being tender, but not mushy. When cooked, remove from heat and sprinkle with salt and pepper to taste. Drizzle with fresh lemon juice. Toss to disburse the seasoning and serve.

* Note: If you prefer, you can use dried garlic. When doing this, skip sautéing the garlic and simply add the green beans to the warm oil/butter mixture. Add the dried garlic substitute when first adding water to the beans. This will allow the garlic to hydrate during the cooking process. Below are the conversions for 2 cloves of fresh garlic:

Garlic powder = ¼ teaspoon
Granulated garlic = ½ teaspoon
Garlic flakes = 1 teaspoon
Garlic salt = 1 teaspoon