Category Archives: Misc

Homemade Marinara Sauce

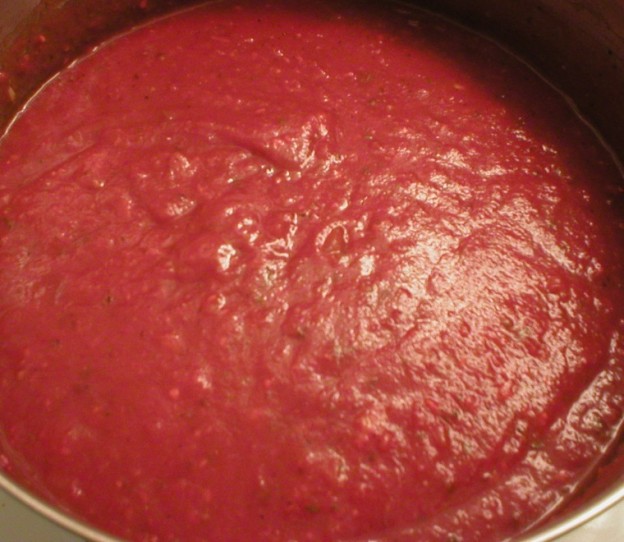
Homemade Marinara / Spaghetti / Tomato Sauce

My mother was a first generation American. Both of her parents were from Italy. Since I started cooking at a very early age, she taught me how to make homemade marinara / spaghetti / tomato sauce (whatever you want to call it) when I was in elementary school. Really! After all these years I had not put this recipe in a written form. I thought it was about time I did that, if for no other reason than to pass it along to my children. So, lucky you! You get to share in this recipe too!

Below is the recipe, followed by a video where I demonstrate making it. Of course, it’s very flexible with the seasonings. Feel free to adjust to your taste.

Enjoy!
Judi

Homemade Tomato / Marinara / Spaghetti Sauce
Makes About 2-1/2 Quarts
(No worries…freeze the extra in small containers)

1 Tbsp extra virgin olive oil
3 cloves garlic, minced (or 1 tsp dried garlic powder)
1/2 medium onion, chopped (or 1 to 2 Tbsp dried minced onion)
1/2 cup diced green bell pepper
1 stalk celery, diced
1 carrot, peeled, left whole or finely grated (recommended, but optional)
2 (28 oz) cans crushed or diced tomatoes
1 (12 oz) can tomato paste
1 (12 oz) can water (or more if needed)
1 tsp granulated sugar
1-1/2  to 2 tsp dried basil
1 Tbsp dried parsley
1 tsp dried oregano
1 Bay leaf
1/4 tsp black pepper
Salt to taste

Preheat a large pot over medium heat. Add olive oil and vegetables (garlic, onion, bell pepper, celery, and carrot). Stir and saute the vegetables until they start to soften. Add the remaining ingredients; stir to combine. Reduce heat to medium-low to low and cover the pot. Allow sauce to simmer gently for about 2 hours or more if you want a thicker sauce. Stir sauce occasionally as it cooks so it does not burn on the bottom. Taste after 30 minutes and adjust seasonings, if desired. Continue cooking until sauce is thick and flavors are blended well. Serve with pasta, stuffed cabbage or peppers, chicken cacciatore, Swiss steak, and use on pizza, or in any dish calling for a tomato-based sauce. Cool extra sauce and freeze in small containers, enough for one meal at a time.

Note: If you want to add ground beef or sausage to this sauce, brown the meat first in the pan you plan to cook the sauce in. Drain excess fat and proceed as directed. If a little fat is left in the pan, you can omit the olive oil.

If you want to add meat balls to the sauce, it is best to prepare the meat balls and precook them before adding them to the sauce. This avoids having excessive fat in the sauce, and the meatballs will stay together better. They can be pan-fried, baked or broiled before being added to the sauce. Add them to the sauce after combining all the sauce ingredients. Allow the meat to simmer in the sauce as it cooks. Stir gently, so as not to break up the meatballs.

When time is short, this sauce cooks well in a slow cooker. You can sauté the vegetables first, then add them to the slow cooker. Or, simply place all ingredients (omitting the oil) in the slow cooker early in the day and cook on low until supper time. You’ll have homemade sauce, ready to go!

About Judi
Julia W. Klee (Judi) began her journey enjoying “all things food” in elementary school when she started preparing meals for her family. That love of food blossomed into a quest to learn more and more about health and wellness as related to nutrition. She went on to earn a BS Degree in Food and Nutrition, then an MS Degree in Nutrition. She has taught nutrition and related courses at the college level to pre-nursing and exercise science students. Her hunger to learn didn’t stop upon graduation from college. She continues to research on a regular basis about nutrition as it relates to health. Her hope is to help as many people as possible to enjoy foods that promote health and wellness.
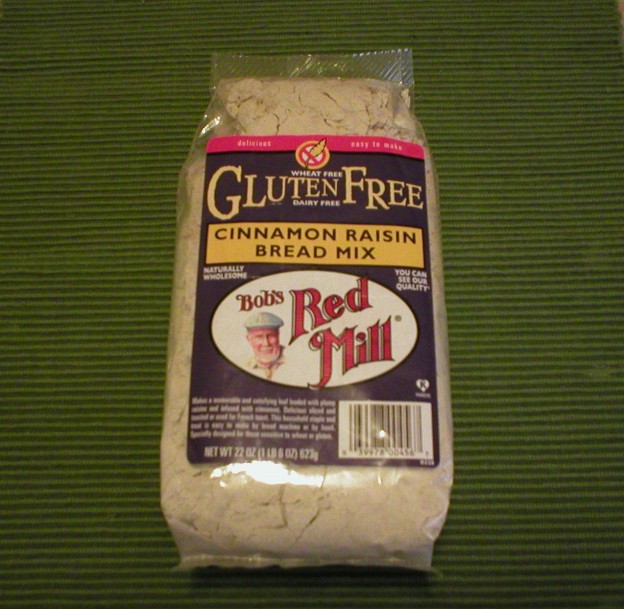
Bob's Red Mill Gluten Free Cinnamon Raisin Bread Mix

Review of Bob’s Red Mill Gluten Free Cinnamon Raisin Bread Mix

For anyone who must eat gluten free and who loves bread, life can be extremely challenging. Ready-to-eat gluten free breads are tasteless, often dry, and don’t have quite the texture you’re expecting. Homemade recipes often turn out crumbly and don’t hold together like bread should. And never mind the flavor…oh my!

Yet, gluten free options are growing in the marketplace. And that’s to be expected…the demand is growing for assorted reasons. After being disappointed about gluten free recipes and options many times over, I decided to try once again to enjoy bread, and review the product at the same time.

Today’s test is on Bob’s Red Mill Gluten Free Cinnamon Raisin Bread Mix. (Please note that I have no connections with the Bob’s Red Mill company, other than buying their products at the supermarket.) Here’s my two cents…

Price. First of all the price seems hefty, at just under $5 a bag where I purchased it. However, when comparing it to the price of ready-to-eat gluten free loaves, it was comparable. So I suppose that’s about all one could ask.

“Hidden” raisins. When I picked up the package I couldn’t see any raisins. No matter how I jostled the bag around I couldn’t see any raisins, so I guessed they were in a separate pack inside, even though the directions didn’t mention any raisin package and they weren’t among the added ingredients I needed. Well, the raisins were there…just “hidden.” When I emptied the package into my mixing bowl, the raisins were there, and they were plentiful! They were well coated with the flour mixture, so they just weren’t visible while in the bag. Thanks, Bob!

Ingredients. The bag includes a separate yeast package, which is to be expected. Other than that, you add warm water, eggs and oil, in a specific order, proofing the yeast first. Very reasonable and most people would have those few ingredients on hand.

Ease of mixing. The instructions recommend using a stand mixer, which I have. With that appliance, the ingredients blended extremely easily and quickly into a smooth but rather thick batter. Without a stand mixer, it will likely involve  a lot of hand mixing to achieve the same smooth texture achieved with the stand mixer. The package says it will be like cake batter. No so to me. IF it was cake batter, it’s so thick I expect you’d have a really dry cake on your hands. It IS smooth like cake batter, but don’t expect it to be as thin because it’s much thicker than that.

Raisin Bread Ready to Rise

Raisin Bread Ready to Rise

Baking pan. The instructions call for a greased 9×5 nonstick loaf pan. I do not have a nonstick loaf pan. Instead I have a good quality aluminum loaf pan. With that, I greased it well with a pat of real butter and hoped for the best. No issues…the bread released easily after baking without any sticking whatsoever. Yeah!

Rise time. The instructions call for allowing the bread to rise in a warm place for 45 to 60 minutes until the dough is level with the top of the pan. Mine took 53 minutes to reach that point. So, Bob is “right on” here.

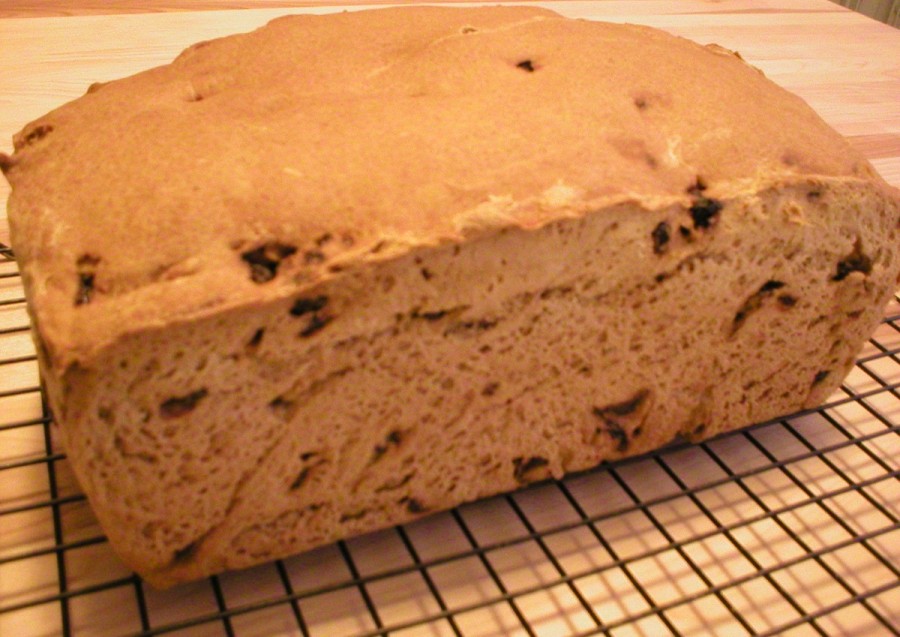
Baked Cinnamon Raisin Bread

Baked Cinnamon Raisin Bread

Baking time. Bob calls for allowing the bread to bake for 60 to 65 minutes until it reaches an internal temperature of 205°F. This bit of instruction may present issues with some people who don’t have an instant read thermometer (which in my life, is a kitchen essential). I baked the bread for 60 minutes and noticed it had pulled away from the sides of the pan. The internal temperature was close. I declared it to be done.

Cover with aluminum foil during baking. The instructions call for covering the loaf with aluminum foil while baking after it begins to brown. I did not have any foil at the time, so I baked it without the foil. I noticed that the bread was nicely browned when it was finished baking…not too dark. However, the top was very tough and dry. It was hard to poke the thermometer through the top of the bread to test the temperature. SO, apparently the foil recommendation is there not for browning, but for maintaining moisture in the loaf. I suggest you use the foil!

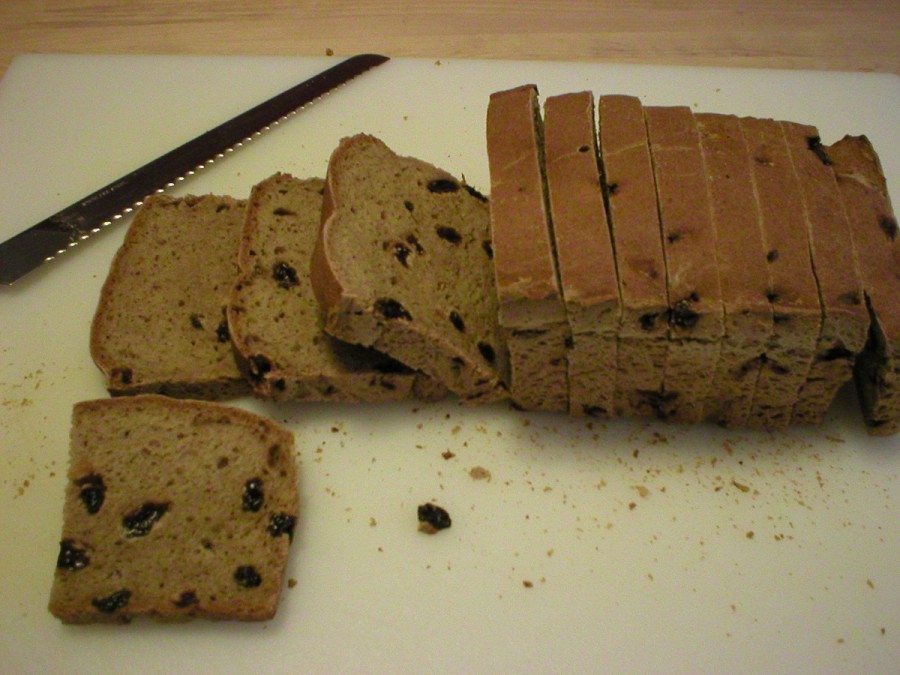
Sliced Raisin Bread

Sliced Raisin Bread

Allow bread to cool before slicing. This is a standard recommendation with all baked breads, and it’s no different here. If you cut bread while it’s hot (as delicious as it is), moisture escapes through the cut section and the bread will be dryer than it would have been otherwise. So, give it time to cool before slicing.

Ease of slicing and bread texture. To my absolute delight, this bread sliced easily despite the tough top crust (from my not using foil during the baking). The slices stayed together and didn’t fall apart as so often happens with homemade gluten free bread. The slices even looked like regular bread, or at least they were a very close second. Even the tough top crust was easy to slice with my serrated bread knife. Thanks again, Bob!

Taste. The taste was fair to me, not absolutely great and wonderful. To my surprise, the bread was moist, so that was a real plus. First I tasted it plain with nothing on it. Secondly, I toasted the rest of the slice and put (real) butter on it. It toasted well in that it browned nicely and held up during toasting. However even with butter, the taste was still a little bland. To me (and maybe not to you), it needed a little more cinnamon to give it a flavor boost. Gluten free flours are very tasteless and it’s often necessary to boost up flavorings to give the baked goods the flavor you’d expect. More cinnamon would have masked the bland flavor of the flours/starches used in the mix.

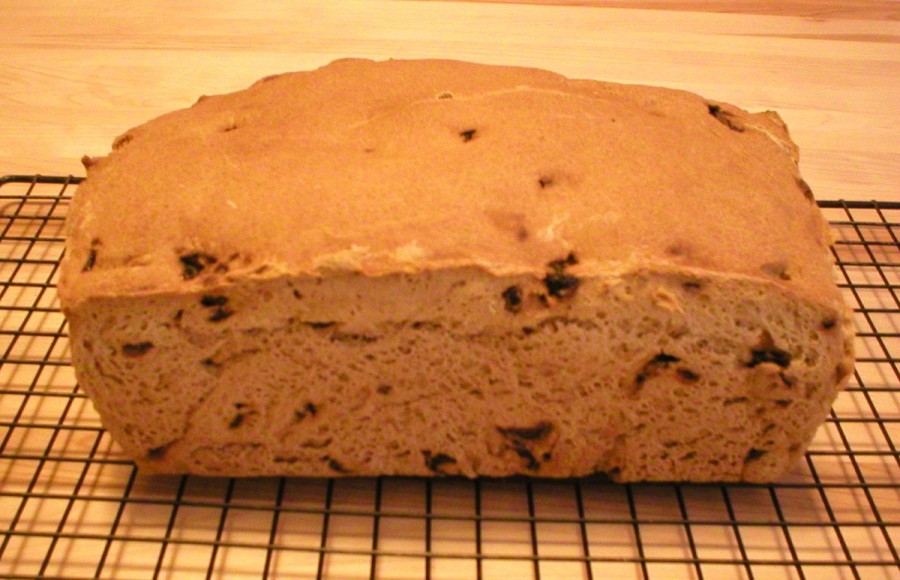
Baked Cinnamon Raisin Bread

Baked Cinnamon Raisin Bread

Overall. Overall, I think this is a good product and I will buy it again. It does take some time to make in that it’s a slow riser and slow baker. However, as long as you’re home, you can do other things during the down times. The price is comparable to other gluten free breads and mixes that are available, so it’s not unreasonable. The flavor could stand some improvement, but that’s likely to be said about all and any gluten free baked goods. A little cinnamon and sugar on it will go a long way in making you feel like you’re eating regular raisin bread.

Thank you, Bob!
Judi 🙂

Stop Bathroom Tile Grout Mildew

We’re in an old house with a small bathroom where the bathtub is located. The bathtub is surrounded by ceramic tile walls, which is really nice. However, that’s a big invitation for mildew to form from the moisture in that small room. Until very recently, we couldn’t even open the one window in that tiny room. Needless to say, the last time I cleaned mildew from the grout with bleach and a toothbrush, I was really gassed out. I swore I wouldn’t do it again.

And so…I haven’t! I experimented and found a way to prevent the mildew from coming back. I’ve just created a YouTube video on it (the link is below). But, in case you don’t want to watch, here’s the trick…

There’s just a couple simple steps involved that anyone can do…

First, I squeegee water off the walls. If you don’t have a squeegee and don’t want to buy one, you can get by without it.

Second step…I dry the walls the best I can with an old rag towel. If you don’t have a squeegee, two towels may be needed to dry the walls.

Third step…and here’s the key! I mist the walls down with pure rubbing alcohol. Yep…I placed straight alcohol in a spray bottle and mist the walls routinely after the last shower of the day. I have NOT had a mildew problem since!

Note that I started with clean walls. I had just gone through the process of scrubbing the grout with bleach and a toothbrush before I searched for an alternative way to deal with the problem. My alcohol routine has prevented the mildew from reforming around the tiles. I’ve done this for at least a year now, so I’m sure the mildew would have reformed by now without the alcohol treatment, so I have no doubts it’s working.

The alcohol kills any microbes that may be there and also helps to dry up any remaining water in the grout. Between the two effects, mildew has NOT returned! Yipee!!

IF you have mildew already in your grout and don’t want to use the bleach/toothbrush routine, feel free to give this a try. Misting alcohol may take several applications to kill it all. Perhaps pouring it on for a first application may kill it all. Otherwise, you may want to remove the mildew any way you are accustomed to doing it, then follow that up daily with this new routine.

I suggest you give this a try if your plagued with mildew in bathroom ceramic tile grout. IF you have a plastic (or whatever) tub kit, please do check with the manufacturer to verify it is safe to spray the finish with alcohol.

Also, if you have painted walls or anything else painted in the area, please try not to spray the alcohol on the paint. Rubbing alcohol softens paint, making it sticky. HOWEVER, if you do accidentally spray paint with the alcohol, just do nothing. As the alcohol evaporates, the paint will harden up again. Just don’t make a habit of spraying paint with alcohol, as I don’t know what repeated exposure to the alcohol would do to your paint. (If YOU know, please share that with us!)

Here’s the video on this topic. Give it a try and let me know how it works for you! Judi

NEW Unique Effective Gentle Dish Scrubbies

NEW Handmade Dish Scrubbies Unique Simple Effective

As I’ve said in previous blog posts, I love to create and am always looking for something a little different to make. I’m a practical person, so I usually stick with “useful” things, rather than dust collectors. When I discovered this new scrubby yarn, I decided to give it a try. To my delight, it makes excellent, nonabrasive, very effective scrub pads that are MUCH less stressful to make than those made with nylon netting. Hence, I’ve added them to the collection of merchandise on my website.

These scrubbies or scrub pads are simple yet very effective at removing dried food and residue from dishes, pots and pans, glassware, ceramics, silverware, etc. They are nonabrasive, so they can easily be used on nonstick cookware, dishes, crystal, glassware, silverware, you name it! I’ve shared them with friends and neighbors and they’ve come back wanting more! They are soft on hands, yet they have a scrubbing power greater than cotton dishcloths alone.

Each is made with two strands of yarn…a cotton yarn plus a scrubby yarn. The new scrubby yarn has little “extensions” that gently remove food from dishes. That yarn is made from 100% polyester, so it does not bleed when washed. I couple it with cotton yarn for absorbency and together they make a real workhorse for washing dishes!

I’ve found that the blend of polyester with cotton makes them more durable than cotton alone, and they don’t tend to sour like all cotton does. When it’s laundry day, simply toss them in the washer and dryer along with other towels and they come out good as new. I prefer to put mine in a laundry bag since they are rather small compared to a bath towel.

The size is roughly 4-1/2 inches square, so they are a comfortable size to handle when doing dishes. Not too big, not too small. They wring out easily too, so they’re worth trying if you’re looking for something a little different that’s new, very effective, simple, nonabrasive, and gentle on skin.

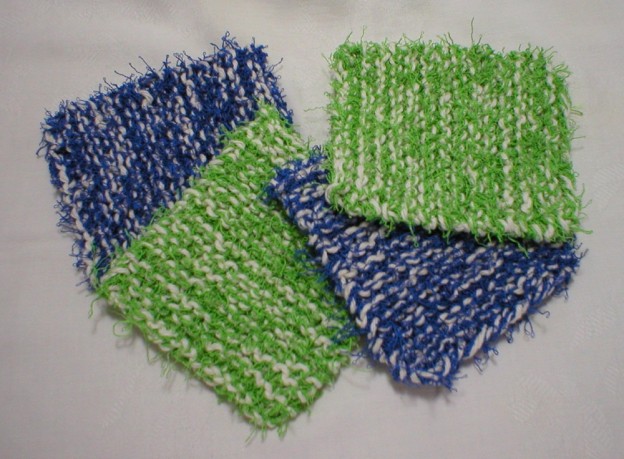
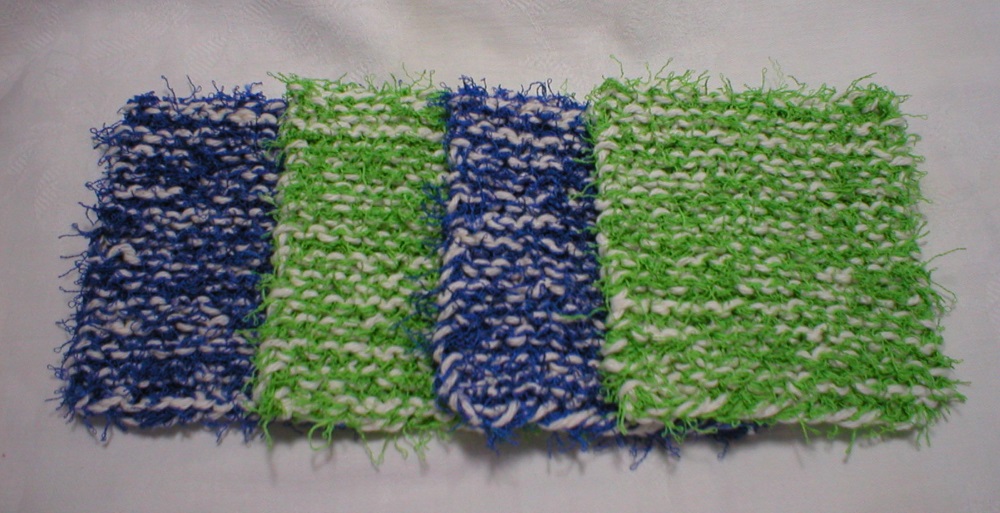
Green and Blue Scrubby Set

Green and Blue Scrubby Set

I currently have three color combinations available, all in packs of four. One combo has two green and two royal blue, all with cream colored cotton yarn.


Red and Yellow Scrubby Set

Red and Yellow Scrubby Set

The next combo has two red and two yellow, all coupled with cream cotton yarn.


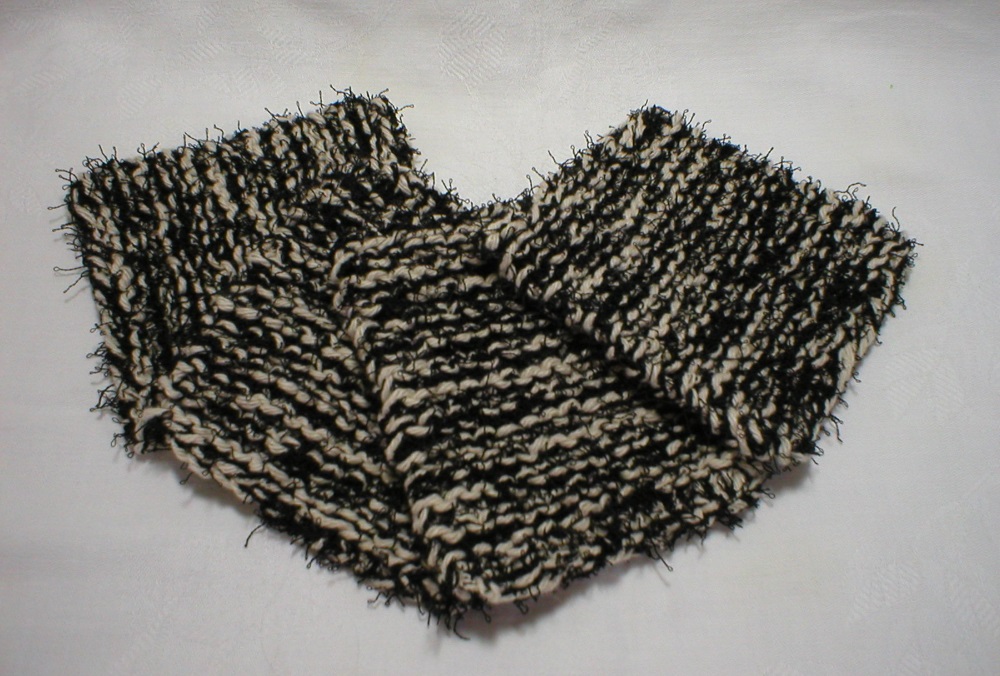
Black with Beige Yarn Scrubby Set

Black with Beige Yarn Scrubby Set

The third option has four black coupled with beige cotton yarn.


Green Blue Scrubby Set

Green Blue Scrubby Set

As you can see from the pics, the scrubby yarn comes in bold, bright colors. More combos are coming! Click the links above (or here) if you’re interested in trying any of these wonderful, new, unique and effective scrubbies! They’re worth a try and you’ll be glad you did!

Enjoy,
Judi

Review of Premier Home Cotton Marls Yarn

I enjoy crocheting and knitting. I especially enjoy making items that I can sell online and at local craft shows! Crochet dishcloths are items that I make on a regular basis since I sell quite a bit of them. Hence, I go through a lot of cotton yarn!

I’ve tried various brands of cotton yarn over the years and have happily settled with Premier Home Cotton Yarns. If you haven’t given this brand a try, let me encourage you to do so the next time you’re looking for yarn! I’ve already done a complete review of Premier’s cotton yarn. (Click the link to see my earlier post!) This review is focusing on their cotton marl yarns.

About Premier Cotton Yarns
First, the marls yarn is similar to their home cotton yarn, in that it’s made with 85% cotton and 15% polyester. For all you 100% cotton yarn fans, don’t let that little bit of polyester deter you. Actually, I’ve found it to be a great benefit when making home accessories. That little blend of fibers makes the yarn softer and much easier to work with than 100% cotton. AND (and this is a big one to me!) it deters color loss when the item is washed and dried. Really! Furthermore, even though the finished products do shrink a little when washed and dried (which is to be expected), they don’t shrink as much as those made with 100% cotton yarns. I’ve found that my dishcloths made with this yarn hold up much better than those made with the other brands, despite a lot of machine washing and drying. Since I sell the items I make, product quality and longevity means a lot to me because I want to offer the best I can to my customers. This yarn wins, hands down, to me in those respects.

Color Effect of Marls Yarn

4 Strands of Vineyard Marls Yarn

4 Strands of “Vineyard” Marls Yarn

4 Strands of "Denim Jeans" Marls Yarn

4 Strands of “Denim Jeans” Marls Yarn

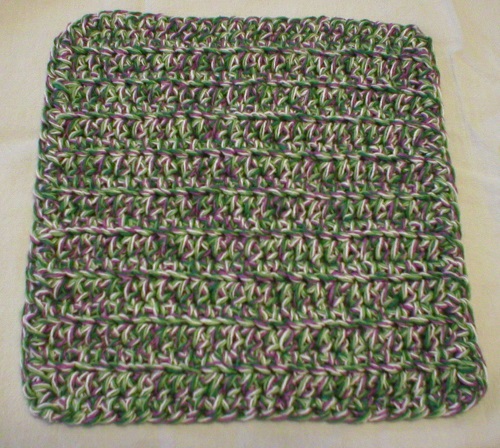
The marls yarn is colorful in that it is a 4-ply yarn, with each strand (ply) having a different color. The four colors are spun together into one strand of yarn. This yields a different effect in the finished product than standard variegated yarns. It’s colorful, yet uniform throughout. Something different! See the photo below of a dishcloth I made with the “Vineyard” color marl yarn!

Dishcloth made with "Vineyard" marls yarn

Dishcloth made with “Vineyard” marls yarn

Sizes Available
(1) Premier Home Cotton Marls Yarn. This is the smaller skein of yarn, with 2.1 ounces (60 grams, 105 yards) per skein.
(2) Premier Home Cotton Marls Grande Yarn. This is Premier’s larger skein, with 11 ounces (312 grams, 545 yards) per skein.
Both size skeins have the same color options.

Price Point
As you’ll typically find with any multicolored yarn, the price point is a little higher than that of the same brand’s solid colors. This is understandable because of the manufacturing process involved. But, if you compare prices of the various brands, you’ll usually find that Premier yarns are sold for less cost per ounce than the other brands. This is a BIG plus if you’re making items to sell or making a lot of things to give as gifts.

Color Options

Denim Jeans Marls Yarn

“Denim Jeans” Marls Yarn

The color options of the marl yarns are not as many as you might expect. I believe this line is relatively new. So, hopefully Premier Yarns will be expanding their color selection soon!


Advantages of Using Premier Home Cotton Yarns
I’ve found there are a number of advantages to using Premier cotton yarns:

Softer and more flexible than other cotton yarns
Great scrub-ability in a crochet or knit dishcloth
Easy to wring out (No hurt hands!)
Colorfastness (Which is HARD to come by!)
Easy machine washing/drying with less shrinkage
Faster drying time than other cotton yarns
More economical than other cotton yarns
Unique colors (as with the marls and variegated options)

I hope this information will encourage you to try this brand of cotton yarn if you’re not already using it. Once I did, I was sold and haven’t returned to the other brands (and I don’t intend to!).

Best wishes to all and happy knitting/crocheting!
Judi

Gluten free? AVOID “herb rice” in restaurants!

Many people have gone gluten free by choice. Others MUST choose gluten free options for health reasons. I fit into the later category, although I haven’t been that way my entire life. In recent years I learned I developed a serious health issue that is triggered by eating anything with gluten in it. Hence, I’ve become gluten free. This is NOT a choice for me.

Eating a gluten free meal becomes very challenging when faced with eating out in restaurants. This is particularly so when faced with menu items that appear to be gluten free. One case in point is “herb rice.” I would expect “herb rice” to be rice mixed with specific herbs and flavorings to make a delicious gluten free dish. However, many restaurants serve an “herb rice blend” that is actually a mix of rice, flavorings and orzo, a tiny pasta made from wheat. THAT’S the problem.

Unfortunately, many restaurant workers, “servers” in particular, are uninformed as to what their “herb rice” actually contains. They’re under the impression that it’s just flavored rice. I have been faced with this TWICE now since I’ve been gluten free. Note that I have nothing against the rice blends they use…they’re actually delicious. HOWEVER, they’re not just rice…they’re NOT gluten free. And with the innocent ignorance of waiters/waitresses, wary customers may be served foods they shouldn’t eat. My personal experiences are cases in point.

First, years back when I newly discovered that I should avoid wheat, I was at a restaurant/bar-grill. I choose something with “herb rice” in it, innocently thinking it was just rice. I asked the waitress if it was just rice and gluten free. She insisted that it was just rice, so I ordered it. After eating about half of it, I realized it had orzo in it…wheat pasta. When I spoke with the waitress about it and said I couldn’t eat the dish, she still insisted that it didn’t contain wheat and was only rice. We had a bit of an argument and she finally brought me the box it came in. Of course, when reading the ingredients list, wheat pasta was listed as one of the components (I’m not ignorant when it comes to food and it didn’t take much to find a wheat product in the ingredients list). When I brought this to her attention and asked for something else to replace the rice, we settled on refried beans. She was obviously not happy with me. I was brought a blob of refried beans, straight out of the can and unheated. I told the manager about the episode when we paid for the meal and I got little response in return. Needless to say, we’ve never been back there again.

Secondly, just last night we were at a different restaurant and they presented us with their new spring/summer menu. A wonderful dish was listed and I opted for it. Again, it was served with “herb rice.” I asked the waitress about it and she was very polite in saying she thought it was just rice, but wasn’t certain. I opted for hash browns instead of the rice. (They were out of the rice blend anyway and I was already planning on ordering hash browns since I suspected the “rice” was not just rice.) Nevertheless, the waitress DID offer information for me…the brand name of the blend. I looked it up and here’s the ingredients list…

Parboiled long grain rice, orzo (macaroni product made from wheat flour), salt, autolyzed yeast extract*, onions*, garlic*, turmeric spice which imparts color.

*dried
CONTAINS WHEAT INGREDIENTS

I’m thankful that the waitress was kind enough to at least offer the information to me so I could check for myself. I also appreciated her humbleness in admitting she was not certain of the ingredients. Unfortunately, apparently restaurant owners and chefs don’t inform their workers about these critical aspects of their food. For most patrons, it’s not an issue at all. But for those who MUST avoid certain ingredients, it’s important for the wait staff to be knowledgeable of what’s being served. Sadly, that’s usually not the case, so it’s up to the patron to be informed and wary of what they order.

Unless you really know the restaurant and how they prepare foods, wait for the herb rice until you get home and make it yourself!! Don’t order it in a restaurant.

I hope this information helps someone out there to avoid ordering some food that can cause health issues. Again, if you can eat gluten, the herb rice blend is a delicious option. But if gluten presents a problem, don’t be fooled by the name. It’s not just flavored rice.

Best wishes to all and happy eating,
Judi

How to Choose the Best Olive Oil

We’ve all seen our favorite chefs at work on TV. Most of them use extra virgin olive oil. Why? Because it’s one of the healthiest oils to consume. However, they rarely say what brand they’re using (unless they’re being paid to advertise for that company).

Good quality olive oil can be one of the healthiest oils to use. It helps correct blood cholesterol problems and is high in vitamin E and antioxidants, fighting harmful compounds in the body. Olive oil plays a vital role in the Mediterranean diet, which we know is very healthful.

So…when we get to the grocery store, choosing which olive oil to buy seems about like choosing a breakfast cereal! There are MANY to choose from…too many. It’s just too confusing. So, I’ve done some research to help us all pick the best olive oil from the array we have to choose from at the moment.

It’s important to know that not all olive oils were created equal. In fact, MANY that are typically on our grocery store shelves are not healthful oils at all. Many have been “refined” (a process that involves heat and/or chemical solvents), have been on the shelf for extended periods of time and hence are not fresh, or are older oils that have been blended with fresher oils to mask their rancid flavor. Yuk!

Because eating old or rancid oils is actually damaging to health, I decided to put together a list of things to look for to help you choose which oil is best among those that are available to you at the moment when shopping. There may be higher quality oils out there in wherever-land, but they’re not the ones you’re looking at for the moment when you’re starring at the huge array on the grocery store shelf. You NEED to know which one to choose NOW! Copy this list and carry it with you the next time you shop for olive oil.

First, it’s important to know that ANY extracted oil is highly perishable. Light, heat and oxygen can interact with the oil and cause it to age or even spoil, creating compounds that are harmful to our health. So, keep this fact in mind as you make your way through the steps below.

When at the grocery store…

Put your “blinders” on! First thing, DON’T look at the price right away. IF you shop for price only, you’ll probably choose the cheapest oil on the shelf. Mistake #1. That oil is very likely refined and not the most healthful. That’s not what you want!

Choose oil in a small dark glass bottle (or packaging that shields the oil from light).  Unless you’re going to use a LOT of oil FAST, go for the small size…one that you know you can use up in a relatively short amount of time. Be sure the bottle (glass, not plastic) is dark, helping to protect the oil from damaging light. Otherwise, if you know you need a lot of oil and will be using it up quickly, opt for oil in a large can.

Be sure the cap is sealed and air tight. Well, duh. This should be a “given.” However…it’s worth checking because you never know what you might come across in a grocery store.

Choose “extra virgin olive oil.” Extra virgin is the highest quality olive oil. Now…DON’T take the front label on the bottle for it’s word. Turn the bottle over and look at the ingredients list. It should only say “extra virgin olive oil.” It MIGHT list refined oil and extra virgin olive oil. If it does, put it back on the shelf. It’s a blend of less-than-healthy refined oil, most likely mixed with fresher oil to improve the flavor. Not your best option.

Look for “first cold pressed” or “mechanically pressed.” This is the natural way to extract oil from olives. Otherwise it was probably extracted using heat and/or chemicals, which is not desirable and not the healthiest oil around. Choose a naturally extracted oil.

Some bottles say “organic.” Organic options in most any foods are good. However, “organic” alone with regard to olive oil is NOT the only thing to look for. Check out the other components before deciding that it’s your best option.

Look for quality seals on the label. Not all oils will have them, but they are helpful in ensuring the oil was produced according to set quality standards. Some seals you might see include:

COOC (California Olive Oil Council)
North American Olive Oil Association
International Olive Oil Council
PDO (Protected Designation of Origin…DOP in Italian)
PGI (Protected Geographical Indication…IGP in Italian)

Look for an expiration date or “best by” date. Try to select one with at least a year left before it expires. The further out the date, the fresher the oil. Freshly produced olive oil will last up to 2 years from the time of harvest, IF kept under ideal conditions (which is often not the case). AND we don’t know the time lapse from harvest to production and many dates are based on production dates, so there is some mystery here. So…the more time left in the dating, the fresher the oil.

Look for the producer and place of origin of the olives. Ideally, it’s best to find an oil from olives that were grown, processed and packaged in the same location. However, that would RARELY be found on our grocery store shelves. Just note that oil will be freshest and of higher quality under those circumstances. That translates into less transport time, less chance of spoilage due to less-than-ideal conditions along the way, etc. However, MOST if not all of what we’ll typically find on our grocery store shelves will not meet this criteria. It’s good to look for it anyway. IF you manage to find one…latch onto it!

NOW…After having looked for oils that meet the above criteria…it’s time to compare prices. Now you’ll know you’re getting the best deal on your olive oil AND the most healthful option you have to choose from at the moment.

When you get home…

TASTE the oil when you get it home. Ignore the color because the color will vary depending upon the variety of olive used and when it was picked. The color does NOT reflect the quality of the oil. When tasting, the oil should smell and taste like olives, and should have a slight bitterness and possibly pepperiness. This indicates the presence of the polyphenol compounds…the healthful compounds that we WANT in the oil! Hopefully the oil you selected will meet this criteria. If not, it’s back to the drawing board the next time you shop for oil.

Store your oil wisely. Store it away from light, heat and oxygen (close the bottle quickly after using it). Use it up quickly…don’t try to store it for a long time.

Get the most health benefits from your oil. Use the oil unheated as much as possible to get the most health benefits from your carefully chosen product. When using it to cook with, heat it the least amount possible to keep from destroying the polyphenol compounds and breaking down the oil (which is not healthful).

Here’s a video that I produced on this subject. Hope this helps!! Happy eating, Judi

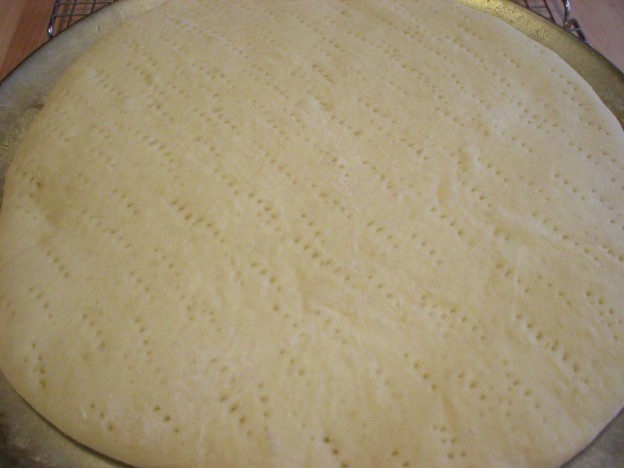
Homemade Pizza Crust

Homemade Pizza Crust

I don’t know too many people who don’t enjoy pizza, at LEAST once in a while. There is SO much you can do with a pizza in addition to the usual tomato sauce, cheese and assorted toppings. It’s truly limited only to one’s imagination.

I started making homemade pizza crust for my family years ago when we first bought a bread machine. A fabulous recipe came in the little booklet that accompanied the machine. Well, the machine is now long out the door from being used for so many years. Since then, I started my bakery and made breads “en-mass” in a quantity NO bread machine could ever handle. Hence, I developed my own recipes.

Here’s a delicious basic pizza crust recipe. Once you master this, it would be easy to get creative with it by adding herbs or other flavorings to enhance whatever pizza you’re making. Give it a try if you haven’t made your own crust before. It truly IS well worth the effort because homemade crust has a flavor far better than any store-bought pizza could possibly have.

Homemade Pizza Crust
Makes One Thick 14″ Crust OR Two Thin 12″ Crusts

3 cups (15 oz) bread flour
1 pkg (1/4 oz) Rapid Rise yeast
3/4 tsp salt
1 cup water, warmed to 120-130ºF
2 Tbsp vegetable oil

Butter or other grease for pan
Cornmeal

Note: The following instructions are designed for a stand mixer. The dough may also be mixed and kneaded by hand. Be sure to knead very well until the dough is smooth and elastic.

In a stand mixer bowl, add bread flour, yeast and salt. Stir to combine and set aside. In a small bowl or mug, add warmed water OR place water in a mug and heat it briefly in a microwave oven until it has warmed to the appropriate temperature. Add vegetable oil to the warmed water. Pour liquid mixture into the flour mixture. Stir to moisten the flour.

Place mixer bowl on the stand mixer and attach a dough hook. Turn the mixer on low speed and allow the mixer to knead the dough for 8 to 10 minutes, until smooth and elastic. Remove bowl from stand. Cover the bowl and allow the dough to rest for 10 minutes.

Meanwhile, prepare the baking pan(s) by lightly greasing the pan with butter, then sprinkling cornmeal on the pan. Spread the cornmeal around the pan by tilting the pan in different directions to lightly coat the greased area with the cornmeal. Set aside.

After the dough has rested, form the pizza crust either by placing it on a VERY lightly floured board and rolling the dough into the desired size circle, then place the dough on the prepared pan. Alternately, you could place the dough ball on the prepared pan and spread the dough into a circle with your fingers. Dock the dough by poking holes in the dough with a fork to prevent air bubbles from forming as it bakes.

Preheat oven to 400ºF and prebake the dough for 5 to 7 minutes, depending upon the size and thickness of the dough. (Be sure to remove the crust from the oven before it starts to brown.) Remove pan from oven. Spread crust with desired toppings and return it to the oven. Bake pizza until the cheese is bubbly and toppings appear cooked. (Note that the time to finish the baking process will vary depending upon the size, thickness and toppings used.) Serve.

Check out my video below to SEE how the crust is made! Enjoy, Judi

Easily Remove Ring Around the Collar

The other day I was ironing my husband’s shirts and discovered a BAD case of ring around the collar! It seems I should have noticed this well before now, but it just snuck up on me. I did a little research then got creative and came up with a VERY easy and EFFECTIVE way to get the stain out. This works whether the shirt has been worn (and not laundered), or even freshly washed, dried AND ironed. (Yes, really!)

Supplies needed: One old toothbrush, a small bowl of water, a little dish detergent that is a good grease fighter, and one dirty collar.

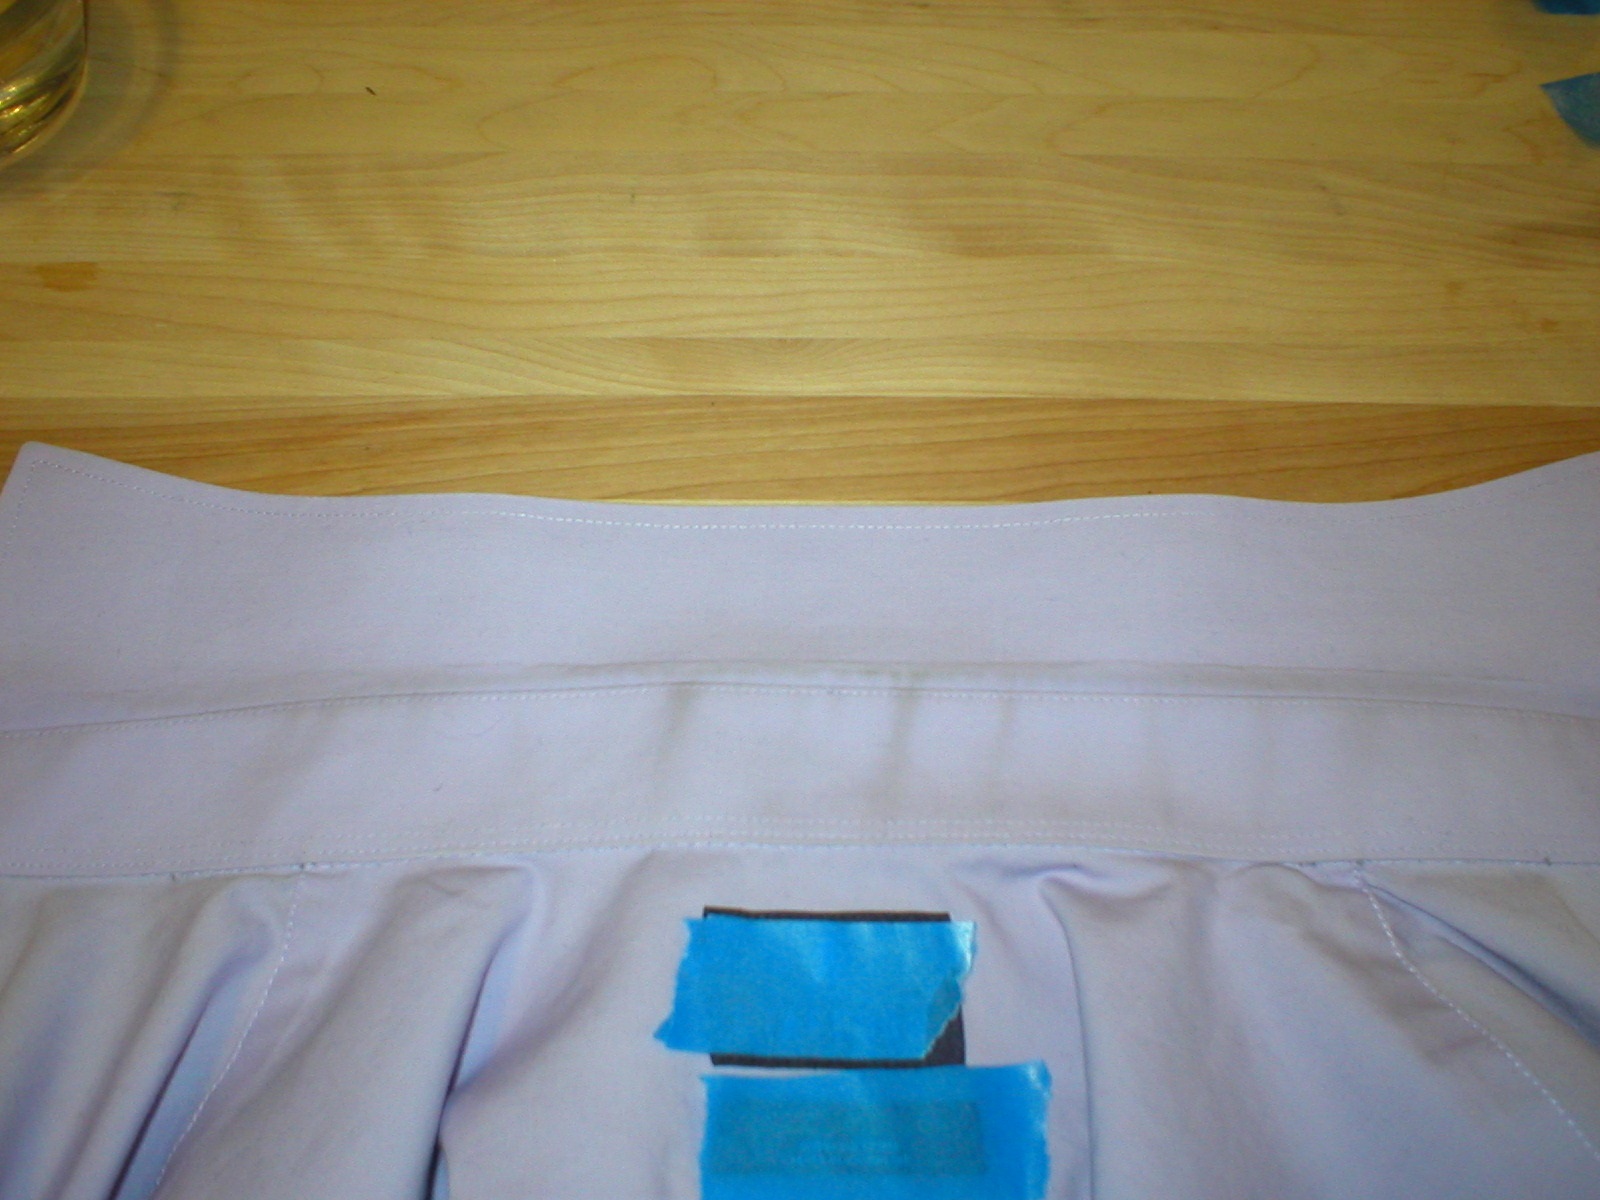
Lay the shirt so the collar lays open and flat. The shirt can be dry…no need to wet it down first.

Dirty shirt collar

Dirty shirt collar

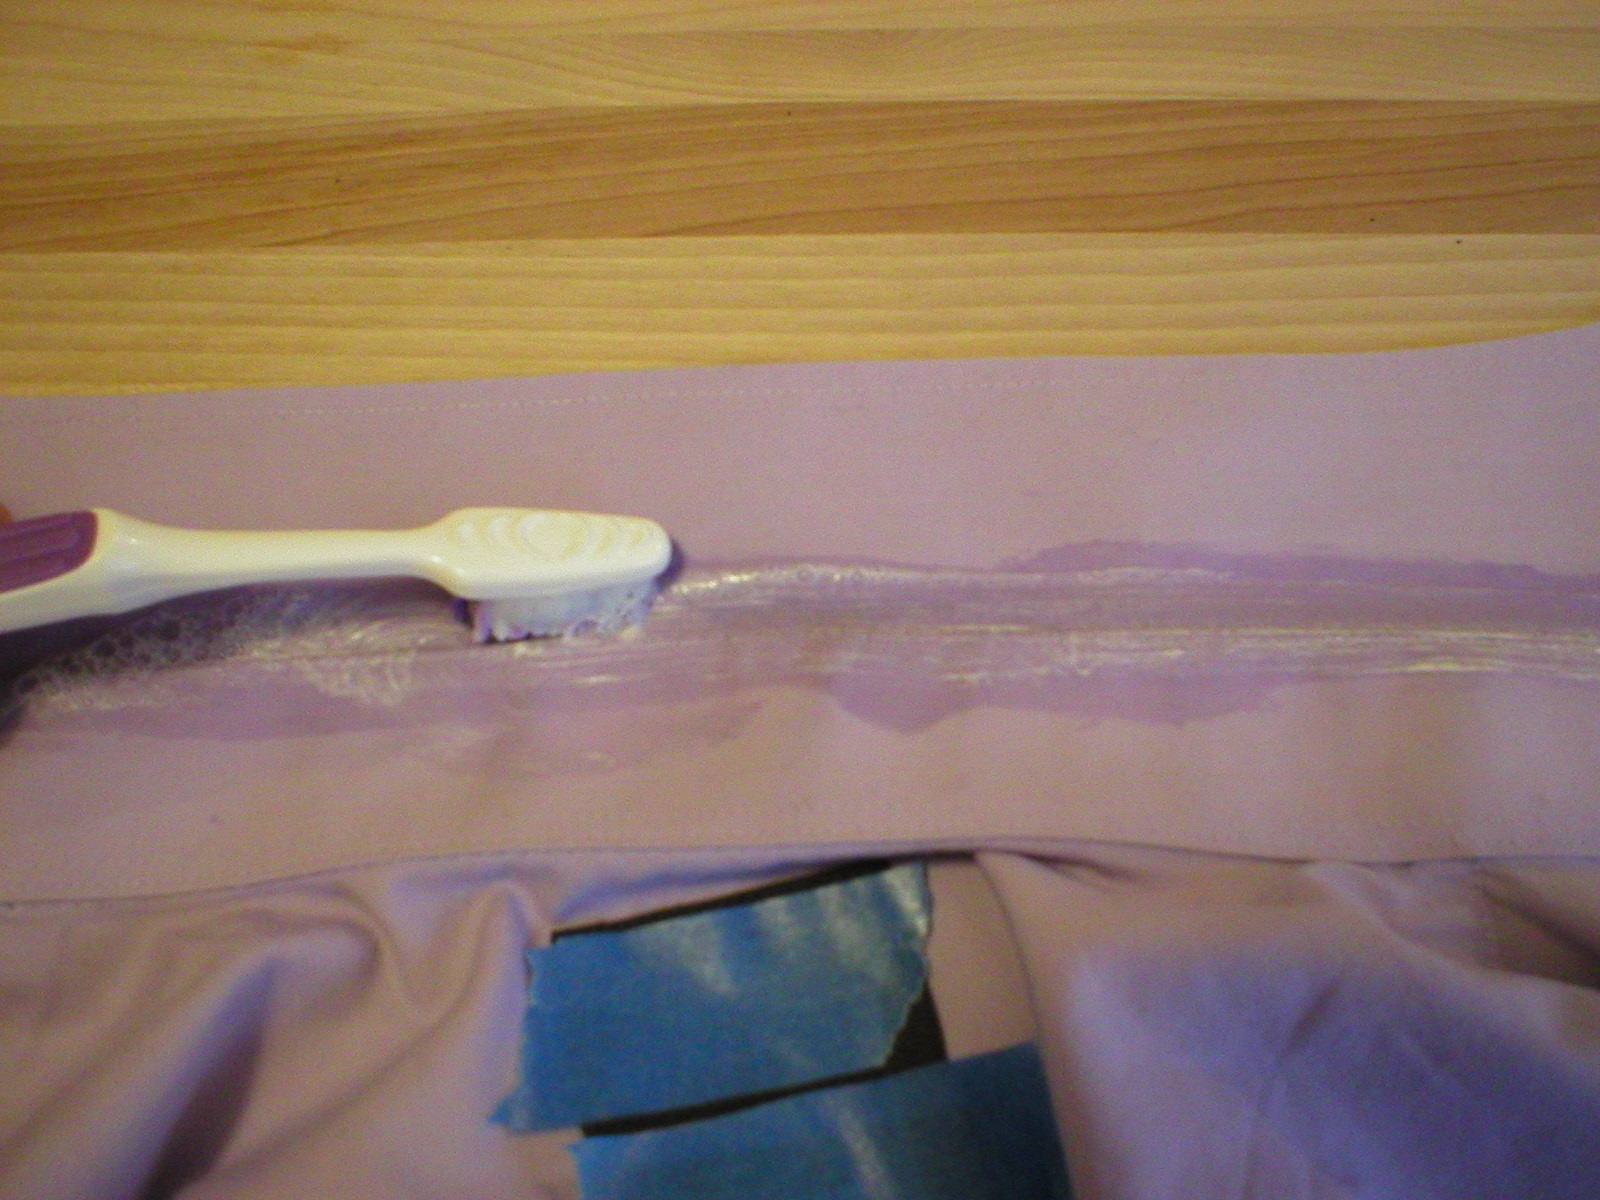
Put a little bit of dish detergent on your toothbrush and scrub the dirt line along the collar.

Scrub collar with dish detergent and toothbrush

Scrub collar with dish detergent and toothbrush

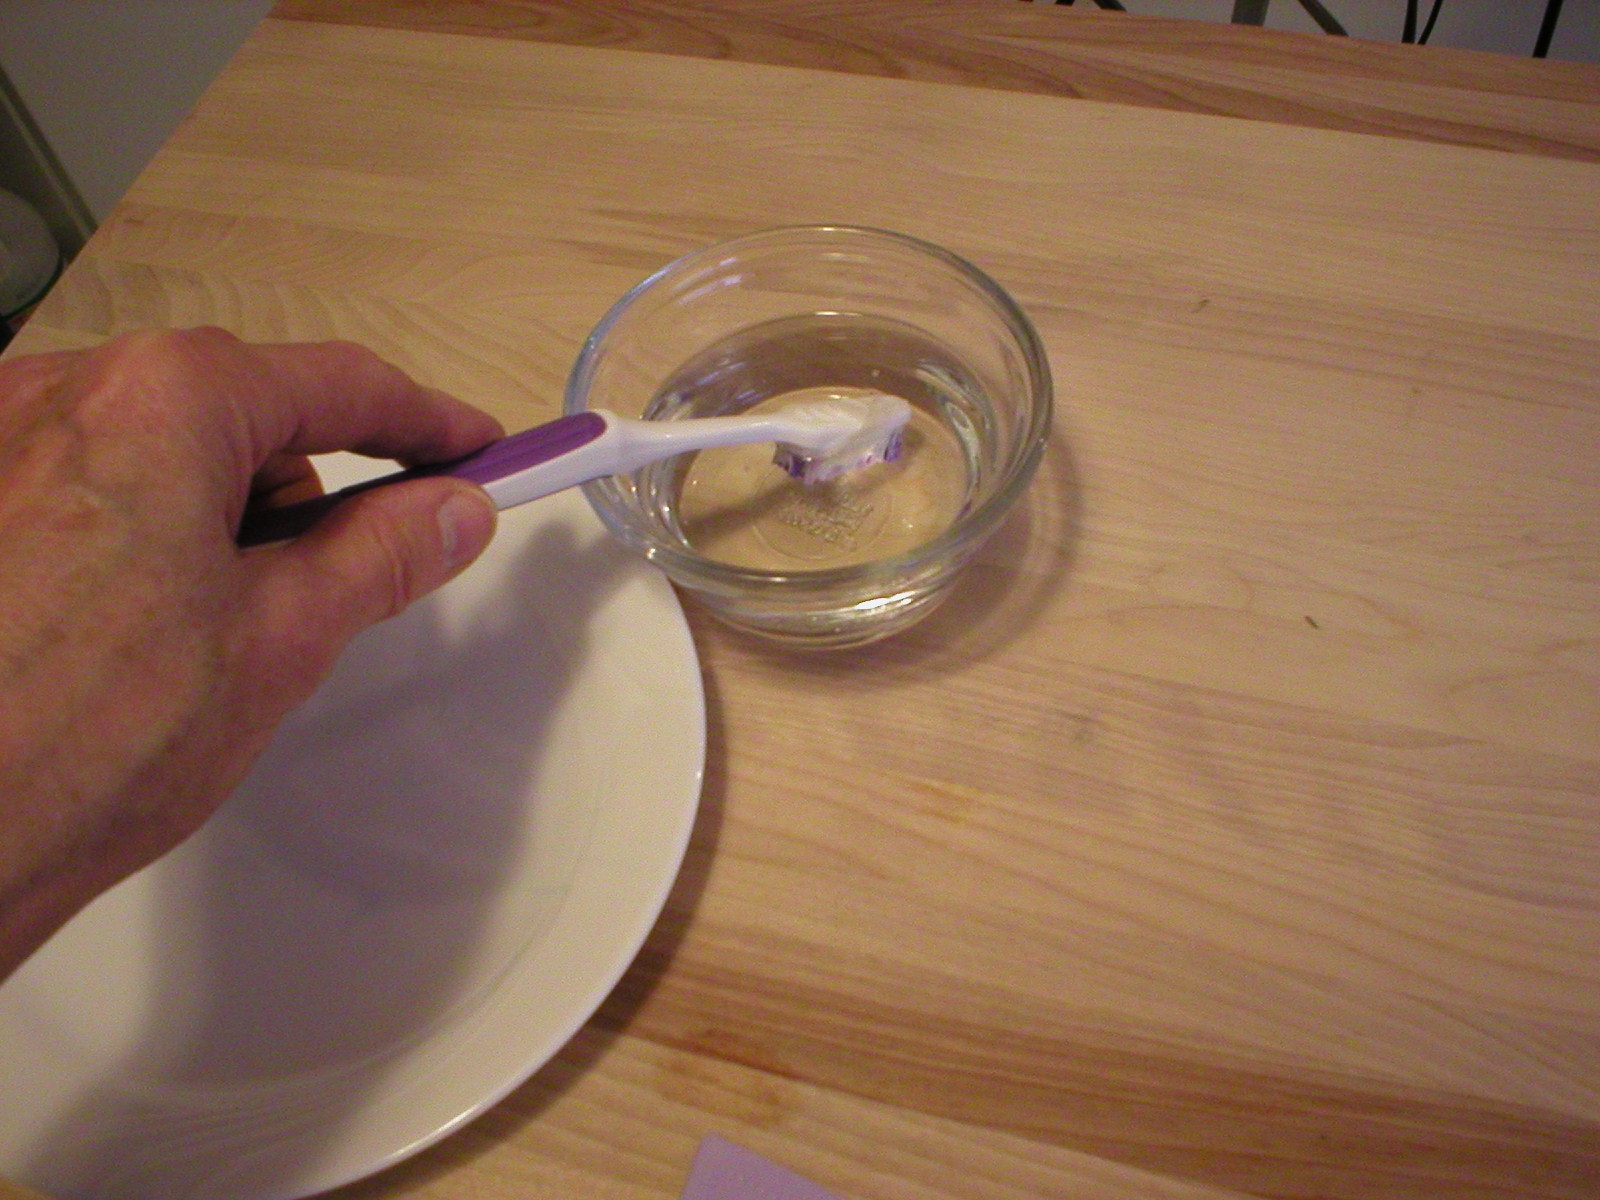
After you’ve done a little scrubbing and worked the detergent into the fabric, wet the toothbrush and scrub the dirt line some more, working up some suds.

Wet the toothbrush

Wet the toothbrush

Work up some suds

Work up some suds

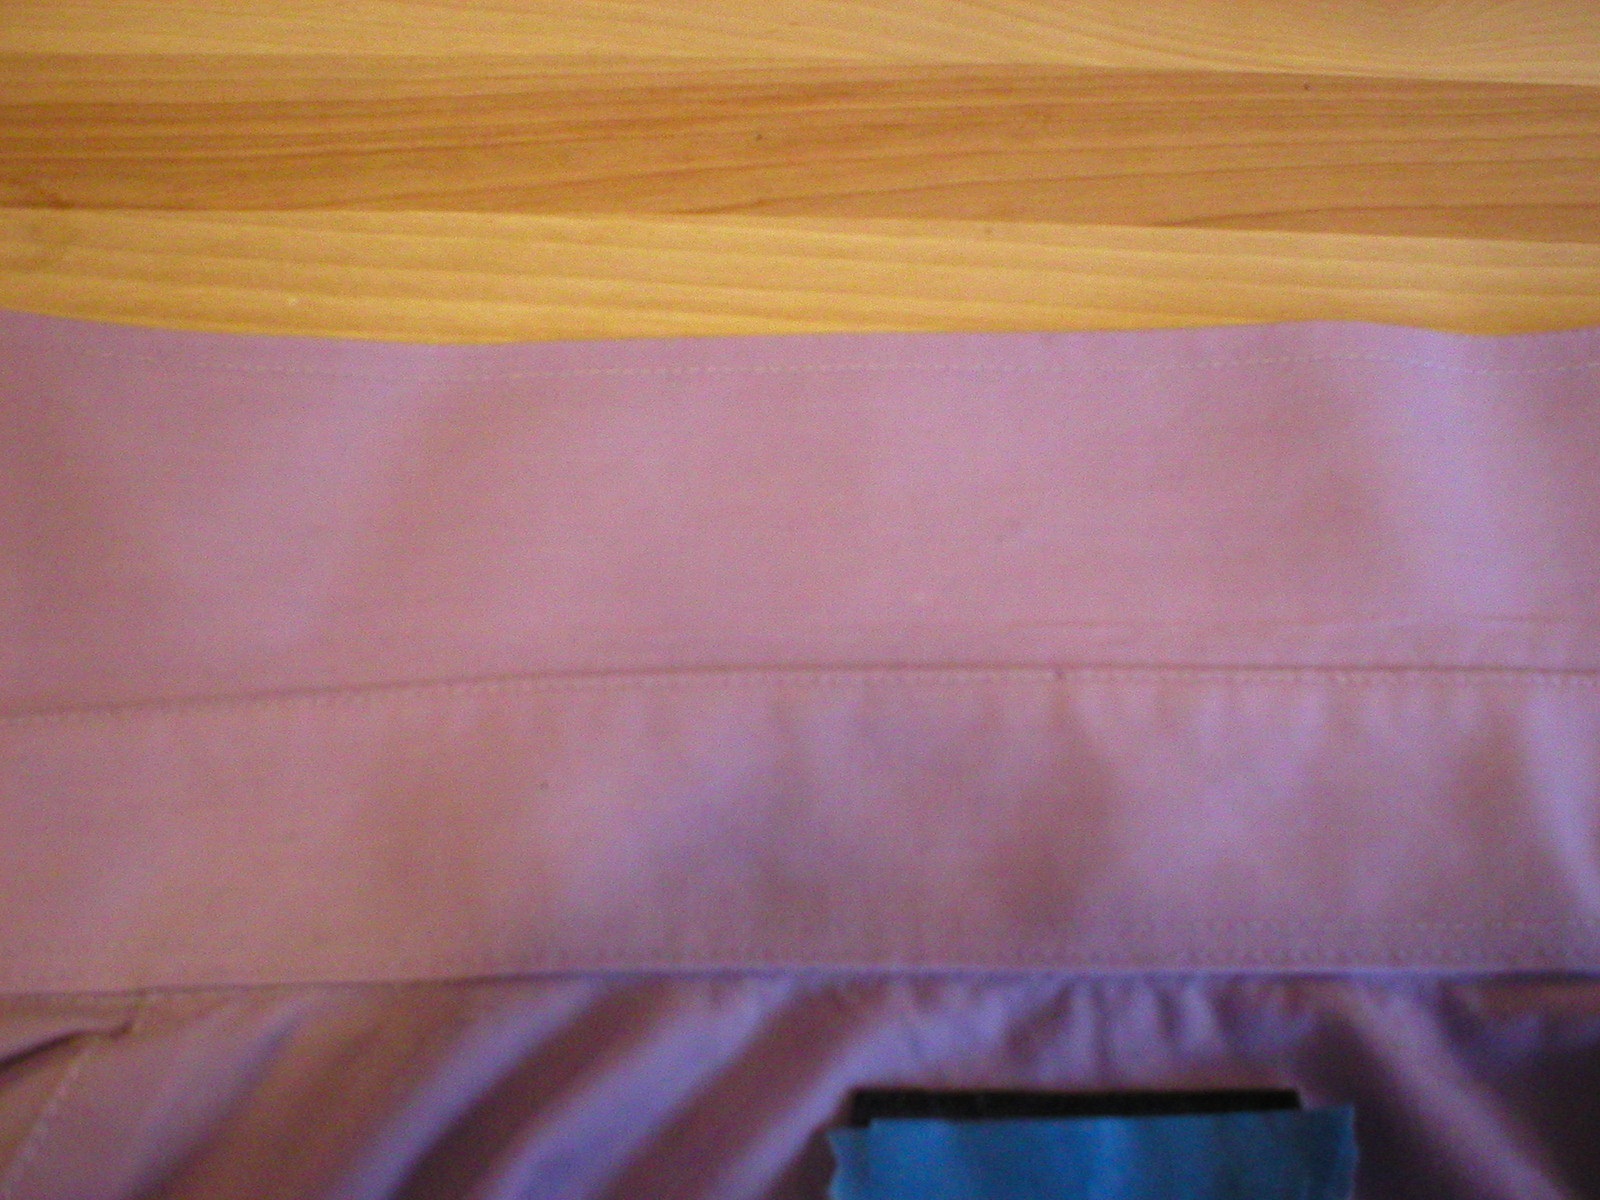
After you’ve scrubbed the dirt line to your satisfaction, the shirt can be laundered immediately in your usual laundry detergent in whatever water temperature you normally use. IF the shirt was exceptionally dirty and you feel your dish detergent is not a great grease fighter, it may help to allow your shirt to sit for a while (up to 1 hour) before laundering it. Note that the collar does not need to be rinsed out before placing it in the washing machine. IF you feel you used a LOT of dish detergent and need to rinse some of it out, go ahead and rinse.

Washed, wet shirt...See how clean!

Washed, wet shirt…See how clean!

After it comes out of the washer, take a quick look to be sure all the ring was scrubbed out. If not, repeat the process. If so, dry it as usual.

Dried shirt...good as new!

Dried shirt…good as new!

This is a fast and easy process that makes shirts look good as new! The real benefit is that you don’t need to buy extra chemicals to do the job. You should already have what you need on hand!

To see my video on this process, click below. Enjoy! Judi

Safely Remove Odor From Dishcloths (No Bleach!)

I recently stumbled upon this easy way to remove lingering odor from kitchen dishcloths. It works with any type of cloth…crochet or knit cotton, microfiber, standard kitchen dishcloths…whatever!

It’s better than bleach for a few reasons. First, bleach is quite toxic so should only be used when absolutely necessary. It will quickly remove color from any cloth it comes in contact with if you use too much (which is very easy to do).

Also, (and I know this for a fact), bleach destroys cotton fiber. Yes, really. I learned this during my undergraduate degree in a textiles lab. We took a small piece of cotton fabric and soaked it in 100% bleach. The fabric disintegrated! Moral of the story…Don’t use bleach on cotton if you care about the fabric!

New trick…boil those smelly yet laundered dishcloths. Place them in a pot of water. Bring it to a boil and boil them for a minute or two. Then leave them on the burner and turn it off. Allow them to sit for 5 to 10 minutes to cool down some and continue killing any remaining germs. Then drain the cloths and add cool water until they can be safely handled. Wring them out and (if desired) dry them further by wrapping them in a clean dry towel. Then toss them in the dryer until they are dried. Done!

It’s really very easy and effective, AND no toxic chemicals involved! Here’s a video on the topic! Enjoy, Judi