Category Archives: Money Saving Tips

Baking Soda

The Many Uses of Baking Soda (What It Is and How To Use It)


What is baking soda?
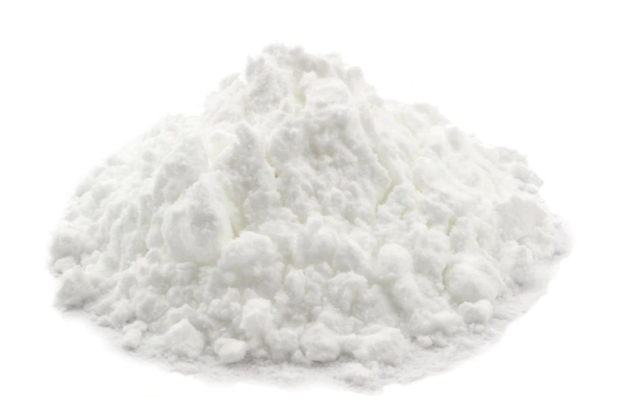
Baking soda is sodium bicarbonate. It is an alkaline compound that will produce carbon dioxide gas when combined with an acid. It is found in nature in crystalline form, and is ground into a fine powder for culinary and household use.

How is it used in baking?
Baking soda is used as a leavening agent in baked goods that contain an acidic ingredient. When it comes in contact with an acid, such as vinegar, citrus juice, buttermilk, yogurt or cream of tartar, it forms carbon dioxide gas bubbles. The small bubbles get trapped in the food batter, causing it to inflate, or rise. The batter is then baked immediately.

Baking soda is often used in baked goods (such as quick breads, pancakes, muffins, cakes and fried foods) that contain acidic ingredients so it will create the leavening or rise in the finished product. Since the reaction with acid occurs quickly, the leavening time is much shorter than when yeast is used as a leavening agent. When baking soda is used as a leavening agent, the foods are cooked immediately. When the food is heated, the leavening is “fixed” in place so the expansion caused by the gas bubbles becomes set. If the food is not baked immediately, the gas bubbles may deflate and the product may not rise as expected.

Tip: When using baking soda in a baked product, be sure to add it to the dry ingredients before liquid ingredients are added. Stir or whisk the dry ingredients well to combine everything before liquid is added. Otherwise, if the baking soda is not disbursed well, the finished product may have large holes in it.

Is baking soda the same thing as baking powder?
Although baking powder does contain baking soda, the two are not the same thing. Baking powder is a mixture of baking soda, one or more acid salts (usually cream of tartar and sodium aluminum sulfate), and cornstarch (to absorb moisture so a reaction won’t take place until liquid is added to a batter). Baking powder usually causes two reactions at different times. This type of baking powder is often referred to as “double acting baking powder.” The first reaction takes place when liquid is added to the batter. The acid and baking soda in the baking powder react causing bubbles to form in the batter. The second reaction takes place when the batter is placed in the oven. The gas bubbles expand, causing the baked product to expand even further. The heat in the oven causes the expanded batter to “set” maintaining the lift or rise.

Since there are two reactions when baking powder is used, there can be a slight delay (15 to 20 minutes) before the product is baked, and leavening will still occur. Baking powder is typically used in recipes that do not contain acidic ingredients.

Shelf Life of Baking Soda vs Baking Powder
When stored in an airtight container in a cool, dry place, baking soda has an indefinite shelf life, although some producers recommend buying fresh baking soda every three years.

Baking powder should also be kept in an airtight container in a cool, dry place. It generally has a shelf life of six months to one year. Check the “Best by” date on the canister to determine its age. Discard baking powder when it is no longer active.

How to Test the Activity of Baking Powder
Place ½ teaspoon of baking powder in a bowl. Pour ¼ cup of boiling water over the baking powder. It should immediately bubble up violently. If it does, it’s still good. If it doesn’t bubble up, it is old and should be discarded. To see a demonstration of how this is done, view my video here…

How to Test the Activity of Baking Soda
Mix ¼ teaspoon of baking soda with 2 teaspoons of vinegar. The mixture should bubble up immediately. If it does not, the baking soda needs to be replaced. To see a demonstration of how this is done, view my video here…

Are baking soda and baking powder interchangeable in recipes?
No, the two are not interchangeable in recipes.

What happens if you use too much baking soda or baking powder in a recipe?
Too much baking soda added to a recipe may cause a soapy flavor and a coarse, open crumb (very large air bubbles/spaces in the finished product). Baking soda can cause cocoa powder to redden when baked. This is a normal reaction and the origin for the name “Devil’s Food Cake”.

Too much baking powder can cause the product to taste bitter. It can also cause the batter to rise too fast, then collapse, resulting in a flattened baked product. For instance, cakes made with too much baking powder will be sunken in the middle and have a coarse crumb (extra-large cells or air spaces).

What can I do with baking soda besides bake with it?
THIS is where the list gets long. Beside using baking soda as a leavening agent in baked goods, it has MANY other uses in the kitchen and around the house. The following is just a smattering of possibilities, since new uses for baking soda are being found all the time.

In the Kitchen
* Baking soda is well known for its ability to absorb odors. A small bowl or box of baking soda is often placed in refrigerators, freezers, or other enclosed areas to absorb odors. Replace it once a month for best results.

* Rubber gloves in the kitchen can get wet inside and smelly. To keep them fresh, sprinkle a little baking soda inside them. You’ll also find they are easier to slip on and off.

* Loosen baked on grease by sprinkling baking soda in the pan. Add some dish detergent and hot water. Allow the pan to soak for a while. The pan will be easier to clean. [NOTE: Do not use baking soda on aluminum cookware or bakeware. It will react with the aluminum and may discolor the pan.]

* Help to soften dry beans when you cook them and make them less gas-producing, add a little baking soda to the soaking water. This can be especially helpful if the beans are old…the older the are, the drier they get, and the longer it takes to cook them. Shorten the cooking time by adding baking soda to the soaking water. Add 1/4 teaspoon of baking soda per pound of beans in one gallon of water. Rinse them well after being soaked. A little baking soda may also be added to the cooking water. A mere ¼ teaspoon may be added to the cooking water to soften the beans and help them to cook faster. This is due to the alkalizing effect of the baking soda.

* Baking soda is mildly abrasive. This property makes it an effective agent for removing stains from coffee mugs, kitchen counters, microwaves, and kitchen tiles, along with grease stains. Make a paste with a little baking soda and a small amount of water. GENTLY rub it on the stained area with a sponge or cloth. When in doubt, do a test rub in an inconspicuous place. Rinse with plain water and buff the area dry. To see a video demonstration of how to remove stains from a coffee mug, watch this…

* Neutralize trash odors. If your kitchen trash can has an odor, sprinkle some baking soda in it to help neutralize the odors.

* Make fluffy omelets by adding ¼ teaspoon of baking soda to every three eggs used in the omelet. Don’t be tempted to add more baking soda, as it may make the eggs taste bland. Also, don’t oversalt your eggs since baking soda contains sodium.

* Baking soda has been found to remove chemical residues from the surface of conventionally-grown fruits and vegetables. Soak the food in a solution of 1 teaspoon of baking soda to 1 to 2 cups of water for 12 to 15 minutes. Rinse the food well, pat it dry, then store it and use it as usual. Note that this removes chemical residues from the surface. It will not remove chemicals that have soaked into the food. [This is a procedure I use on a regular basis and I can say from personal experience that it works. Here’s a video I have on this topic…

* Baking soda has been used to remove tarnish from silverware. Line a baking pan with aluminum foil. Add 1 tablespoon of baking soda to the foil-lined pan. SLOWLY pour in ½ cup of white vinegar. (Yes, there will be a reaction!) Pour in one cup of boiling water, then place your tarnished silver in the pan. The tarnish should begin to disappear almost immediately. Most of the silverware can be removed within 30 seconds. Heavily stained silverware may take up to one minute to be cleaned. Rinse your cleaned silverware in plain water and wash as usual. The tarnish will be left as a residue at the bottom of the baking pan. Discard it and the foil, then wash the pan.

* Another way to clean tarnished silverware is to gently rub a paste of three parts of baking soda to one part of water onto the silverware with a soft cloth or sponge. Rinse and dry.

* Make a paste of baking soda and water and rub it on plastic containers to remove stains.

* Try baking soda as a natural oven cleaner. [Note that this should be used only on conventional ovens, not self-cleaning ovens.]  Sprinkle baking soda on the bottom of the oven, while avoiding getting it on the heating element. Spray with a water bottle to dampen the baking soda. The sides can be cleaned by spreading on a paste made of 3 parts of baking soda with 1 part of water. Allow it to sit overnight. Scrub it off in the morning. Rinse thoroughly.

* Use baking soda and vinegar to remove burned on milk from a [NON-ALUMINUM] pot. This is a trick that I learned a long time ago and it has worked many times for me and my video viewers as well. Simply sprinkle a generous amount of baking soda on the burned milk in the pot. Add enough water to the pot to cover the burned area by about one inch. Add a generous portion of white vinegar to the pot. (Notice there are no specific measurements here…that’s deliberate!) The mixture will bubble vigorously. Turn the stove on high and bring the mixture to a boil. (Monitor it carefully because the baking soda and vinegar will quickly bubble up and raise within the pot. If it gets too high, lift the pot off the stove briefly and the bubbles will go back down.) Allow the mixture to boil for about 5 minutes. Turn off the heat and allow the pot to sit on the burner until the mixture cools completely. The pot is ready to be washed. The burned area should lift off easily with little scrubbing. Here’s a video where I demonstrated this technique …

* For an effective homemade cleaning solution for your refrigerator, simply mix 1 teaspoon of baking soda in a quart of warm water. Use the solution to wipe off the refrigerator, inside and out.

* To deodorize and clean your garbage disposal, pour 1 cup of baking soda down the drain while simultaneously running warm water. Then run your disposal for one minute, while running warm water, until all the baking soda is gone. This will help keep the grinding mechanism free of grease.

* To remove odors from plastic containers, first wash the container well. Then add 2 tablespoons of baking soda and fill the container with hot water. Place the lid on the container and shake well to dissolve the baking soda. Allow it to soak for 2 hours up to overnight (especially with strong odors). Wash the container well. This method can also work with juice pitchers, thermal bottles, lunch boxes, and any glass or plastic food container.

* To remove odors from your hands after preparing foods like garlic, onions or fish, wet your hands, sprinkle on some baking soda. Rub your hands together well, then rinse and dry.

* If the inside of your microwave is REALLY dirty with a lot of baked-on splattered food, baking soda can come to the rescue. Mix 2 tablespoons of baking soda with 1 cup of water in a microwave-safe bowl. Let this solution boil in the microwave on high for a few minutes, so that moisture collects on the inside walls of the microwave. Remove the bowl, then use paper towels to wipe down the inside of the microwave, including the door, and door seal. Then wipe it all down again with a damp sponge or cloth.

* To deodorize a wood cutting board, apply a paste of 3 parts of baking soda to 1 part of water. Leave the paste on for about 10 minutes. Rinse well, then dry.

* Remove black heel marks from kitchen linoleum or vinyl flooring with baking soda and a damp sponge or nylon scrubber. Rinse and dry the area.

* If you’re baking and a recipe calls for baking powder and you don’t have any, use ½ teaspoon of baking soda plus 1 teaspoon of cream of tartar in place of 2 teaspoons of baking powder. Since this is not a “double-acting” baking powder substitute, bake the item immediately after the liquid and dry ingredients are mixed together.

Personal Care
* Baking soda has been used to relieve heartburn or acid reflux. Dissolve a teaspoon of baking soda in a glass of water and drink the mixture slowly. Note that baking soda is high in sodium. If you need to restrict your sodium intake, this tactic may not be recommended for you. Check with your healthcare practitioner first. Also, do not drink this on a regular basis as it may cause metabolic alkalosis if ingested too often.

* Some people have used a baking soda solution as a mouthwash. Add ½ teaspoon of baking soda to a half glass of warm water. Swish around your mouth as usual. This will increase the pH of your mouth, which can inhibit the growth of bacteria. It also has been found to freshen the breath.

* Baking soda has been found to soothe canker sores inside the mouth. Rinse your mouth with baking soda mouthwash (as in the previous bullet point…1/2 teaspoon of baking soda in half a glass of warm water) once a day until the sore heals.

* Toothpaste with baking soda has been found to whiten teeth and remove dental plaque more effectively than toothpaste without baking soda. This is believed to be due to the mild abrasiveness and antimicrobial properties of baking soda.

* Some people use baking soda as an effective deodorant. Patting your armpits with a little baking soda can help to neutralize the acidic waste products of bacteria that cause the odor.

* A baking soda bath is often recommended to soothe itchy skin from insect bites and bee stings. Add 1 to 2 cups of baking soda to a tub of warm water. Soak in the tub for 10 to 40 minutes. Rinse with fresh water afterwards and drink plenty of water. If you don’t want to bother with a bath, just make a paste of baking soda and a little water. Apply the paste to the affected area and allow it to sit for a little while until the itching or stinging sensation stops. Rinse the paste off with cool water.

* For sunburn relief, add a few heaping tablespoons of baking soda to a bath tub along with a cup of oats. Fill the tub with cool water and soak for 15 to 20 minutes. Do not scrub the skin. Dab yourself dry with a towel afterwards.

* Sooth the irritation from vaginal yeast infections with a baking soda bath. A 2014 study found that baking soda killed Candida cells that led to yeast infections. Furthermore, baking soda has been found to have antifungal affects.

* Help sooth diaper rash by soaking the baby’s bottom in a baking soda bath for 10 minutes, three times a day. Use 2 tablespoons of baking soda in a tub of water. Pat the baby dry (do not rub the skin).

* Make a soothing foot bath by soaking feet for 10 minutes in a solution of 4 tablespoons (1/4 cup) of baking soda in 4 cups of warm water. This will relieve tired feet, soften calluses, and soothe athlete’s foot.

* To keep hair combs and brushes clean and free of oils, soak them overnight in a solution of 1 teaspoon of baking soda in one cup of water. In the morning, rinse them off and you’re ready to start your day!

* A baking soda bath can help relieve the itching and redness from eczema. Add ¼ cup baking soda to the bath water. Soak in the tub for 10 to 15 minutes. Pat the skin with a towel to remove excess water, and apply moisturizer to the skin afterwards, while the skin is still damp.

* Irritation from poison ivy and poison oak can be relieved with a baking soda bath. Dissolve ½ cup of baking soda in a tub of warm water. Soak up to 30 minutes.

* Urinary tract infections can be relieved with a baking soda bath. Add ¼ cup of baking soda to the bath water. Adults, soak up to 30 minutes. Young children should soak for 10 to 15 minutes. Do this twice a day.

* Baking soda can be used to remove odors from shoes. Put two tablespoons of baking soda in the center of a thin cloth. Gather the corners of the cloth and secure the edges with a rubber band or string. Place a sachet inside each smelly shoe. Remove the sachet when you’re ready to wear the shoe.

Safety of Baking Soda Baths. Generally, baking soda baths are considered to be safe and well-tolerated by most people. However, do not take a baking soda bath if you are pregnant or breastfeeding, have high blood pressure, have diabetes, have open wounds or serious infections, or are prone to fainting.

Around the House
* If you enjoy air fresheners in your home, try a homemade baking soda air freshener. Place 1/3 cup of baking soda in a small jar. Add 10 to 15 drops of your favorite essential oil. Cover the jar opening with a clean cloth and secure it with a string, ribbon or rubber band. When the scent starts to fade, gently shake the jar a few times. Add more essential oil as needed.

* Use baking soda to help whiten your laundry. Add ½ cup of baking soda to your washer along with your usual laundry detergent. The baking soda can help to remove stains from your clothes. Also, it will soften the water, so you may be able to use less laundry detergent.

* Baking soda can act as a multi-purpose cleaner in the bathroom. Make a paste with baking soda and a little water. The paste can be used to clean bathroom sinks, tiles, bathtubs, and showers. Use a sponge to apply the paste to scrub the area you want to clean. Allow it to sit for 15 to 20 minutes. Wipe the area down with a damp cloth afterwards.

* To clean your toilet bowl, routinely sprinkle some baking soda in the bowl and scrub with a toilet brush. For stained bowls, pour in ½ cup of baking soda and ½ cup of white vinegar. Scrub with a toilet brush, then flush. Be careful when doing this in case the bubbling action splashes upward!

* To remove perspiration stains from clothing, make a paste of baking soda and a little water. Rub the paste into the stained area and let it sit for one hour, then launder as usual.

* Did you accidentally spill a little gasoline on your clothes? Remove the odor by sprinkling the stained area with some baking soda. Place your clothes in a trash bag and seal it up. Let them sit there for a few days, then launder as usual.

* Is it winter and you’ve run out of ice melt? Sprinkle a little baking soda on the ice on your steps. It will provide some traction and melt the ice. Unlike rock salt, it won’t damage indoor or outdoor surfaces.

* For a safe way to clean your toothbrush, let it soak in a baking soda and water solution overnight.

* Do you have clogged bathroom drains? For a simple drain cleaner, start by pouring a cup of boiling water down the drain to help loosen things up. Mix one cup of baking soda with 1 cup of salt.  Place ½ cup to 1 cup of white vinegar in a separate measuring cup. Alternately spoon the baking soda and salt mixture into the drain, flushing it with a little white vinegar to help the dry mixture go down to the clog. Be careful, as it will bubble up! Once all the dry mixture and vinegar have been placed in the drain, cover with the drain plug and wait for 15 minutes. Then pour a large pot of boiling water down the drain. This will clear most clogs.

* Mop your tile floors clean with a solution of ½ cup of baking soda in a bucket of warm water.

* Make cloth diapers easier to clean by first soaking them in a solution of ½ cup of baking soda in 2 quarts of warm water. They should come out cleaner when laundered.

* Help keep cut flowers longer by adding a teaspoon of baking soda to the water in the vase.

* Help to keep your kitty’s litter box smelling fresh by sprinkling the bottom of the box with baking soda before adding litter. Use about one cup of baking soda to three pounds of litter. If you need to clean the box but are short on time, sprinkle some baking soda on top and give it a light stir. This will help keep odors in check for a short while until you can change the litter.

Resources
https://www.thespruceeats.com/what-is-baking-soda-p2-1328637

https://www.joyofbaking.com/bakingsoda.html

https://www.davidlebovitz.com/how-to-tell-if-baking-powder-is-still-good/

https://www.healthline.com/nutrition/baking-soda-benefits-uses#2.-Mouthwash

https://www.healthline.com/health/baking-soda-bath

https://pmaonline.com/posts/adult-primary-care/8-ways-to-treat-sunburn-at-home/

https://www.almanac.com/content/best-baking-soda-uses

https://www.liquidplumr.com/diy-plumbing-tip/how-baking-soda-and-vinegar-cleans-drains/

https://www.thankyourbody.com/uses-for-baking-soda/

https://www.networx.com/article/6-ways-not-to-use-baking-soda

https://www.readersdigest.ca/home-garden/tips/5-things-do-baking-soda/

https://www.cooksillustrated.com/articles/1745-can-baking-soda-make-beans-cook-faster

http://www.eatingwell.com/article/292167/the-weird-reason-you-should-be-adding-baking-soda-to-your-beans/

https://www.tasteofhome.com/article/degassing-beans/

https://nutritionfacts.org/questions/does-adding-baking-soda-to-soaking-beans-reduce-raffinose/

https://skillet.lifehacker.com/make-extra-tender-beans-with-a-little-baking-soda-1842156539

https://www.healthline.com/nutrition/10-baking-powder-substitutes#TOC_TITLE_HDR_5

https://www.armandhammer.com/

Baker, Jerry. (2006) Grandma Putt’s Old-Time Vinegar, Garlic, Baking Soda, and 101 More Problem Solvers. USA: American Master Products, Inc.

Ciullo, Peter A. (1995) Baking Soda Bonanza. New York, NY: Harper Collins Publishers, Inc.


About Judi

Julia W. Klee (Judi) began her journey enjoying “all things food” in elementary school when she started preparing meals for her family. That love of food blossomed into a quest to learn more and more about health and wellness as related to nutrition. She went on to earn a BS Degree in Food and Nutrition, then an MS Degree in Nutrition. She has taught nutrition and related courses at the college level to pre-nursing and exercise science students. Her hunger to learn didn’t stop upon graduation from college. She continues to research on a regular basis about nutrition as it relates to health. Her hope is to help as many people as possible to enjoy foods that promote health and wellness.

Cabbage

Inexpensive Foods with Tips for Healthy Eating When Money is Short

We’ve all had times when money is tight. It’s never fun, but in the vast majority of cases, things WILL get better. It’s usually a matter of “hanging in there” until it does. In the meantime, here is a list of inexpensive foods and tips for healthy eating that can help you make it through the tough times.


Vegetables…

Fresh Carrots

Fresh carrots are a great buy year-round. A one-pound bag is under a dollar in most grocery stores and can go a long way in servings. There is little waste, especially if they are not peeled. Simply wash them very well and cut off the ends and any area that doesn’t look good. They can be eaten raw in salads or as a snack, added to soups, stews, and casseroles, served as a side dish, and included in main dishes. A pound of carrots yields about 3-1/2 cups when sliced. Assuming a serving is about one cup, and the cost of one pound of carrots is $0.75, that brings the cost per serving to about $0.21. The cost of a half-cup serving of cooked carrots, at $0.75 per pound would be about $0.11 each.

Fresh Cabbage

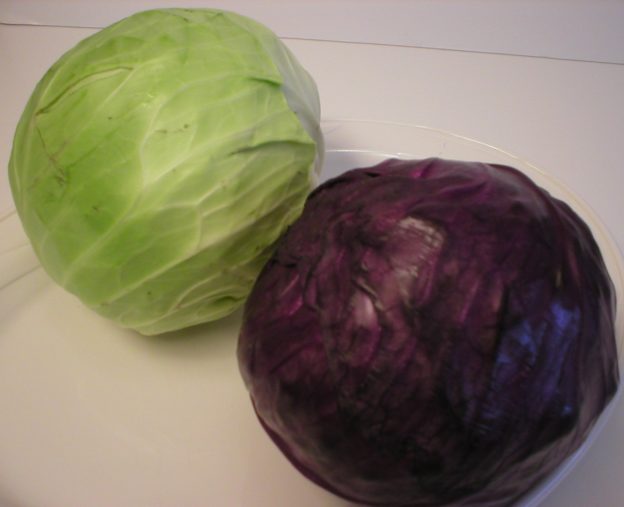
A head of fresh cabbage packs a lot of food within its head. Whether it’s chopped, shredded, fermented, stir-fried, boiled, roasted, sautéed, or used as a wrap, we can get a lot of mileage out of one head of cabbage. One pound of shredded cabbage yields about 4-1/2 cups. Most cabbages weigh well over one pound, so if you opt for a heavy cabbage, you’ll get a lot of servings out of it. Assuming one serving is one cup of shredded cabbage, and assuming that cabbage cost $0.68 per pound, that brings the cost per serving to a mere $0.15.

White Potatoes

A five-pound bag of white potatoes can often be found for around $2.50, or even less. One pound of potatoes yields about 3-1/2 cups chopped or 2-3 cups mashed. Assuming a serving size is 2/3 cup, at $2.50 for five pounds, that brings the cost per serving of chopped potatoes to around $0.09, and mashed potatoes to around $0.13.

Sweet Potatoes

Fresh. Fresh sweet potatoes are usually around $1.00 per pound (sometimes less). As with white potatoes, one pound yields about 3-1/2 cups chopped. So comparisons are equal, assuming a serving size is 2/3 cup (which is what is listed as a serving size on the canned sweet potatoes), at $1.00 per pound, that brings the cost per serving to about $0.19.

Canned. A 40-ounce can of yams sells for about $2.25. The Nutrition Facts panel lists a serving size as being 2/3 cup with 7 servings being in the can (including the liquid). At that rate of usage, the cost per serving is about $0.32. Note that canned yams are usually packed with added sweeteners. If you are trying to avoid such additives, fresh sweet potatoes would be your best option.

Lettuce

Whole heads of lettuce are usually your cheapest option when buying lettuce. They are often the freshest to choose from, offer the most lettuce for your money, and have been shown to have the lowest bacterial count among the options, even when compared with triple-washed lettuce and lettuce blends in bags and plastic boxes. A whole head of non-organic lettuce averages about $1.50, with organic options up to twice that amount.

One head of lettuce yields from 4 to 6 cups when torn, depending upon the variety. For the sake of comparison, we’ll assume one head of lettuce yields 5 cups of torn leaves. Assuming 1 cup is a serving, that brings one serving of torn lettuce leaves to about $0.30. When comparing head lettuce to spring mix baby leaves in an 11-ounce tub that sells for $4.84, a one cup serving comes to $0.69 each.

Cauliflower (Fresh Whole Head vs Frozen Florets)

Fresh. The advantage to buying a whole head of cauliflower is that they are usually priced individually rather than by the pound. Choose a fresh cauliflower that feels very heavy for its size, with no browning on the surface, and you’ll get a lot of bang for your buck. A medium head of cauliflower yields about 6 servings and averages about $2.75 in cost. That brings the cost per serving to $0.46.

Frozen Cauliflower Florets. Frozen cauliflower florets may be found in some stores. When writing this, I found a 12-ounce bag of frozen cauliflower florets for $1.79. The Nutrition Facts panel suggested a serving size as being ¾ of a cup, with 3 servings in the bag. That brings the cost to $0.60 per serving.

Fresh Kale or Other Greens by the Bunch

A one-pound bag of fresh (not organic) kale costs about $2.94. The bag lists about 6 servings per bag. That comes to $0.49 per serving.

Bunches of fresh greens, such as kale, turnip greens, and collard greens often sell for about $1.48 each. Bunch sizes vary, so it’s impossible to precisely state the cost per serving. However, assuming one bunch offers 4 servings, at $1.48, it comes to $0.37 per serving. With that, the individual bunches of greens are cheaper per serving than the prepackaged one-pound bags.

Canned Tomatoes and Tomato Paste

Canned tomatoes and tomato paste are available in just about any grocery store year-round. They are inexpensive and flavorful additions to many foods. They can be added to soups, stews, casseroles, sauces, dressings, and even beverages. Unless you grow your own tomatoes, the canned varieties are usually cheaper than buying fresh tomatoes for the same applications. The price of canned tomatoes (14.5-ounces) usually starts around $1.00 a can, with name brands being a little higher. Generic (6-ounce) cans of tomato paste may start as low as $0.42 a can with name brands being higher than that. Whichever you choose, they are a great buy and can add a lot of flavor to foods.

Frozen Vegetables

Frozen vegetables are a very easy and convenient food to have available. They can be used as side dishes and included into a wide array of other foods like salads, soups, stews, casseroles, etc. Many people are now buying frozen vegetables in steamable packaging, which makes cooking them in the microwave very easy and convenient. However, when comparing the cost per serving, the steamable packaging often adds extra expense to the vegetables. Notice that I said “often.” That is because this is not always the case. In this case, it’s helpful to compare cost per serving to determine which is cheaper…frozen vegetables in steamable packaging or those in regular packaging that cannot be placed in the microwave. Usually, those packaged in regular packaging are cheaper per serving, but not always, especially when comparing like items in a generic brand. That being said, however you buy them, frozen vegetables can go a long way in helping to stretch the food budget, depending upon how they are used.

Fresh Celery (Whole Bunch, Not Celery Hearts)

When shopping for celery, choosing the entire bunch will be cheaper than selecting a package of celery hearts. The whole bunch includes the leaves and root end. Many people cut off and discard the leaves, however, they are completely edible and add celery flavor to any dish they’re added to. If you have aversion to eating the celery leaves, place them in the freezer and save them for soup or stock. The entire bunch of celery often can be purchased for about $1.50, whereas the celery hearts will cost more than that, sometimes up to $3.00 for organic varieties.

Fresh Onions

One 3-pound bag of yellow onions can be found at many grocery stores for around $1.50 a bag. Onions are essential for flavoring some foods, and a 3-pound bag of onions can go a long way when being added to freshly prepared foods. They can be used raw in salads and on sandwiches, added to a huge array of cooked foods, and even caramelized and eaten as a side dish with a uniquely sweet flavor. For anyone who prepares food “from scratch” onions are a very inexpensive essential ingredient.

Fresh Garlic

Fresh garlic may appear to be expensive, since it is usually priced by the pound. However, a bulb of garlic is small and lightweight, bringing the cost per bulb down more than you would think at first glance. When priced by the “each,” garlic bulbs can be found for $0.50 each. Like onions, garlic is an essential ingredient in many home-cooked foods and there simply is no substitution. Considering that many recipes call for only one or two garlic cloves at a time, you can get some flavor bang for your buck when buying garlic.


Fruit…

Bananas

Bananas are one of the cheapest fruits available, often selling for around $0.69 a pound (and sometimes less). One medium banana will usually cost around $0.25 each, of course depending upon its size. They are filling and nutritious, so bananas are excellent options when on a tight budget. Even better is the fact that you can buy whatever number of bananas you want, down to only one, if needed.

Fresh Pineapple

Fresh pineapple is a fruit you may not think of when on a tight budget. However, they can often be found for around $2.25 each. Considering how much fruit you get from one whole pineapple, it’s a good buy, especially when comparing it to the cost of canned pineapple. One fresh pineapple contains about 5 cups of pineapple when cut into cubes. One-half cup is considered to be a serving, so one whole pineapple has about 10 servings of fruit. At $2.25 each, one serving of fresh pineapple comes to about $0.23. One 20-ounce can of pineapple chunks (packed in juice) sells for about $1.28. The can holds about 4-1/2 (1/2 cup) servings, bring the cost per serving to $0.28, so fresh pineapple is a better buy.

Watermelon (when in season)

One large watermelon in season offers a lot of servings and is a great bargain when considering the number of servings you get per fruit. When in season, they are usually sold by weight and are very inexpensive since they are usually plentiful. When off-season, many stores still carry them, but they are much more costly and would not be the cheapest option during the winter months and early Spring. Choose a melon that is heavy for its size, sounds hollow when tapped, and is yellowish on the side where it rested on the ground. There may be pre-cut melons available, but they will cost more per pound than the whole melons.

Frozen Mangoes

When thinking about inexpensive foods, mangoes usually don’t come to mind. However, when comparing the cost of a fresh mango to a large bag of frozen mango chunks, the frozen bag wins the prize. I found a 48-ounce bag of generic brand frozen mango chunks for $6.47. That may sound a bit pricey, but when considering the contents vs buying that same amount in fresh mangos, I considered the frozen option to be a good buy. The large bag had 10 each 1-cup servings, which is equivalent to about 10 average size mangoes. With the price of the large bag, that comes to about $0.65 per mango or per 1-cup serving. Where I live, fresh mangos usually sell for about $1.00 each. Sometimes they sell for less, but it’s not often that I can find them for as low as $0.65 each. So, with all things considered, if you enjoy mangoes, the frozen option may be a good choice for you. Also, the advantage of the frozen option is that you won’t be in a rush to eat them before they go bad. You can simply take what you need from the bag without issue.


Grain Products…

Oats

Oats have become increasingly more popular these days. They can be used as a traditional breakfast porridge, eaten soaked with milk of choice, made into oat milk, added to burgers and other foods, and even eaten in savory dishes at meals other than breakfast. When comparing prices, I focused on old fashioned rolled oats, either regular or quick cooking. Prices varied a lot, with $0.11 to $0.13 being the lowest cost per ½-cup serving (when measured dry) of rolled oats.

When comparing the price of steel cut oats, the cost per serving was about $0.18.

Rice

White Rice Long-Grain. There are many types of rice on the market, and they each have their own price points. For the most part, whichever type of rice you buy, it will have a relatively low cost per serving. When comparing the ever-popular long grain white rice, the cost per serving ranged from $0.04 to $0.08. This is an EXTREMELY low-cost food when considering cost per serving and can be a staple for many meals when on a tight budget.

Brown Rice, Long-Grain. When comparing the price per serving of brown rice, it was very comparable to the long-grain white rice, averaging about $0.06 per serving.

Pasta

Pasta is a standard low-cost food, often being sold for around $1.00 to $1.30 a pound (for traditional wheat-based pasta). It can be used in salads, side dishes, main dishes, soups, casseroles, and even as a crust for pizza. Food processors often list 2 ounces of dry pasta as a serving. From my personal experience, I find that to be about half what I would normally eat when having pasta as a main course. So, assuming pasta is the main course, we’ll count 4 ounces (dry) as one serving. At $1.30 a pound, that brings the cost of one serving to $0.33. If serving pasta as a side dish, using 2 ounces (dry) per serving, the cost would be about $0.16.

Bread

Bread can serve as a foundational element of many meals, from sandwiches to French toast to being used as a pizza base. Assuming a loaf of traditional bread costs about $3.00 and has 22 slices, the cost per slice is $0.14. The cost of specialty bread such as gluten-free bread is usually twice that of traditional wheat bread, and often has fewer slices per loaf. Assuming the cost of such a loaf is $6.00 with only 12 slices, the cost per slice is much higher at $0.50. If you’re on a tight budget and must eat gluten-free, then such bread may be too costly when money is tight. Opting for something else may be preferred.


Protein Foods…

Peanut (and Nut) Butter

Peanut butter can be used as a sandwich and snack filling, and even as a thickener and flavoring agent in sauces, dressings, and other foods. All nut/peanut butters are considered to be good sources of protein and may help meet nutritional needs, especially when dollars are short. Peanut butter is usually cheaper than nut butters, and is available in most grocery stores. Prices per 2-tablespoon serving vary widely among different types of peanut butters. One name brand all-natural peanut butter sold for $4.86 for a 26-ounce jar. The price per serving came to $0.21. Another name brand option of traditional peanut butter sold for $5.44 for a 40-ounce jar, bringing the cost per serving to $.16. A generic brand of traditional peanut butter sold for $4.68 for a 64-ounce jar, bringing the cost per serving to $0.08. DO read the labels because all peanut butters are not created alike. Ingredients DO vary, so be sure you’re getting what you need before making your purchase.

Nut butters vary in price depending upon the type of nut or seed used in the butter. When comparing a name brand of almond butter with a generic brand, of course the generic brand was cheaper per serving. The name brand sold for $6.97 for a 12-ounce jar, with 11 servings, bringing the cost per serving to $0.64. That may be too high when money is tight. The generic brand of almond butter was a little cheaper, selling for $4.98 for 12 ounces, bringing the cost per serving to $0.45. That is still not an extremely cheap food, but it is less costly than meat. So, it may or may not work for you when money is tight.

Dried Beans, Lentils, and Chick Peas

Dried legumes are well known for being inexpensive sources of protein. They can be cooked and used as a main dish or side dish, and added to soups, stews, casseroles, burger, tacos, burritos, and even salads. The prices will vary among the different varieties, but any way you go, you’ll get a lot of food for your dollar. Yes, they must be soaked and cooked, but there is not a lot of hands-on time spent in the process, and it’s actually very easy. Extras can be stored in the refrigerator or in the freezer for a longer period of time. Dried beans, lentils and peas should be a first-choice for a protein source when on a tight budget.

Canned Baked Beans

Canned baked beans are a very inexpensive choice when planning meals on a tight budget. Simply open the can and they are ready to use. They can be used as-is or more flavorings added, if desired, although that is not mandatory. One name brand of baked beans was sold for $1.50 for a 28-ounce can. The can held 6 each ½-cup servings, bringing the cost per serving to $0.25. Putting together a main dish with canned baked beans can’t be any easier when on a tight budget!

Canned Tuna

Canned tuna is another very quick and easy protein option when planning meals on a tight budget. When comparing prices, a 12-ounce can of name brand tuna sold for $2.08. There were three servings listed on the Nutrition Facts panel, bringing the cost per serving to $0.69. Not bad for a complete protein, and it’s cheaper than meat.

Eggs

A dozen eggs can be found in just about any grocery store. They often sell for around $1.50 a dozen, coming to about $0.13 each. This is REALLY inexpensive considering they can be used as a main course, boiled and added to salads and other dishes, used as binding agents in breads, pancakes, and other cooked or baked foods, and even eaten as snacks. When on a tight budget, having a dozen eggs in the refrigerator can help to stretch your dollars in a lot of ways!


Dairy…

Milk

Buying milk by the gallon is cheaper than buying it in smaller containers. If you’re a milk drinker, this may be your preferred option. Nonfat dry milk is usually cheaper than fluid milk, but the flavor is certainly not the same. If you don’t use a lot of milk, but want to have some available, consider buying a small box of dry milk and mix up only what you need at the moment.

Non-Dairy Milk

Non-dairy milks are without a doubt more expensive than cow’s milk. However, there are many reasons why some people avoid cow’s milk and opt for plant-based milks. If you prefer plant-based milks yet find them to be too expensive at the moment, consider making your own oat milk. It’s not hard to make, and you can easily make as much or as little as you want at a time. This saves money and allows you to use what you probably already have in your pantry.


Tips for Healthy Eating When Money is Short…

Plan Home-Cooked Meals and Make a Grocery List

Take time to plan your meals in advance, if at all possible. When money is tight, it’s far cheaper to prepare meals yourself than ordering take-out or going to your favorite restaurant. Take a look in the refrigerator, pantry and freezer and incorporate what you can that you already have into the next week’s meals. This will not only save money, but will help to rotate your food so it’s used before it gets stale or goes bad. Make a grocery list of what you’ll need (that you don’t already have) to make those meals. Try to avoid adding too many extra things that won’t be needed for the next week.

Stick with Your Grocery List When Shopping

When you’re at the store do your best to stick with your grocery list. When choosing items, look for the cheapest option and choose that, if it will work for you. This might be the least cost per ounce, pound, or by the “each.” Sometimes the label on the store shelf will list the price per unit. This can make shopping easier than trying to do the math yourself. If you see something you forgot to add to the list that you know you don’t have at home and will need for the meals you’ve planned, then get it. If it’s not needed for the next week, let it wait and save those few dollars for the moment.

Save Time by Fixing Large Meals and Using the Leftovers

This saves time over the course of the week. Leftovers can be used for lunches the next day, or used as small portions along with a salad for another main meal. They can also be frozen in individual serving size containers for use later when time and/or money is short.

Avoid Shopping When You’re Hungry

Shopping when you’re hungry is a BIG way to add to the grocery bill. It’s all-too-easy to pick up extra items when you have an empty stomach. Before you know it, you’ve gone way over budget. So, try to arrange your shopping trips after having eaten a substantial meal. It’ll do a budget good!

Buy Less Processed Foods (Strive for None)

Less processed, whole foods are healthier to eat than processed. Sometimes, they are cheaper. For instance, a brick of cheese is usually less costly than shredded packaged cheese. A whole cauliflower is cheaper than packaged cut cauliflower. A whole melon will be cheaper per pound than a cut melon. Nevertheless, many people swear that processed foods are cheaper when groceries are tallied. In some cases, that may be true. However, when considering the toll processed foods have on your health, eating whole, unprocessed foods (and preparing meals yourself from plain ingredients) will help to regain and preserve your health far better than their processed counterparts. There’s an adage that applies here… “You either pay for it at the grocery store, or pay later at the doctor’s office.” Truer words could never be spoken when it comes to food. If you want to keep or regain your health, remember that motto and opt for less processed foods any time you can. Your body will thank you for it. AND, so will your pocketbook in the long run!

Buy Generic Brands When You Can

Buy generic brands if you can. Read the labels to be sure they will meet your needs. Sometimes the ingredients in generic brands will differ than those in the name brands. This may or may not be right for you. If possible, use the generic brands since they will almost always be cheaper.

Avoid Junk Food

If a food won’t promote good health, then it’s not worth spending your precious dollars on. If you yearn for a dessert after a meal, choose fresh fruit instead of something laden with added sugars, fat and empty calories. Those foods are unhealthy to eat and are expensive too. Enjoy a piece of fresh fruit and savor it as you eat it. Slow down, enjoy the moment, taste the natural sweetness, chew slowly, and enjoy nature’s bounty as it is intended to be enjoyed.

Take Advantage of Sales

If items you use on a regular basis are on sale, buy a few extra to save dollars over time. If the items are perishable, make sure you can use them before they go bad. Otherwise, you’re simply tossing your hard-earned dollars in the trash.

Eat More Plant Proteins

Plant proteins such as beans, peas, lentils, nuts and seeds are cheaper per serving than most animal proteins. Such foods also provide an array of vitamins and minerals, along with fiber that is not found in animal foods. Even if you enjoy meat, fish and poultry, making one or two days a week “meat-free” will boost your health in many ways as well as giving your budget some relief.

Shop in Season

Fresh foods in season will often be cheaper than those that had to be shipped half way around the world to reach you during off-season months. Foods in season will also be higher in nutrient value than older ones that had to be shipped long distances to reach your grocery store. So, shopping in season and buying locally when possible not only gives your wallet a break, but also boosts your nutritional intake too.

Don’t Forget Frozen Fruits and Vegetables

Fruits and vegetables are usually frozen soon after being harvested. So in some ways, they may be fresher than their counterparts in the fresh produce isle. There may be some nutrient loss during the freezing process, but there is also nutrient loss over time in fresh fruits and vegetables. The only way to get around that is to pick your own from your personal garden or a local farm. Shopping at a local farm market is the next best thing, but in many areas they are not available year-round. Your next best option would be to choose frozen fruits and vegetables. Frozen fruits and vegetables can be used in meals, added to smoothies, used as a topping for morning porridge, thawed and used in salads and desserts. They are very convenient since they will be there when you’re ready for them, with no worries about perishability in the refrigerator.

Buy in Bulk When You Can

If you have storage room, buying in bulk can save money over time since many foods are cheaper by the “unit” when purchased in bulk. Grains are an excellent example. Rice, millet, barley, and oats can often be found in bulk, whether online or in some grocery stores.

Start a Garden, If Possible

Growing your own food is not only rewarding, but cheaper than buying it in grocery stores. Seeds are inexpensive, considering the yield you get from a mere seed or two. Extra seeds can be kept in the freezer to prolong their life, so they can be good for more than one growing season. Also, freshly grown produce often tastes better than store-bought, and its nutrient content should be higher than that of store-bought counterparts since they are not as old. So, get venturesome and start a garden if you can. Start small as you learn, then plant larger gardens as time, space, and knowledge allows.

Pack Your Lunch

Taking your own lunch ensures you have complete control over what’s in your meals. You’ll very likely be eating more nutritious meals than you would have if buying your lunch out, AND you’ll be saving money too. If you’re used to buying lunch out on a regular basis, taking your own lunch may seem like a daunting task. However, it doesn’t have to be. Make extra food in the evenings, pack it up in a to-go container, and place it in the refrigerator for the night. In the morning, simply take your lunch container to work with you and store it in the refrigerator there, if there is one. If not, put it in an insulated bag with ice packs and it should keep well for you until lunchtime. Most offices have a microwave available, so if it needs to be heated, use the microwave. Packing lunch for the next day while preparing supper (OR packing some leftovers when you’re finished eating supper) makes taking your lunch extremely easy and doesn’t take any extra time in the morning. Simple planning ahead makes this very do-able.


Resources
https://www.healthline.com/nutrition/29-cheap-healthy-foods#section2

https://tuppennysfireplace.com/best-frugal-foods-buy-broke/

https://money.usnews.com/money/personal-finance/spending/articles/cheap-foods-to-buy-when-youre-broke

https://familiesforfinancialfreedom.com/cheapest-groceries-list/

https://greatist.com/health/44-healthy-foods-under-1#Drinks

https://www.mymoneyblog.com/cheapest-vegetables.html

https://www.thekitchn.com/best-cheap-fruits-vegetables-258057

https://www.backyardboss.net/cheapest-fruits-and-vegetables/

https://www.almanac.com/content/measuring-vegetables-recipes-pounds-cups#

https://www.walmart.com/

https://www.healthline.com/nutrition/19-ways-to-eat-healthy-on-a-budget#section5

https://www.wisechoicemarket.com/blog/-the-true-cost-of-processed-foods/


About Judi

Julia W. Klee (Judi) began her journey enjoying “all things food” in elementary school when she started preparing meals for her family. That love of food blossomed into a quest to learn more and more about health and wellness as related to nutrition. She went on to earn a BS Degree in Food and Nutrition, then an MS Degree in Nutrition. She has taught nutrition and related courses at the college level to pre-nursing and exercise science students. Her hunger to learn didn’t stop upon graduation from college. She continues to research on a regular basis about nutrition as it relates to health. Her hope is to help as many people as possible to enjoy foods that promote health and wellness.
Blueberries

How to Keep Blueberries Fresh

Fresh blueberries are certainly seasonal. But with the wonders of modern transportation, we can find fresh blueberries in most grocery stores year-round. To say the least, they’re healthful to eat and most of us would benefit from including them in our foods as much as possible. Yet, we’ve all experienced the disappointment of having our prized fresh blueberries turn to moldy mush in the refrigerator. AND, this happens FAR earlier than expected. So, what can we do to remedy this situation? I found a way…read on!

First, moisture is the problem with fresh blueberries. With these delicious berries, moisture invites mold and decay. So, it’s important to keep your fresh berries as dry as possible. Absolutely don’t wash them until you’re about to use them! “OK, I know that” you say.

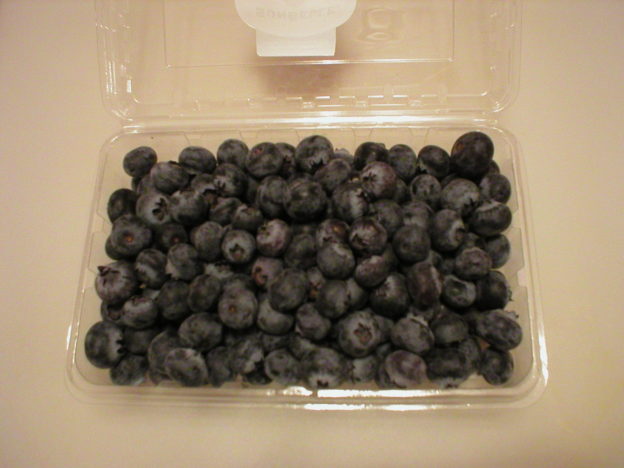
Here’s the key…When you get your fresh pack of blueberries home, before putting them in the refrigerator, look at the bottom of the carton. If it has a moisture absorber in it, great! Some packages have them whereas others do not. So, that’s Tip #1…look for a moisture absorber.

Tip #2…If it doesn’t have a moisture absorber at the bottom of the container, OR if the moisture absorber looks damp, you’ll need to add your own moisture absorber. It’s really simple. Gently transfer the berries to a clean, DRY bowl. Fold a paper towel or two to fit the bottom of the container and lay the folded paper towel in the container. Gently transfer the berries back into their original container and store them in the refrigerator. It’s THAT simple. They WILL last longer because the paper towel will help to absorb moisture that is released from the berries as they sit in their box.

Tip #3…To take this one step further and help the berries to last even longer, save a container from berries that you’ve finished up. Wash the container well and allow it to dry completely. When you purchase your next box of fresh berries, follow the same procedure as Tip #2, but also place a folded paper towel in the bottom of your extra container. When you return your newly purchased berries back to their container, divide the berries between the two containers, leaving each container only about half full. This allows for more air flow around the berries, helping them to keep fresh even longer.

I’ve tried these methods and trust me, they work! Our fresh berries have lasted much longer than when we simply put the containers directly in the refrigerator. Now, please don’t ask me exactly how long the berries will keep like this. That depends upon how old the berries are to begin with, so I can’t predict that. Nevertheless, we have not had to toss moldy berries in the trash since I started doing this simple trick.

Below are videos where I demonstrate these tips. I hope this helps!

Enjoy,
Judi

Keep Blueberries fresh longer…

About Judi
Julia W. Klee (Judi) began her journey enjoying “all things food” in elementary school when she started preparing meals for her family. That love of food blossomed into a quest to learn more and more about health and wellness as related to nutrition. She went on to earn a BS Degree in Food and Nutrition, then an MS Degree in Nutrition. She has taught nutrition and related courses at the college level to pre-nursing and exercise science students. Her hunger to learn didn’t stop upon graduation from college. She continues to research on a regular basis about nutrition as it relates to health. Her hope is to help as many people as possible to enjoy foods that promote health and wellness.
Save Money on Hair Conditioner

Hair conditioner is something most of us use on a regular basis. Without giving much thought to it we usually follow the simple directions…apply to hair, rinse out, dry and style hair as usual.

Have you ever given thought to how much you’re actually rinsing down the drain and how much is actually clinging to your hair? Well I have, and decided to try applying only as much as I could imagine actually stuck to my hair after being rinsed out. It’s a LOT less!

So, with that in mind, I gave it a try. I applied very little conditioner to my freshly washed hair…only as much as I imagined that stayed on my hair after it was rinsed…and then didn’t rinse anything out. Guess what??? It was wonderful. It was just as good, if not better, than having applied a lot more then rinsed it out of my hair.

So, what am I doing and how much am I using? My hair is about shoulder length. I apply a very small amount of conditioner to the palm of my hand, about 1/4 teaspoon at the most. Yes, that’s all. Then I rub my hands together, focusing on getting the conditioner onto my fingers. Then I rub my hands in my hair, disbursing the conditioner throughout my hair the best I can. Combing the hair helps to spread the conditioner around. That’s it! Then I dry my hair as usual. No rinsing; no waste. My one bottle of hair conditioner will go a LONG way with this method, saving some money along the way.

Yes, I know the question comes up…”Won’t my hair be greasy?” Well, yes it will IF you apply too much. The key to success here is being VERY stingy on how much you use. I literally use NO MORE than 1/4 teaspoon of it in one application. That’s FAR less than I would have used if I applied it to rinse it out. So, it’s a matter of experimenting to learn how much is right for you. If you do this and your hair turns out to be greasy, then you’ve used too much. Cut way back next time. If your hair turns out fuzzy, then you didn’t use enough.

Give this a try. It really does work as long as you don’t overdo it with the amount of conditioner you use. AND you’ll save some money along the way because one bottle will last a VERY long time!

At the top of this post is my video showing how I do this. I hope this helps!

Judi

Money Saving Tip…Buy Bar Soap for Less

In today’s world I don’t think there are many of us who prefer to do without soap. Even if we don’t bathe every day, at SOME point, we’re going to reach for a bar of soap to get washed up. Since we all must buy it at some point in time, why not save a few dollars along the way?

A while back I discovered that literally anyone can buy soap bases from online soap making supply stores. Really! They sell “melt and pour soap bases” that are literally what they say…you can melt them down, add whatever embellishments you want, pour them into a mold and allow them to harden back up. This is how many people sell “handmade” soaps online. It’s really easy AND you don’t even have to go through all the melting process. These bases are wonderful on their own and can simply be used just as they are. No embellishments needed!

These soap bases come in bulk bars, ranging from one pound increments up to 50 pounds. The varieties available are wide, ranging from clear soap base made with organic oils, olive oil, goat’s milk, honey, oatmeal, and much more. A typical bar of soap weighs four ounces, so a one pound bar will provide four bars of soap. My video (link below) shows just how simple it is to yield four bars of soap (or even eight small bars of hand soap) from a one pound block of soap base. These bases can be used just as they are. There is really no need to melt them down unless you truly want to add something to them. It’s not mandatory.

In the description box of the video, I have listed a number of online soap supply stores. I have no connection with any of them, so I am providing the list to help my viewers. If you want me to add a store to the list, please let me know and I’ll be happy to do so.

I have been buying and using soap bases for our bar soaps for years and have saved a good bit of money by doing this. I urge you to give it a try! Check out the video below.

I hope this helps!
Judi

Cheap, Effective DIY Bug Spray

If you’re like us, you don’t enjoy sharing living space with uninvited small flying creatures that make their way inside your home. Flies, mosquitoes, wasps…you name it…they’re no fun inside the house!

I discovered this do-it-yourself, cheap and VERY effective bug spray years ago. I always keep a bottle of straight rubbing alcohol (70%) in my bathroom near the tub to spray tile grout after a shower. One day a fly made its way into the bathroom. I grabbed the alcohol bottle and sprayed the fly. It dropped dead in no time! Really! It was the fastest, most effective bug killer I ever found!

We have tried this on fruit flies, wasps, flies, and mosquitoes. It literally has killed any insect we’ve ever sprayed with it! So…for a cheap, really effective do-it-yourself bug spray, just find an empty spray bottle and fill it with 70% rubbing alcohol. Do not dilute the alcohol. Use a quick spray or two on any unwanted insect in the house and you’ll quickly be rid of it.

ONE WORD OF CAUTION: Be mindful of what you’re spraying the alcohol on in your house (other than the bug). Rubbing alcohol WILL TEMPORARILY soften paint. If you do spray some on paint, such as on a fly in a window, simply do not touch the paint with anything until the alcohol dries out (this includes leaving the dead fly alone). This won’t take long at all as alcohol dries quickly. Once the alcohol dries out and the paint hardens back up (usually in less than a minute), you can pick up the dead bug.

Also, be careful about spraying this over finished wood furniture. Some finishes might be damaged, if only temporarily, by the alcohol. If in doubt, test a very small area with the alcohol in an inconspicuous area before spraying any bug that lands on your fine furniture. Otherwise, just wave the insect away from the furniture and spray it in flight or when it lands on something that can safely be sprayed.

No more bugs in the house! Yipee!

Hope this helps,
Judi

Overcharged on Produce at Local Store

I don’t normally write such a post, but this one is warranted. We shopped at a store in Carroll, Iowa yesterday (October 29, 2016). We eat a lot of fresh fruits and vegetables, so of course, I purchased a number of items that needed to be weighed at the register.

When checking out, I didn’t watch the prices as the cashier rang up our items (my mistake). It wasn’t until this morning that I actually looked at our receipt. What really caught my eye was the fact that I saw the price for the ONE honey crisp apple that I bought. I’ve never tried one and since they’re expensive, I just bought one to try. I noticed that the ONE apple cost $3.60. “What??” I yelped! I looked at the weight and according to the receipt that one apple weighed 1.35 lbs. I have an accurate digital kitchen scale. I weighed the apple and it weighed less than 8 ounces. Hence, I was charged more than double what I should have been for that one apple. (Note that at the store, I put the apple was in one of those produce lightweight plastic bags that you can grab from a dispenser, which I had removed after bringing the food home. So the “tare” weight was not added in, but there’s NO way that little plastic bag weighed over 8 ounces. I’m sure it weighed way less than an ounce.)

Then I got out the eggplant that I purchased and have not yet cut in any way. It too rang up for a lot more weight and cost than it should have. Then I checked other items that we had not used, and they ALL weighed more on the receipt than they actually did…way more…sometimes double the weight or more.

I called the store and spoke with someone in customer service. She said they check their register scales every other day. She got the register number from my receipt and said she would go check the scale right away.

This may be an innocent problem, but I’ve heard of such schemes in the past (where stores alter their scales to show items weighing more than they actually do) and I know from reading online that the law has cracked down on such things. I don’t know if this was deliberate or not, but knowing how Walmart does their best to make as much money as they can, any way they can, I suspect that they might deliberately calibrate their scales so they overcharge customers on items that must be weighed.

So…it’s time for all of us to check this out and make it known to any store that overcharges that you caught them in the act. We could go back to that store and easily prove our point by carrying the items back to have them reweighed. However, we live in a different town and that store is about 30 minutes drive from here (country driving, so we’re talking about 30 miles one way). If I lived closer, I’d carry the produce back and have customer service weigh them again and prove my point. I’m estimating I was overcharged $10 to $15 or more (total) on the assortment of produce I purchased that had to be weighed. Because of the cost in gasoline and time factor in going back to the store, I’m opting to make this event known to the public this way, and absorbing the loss rather than driving back to the store. I doubt I’ll ever purchase anything that must be weighed at that store again. AND I’ll watch prices on items as they’re rung up at any store I shop in from now on.

I hope this helps you as a reader in some way, if nothing more than making you aware that such things can and do happen and that we should ALL watch the monitor as items are being rung up at any cash register. As I’ve learned, it pays to watch.

Easily Remove Ring Around the Collar

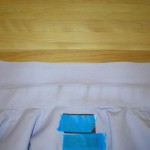
The other day I was ironing my husband’s shirts and discovered a BAD case of ring around the collar! It seems I should have noticed this well before now, but it just snuck up on me. I did a little research then got creative and came up with a VERY easy and EFFECTIVE way to get the stain out. This works whether the shirt has been worn (and not laundered), or even freshly washed, dried AND ironed. (Yes, really!)

Supplies needed: One old toothbrush, a small bowl of water, a little dish detergent that is a good grease fighter, and one dirty collar.

Lay the shirt so the collar lays open and flat. The shirt can be dry…no need to wet it down first.

Dirty shirt collar

Dirty shirt collar

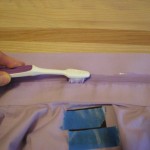
Put a little bit of dish detergent on your toothbrush and scrub the dirt line along the collar.

Scrub collar with dish detergent and toothbrush

Scrub collar with dish detergent and toothbrush

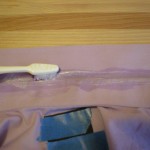
After you’ve done a little scrubbing and worked the detergent into the fabric, wet the toothbrush and scrub the dirt line some more, working up some suds.

Wet the toothbrush

Wet the toothbrush

Work up some suds

Work up some suds

After you’ve scrubbed the dirt line to your satisfaction, the shirt can be laundered immediately in your usual laundry detergent in whatever water temperature you normally use. IF the shirt was exceptionally dirty and you feel your dish detergent is not a great grease fighter, it may help to allow your shirt to sit for a while (up to 1 hour) before laundering it. Note that the collar does not need to be rinsed out before placing it in the washing machine. IF you feel you used a LOT of dish detergent and need to rinse some of it out, go ahead and rinse.

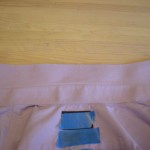
Washed, wet shirt...See how clean!

Washed, wet shirt…See how clean!

After it comes out of the washer, take a quick look to be sure all the ring was scrubbed out. If not, repeat the process. If so, dry it as usual.

Dried shirt...good as new!

Dried shirt…good as new!

This is a fast and easy process that makes shirts look good as new! The real benefit is that you don’t need to buy extra chemicals to do the job. You should already have what you need on hand!

To see my video on this process, click below. Enjoy! Judi

Safely Remove Odor From Dishcloths (No Bleach!)

I recently stumbled upon this easy way to remove lingering odor from kitchen dishcloths. It works with any type of cloth…crochet or knit cotton, microfiber, standard kitchen dishcloths…whatever!

It’s better than bleach for a few reasons. First, bleach is quite toxic so should only be used when absolutely necessary. It will quickly remove color from any cloth it comes in contact with if you use too much (which is very easy to do).

Also, (and I know this for a fact), bleach destroys cotton fiber. Yes, really. I learned this during my undergraduate degree in a textiles lab. We took a small piece of cotton fabric and soaked it in 100% bleach. The fabric disintegrated! Moral of the story…Don’t use bleach on cotton if you care about the fabric!

New trick…boil those smelly yet laundered dishcloths. Place them in a pot of water. Bring it to a boil and boil them for a minute or two. Then leave them on the burner and turn it off. Allow them to sit for 5 to 10 minutes to cool down some and continue killing any remaining germs. Then drain the cloths and add cool water until they can be safely handled. Wring them out and (if desired) dry them further by wrapping them in a clean dry towel. Then toss them in the dryer until they are dried. Done!

It’s really very easy and effective, AND no toxic chemicals involved! Here’s a video on the topic! Enjoy, Judi

Baking, Cooking, Food, Cleaning Questions Answered

I recently had someone ask me a question, which sparked an idea. Since I have a lot of food, nutrition, and Family and Consumer Sciences education and experience, I’ll put that to work for YOU!

I’ve decided to make myself open to researching answers to YOUR QUESTIONS related to food–be it cooking, baking, preparation, preservation, or nutrition– and household issues, such as cleaning.

Most people know HOW to find answers to their questions, but simply don’t have the time for the research. I’ll do it for you. Answers will likely come in the form of a video. They may also be in a blog post, or simply a reply to a posted comment. Whichever is most appropriate will suffice.

Below is a link to my video offering this service. Feel free to comment below the video on YouTube or below this post! I’m happy to help!

Judi