Category Archives: Misc

Homemade Vegetable Broth

Homemade Vegetable Broth

Making your own vegetable broth is not hard. Yes, it does take a little time, but it’s a great way to use up some vegetable scraps and can save a lot of money over time if you use a lot of it when cooking. Why not give it a try? You can make a small amount just for starters to see how it goes for you. When you’re comfortable, make a big pot of it, divide it into containers holding the amount you expect to use at one time, and freeze it. It should keep for up to 6 months in the freezer. What you add to your vegetable broth can vary according to what you have available and your personal preferences. There are few “hard and fast” rules to making it, so why not make some? If nothing else, add it to homemade vegetable soup and you’ll be glad you did!

Below is a video demonstration of how I make my own vegetable broth. The written recipe is below that, followed by ideas on ways to use the leftover vegetables from the broth.

Enjoy!
Judi

Homemade Vegetable Broth

1 onion, chopped (or 4 tablespoons of dried minced onion)
4 stalks celery, chopped
4 carrots, sliced
4 to 6 cups chopped greens of your choice (i.e. kale, collards, cabbage, bok choy, turnip greens)
1 (6 oz) can tomato paste
2 Tbsp dried parsley
4 Bay leaves
2 tsp dried thyme
Salt and pepper (to taste, optional)*
Water to fill the pot

Optional add-ins of choice:
Bell peppers
Mushrooms
Corn cobs
Any vegetable scraps you saved in the freezer for making broth
Sugar
Garlic
Nutritional yeast
Marjoram

Place all ingredients in a large pot with a lid. Fill the pot with water. Cover the pot and bring everything to boil. Lower the heat, and allow everything to simmer for at least 1 hour (2 hours or more is preferable to get the most flavor out of your vegetables). When the vegetables are well cooked and flavors blended, remove the pot from the heat and allow it to cool some. Strain out the vegetables and place the broth in covered containers and label with the date made. Store in the refrigerator for up to 4 days, or in the freezer for up to 6 months.

Note: When freezing broth, it is helpful to store it in containers that hold the amount you anticipate needing (or in increments of that amount). For instance, storing it in 1, 2 or 4-cup increments can be helpful when making soups calling for broth. Simply remove one or two containers and you’ll know you have the right amount of broth needed for your recipe.

* Adding salt, pepper, and other seasonings (such as garlic) is actually optional. Remember that your broth will be used in future recipes to add flavor to foods. It is generally not used alone as a soup in itself, but added to soups for flavor. Being conservative on seasonings allows you the freedom to season future dishes appropriately without having to take into consideration what was already added to the broth.

Ideas for using the vegetables from making the broth…
Yes, the flavor of the vegetables WILL be diminished after cooking them to make broth (at least, that’s the goal). But they are still OK to eat and there is still some nourishment left in them, along with their fiber. So, why not use them somehow? Here are some ideas.

* Season them with your favorite herbs and maybe a little salt and pepper, and simply eat them as a side dish with a meal. If the flavor is still too bland, combine them with some vegetables that were not used in making the broth. Cook the “new” vegetables however you want and add in the broth vegetables at the last minute, just to heat them up.

* Add them along with fresh vegetables to soups (especially vegetable soup), stews, and casseroles.

* Add them along with sautéed mushrooms and onions to an omelet.

* Puree them and add them to a Sloppy Joe mixture for bulk and thickening.

* Season them and serve them over rice or another grain.

* Add them to quinoa salad.

* Puree them and add them to chili as a thickening agent.

* Freeze them for later use.

* Squeeze them through a colander, in cheesecloth, or through a nut milk bag to get yet more broth out of them. Make pulp crackers with the pulp or add it to your compost pile.

* Puree them and add them to tomato or marinara sauce.

* Puree them and add them to burger patties or meatloaf (both meat or meatless).

* Puree them in a food processor, season the mash to your liking, spread onto dehydrator trays and dry them into veggie crackers.

* Puree the vegetables and stir them into softened cream cheese, cashew cream, or another base. Add whatever seasonings you like and use it as a vegetable dip.

* Puree the vegetables and use them as a base for creamy potato soup.

* If nothing else appeals to you, add them to a compost pile.

About Judi
Julia W. Klee (Judi) began h
er journey enjoying “all things food” in elementary school when she started preparing meals for her family. That love of food blossomed into a quest to learn more and more about health and wellness as related to nutrition. She went on to earn a BS Degree in Food and Nutrition, then an MS Degree in Nutrition. She has taught nutrition and related courses at the college level to pre-nursing and exercise science students. Her hunger to learn didn’t stop upon graduation from college. She continues to research on a regular basis about nutrition as it relates to health. Her hope is to help as many people as possible to enjoy foods that promote health and wellness.

(Almost) Tropical Slushy

(Almost) Tropical Slushy

Here’s a REALLY fast, easy and delicious dessert or treat you can whip up in no time on a hot summer day. This is a spoonable treat, not your typical slushy that you sip through a straw. The recipe makes about 3 servings, but it could VERY easily be increased to make whatever amount you want. It’s best served right away, but can be kept in the refrigerator for later use and partially refrozen if needed.

Below is a video showing how to make this treat. The written recipe follows the video.

Enjoy!
Judi

(Almost) Tropical Slushy
Makes 3 Servings

1 cup very cold (or partially frozen) roasted butternut squash*
1 cup frozen mango cubes (not thawed)
½ cup canned pineapple with juice**

Place all ingredients in a blender and process until smooth. If you prefer a sweeter mixture, add a little sweetener of your choice. Serve immediately.

Note: This mixture is at its best when it is freshly made and has partially frozen elements in it. It will be like a spoonable slushy. Store any leftover mixture in a covered container in the refrigerator. The leftover mixture will taste good, but will not taste as sweet as when it is icy cold.

* For a true slushy texture, place the butternut squash in the freezer and use it when it is partially frozen (but not rock solid).

** Any type of canned pineapple may be used since it will be blended smooth. Fresh pineapple may also be used, but you may need to add a couple tablespoons of water or pineapple juice so it will blend smoothly.

About Judi
Julia W. Klee (Judi) began her journey enjoying “all things food” in elementary school when she started preparing meals for her family. That love of food blossomed into a quest to learn more and more about health and wellness as related to nutrition. She went on to earn a BS Degree in Food and Nutrition, then an MS Degree in Nutrition. She has taught nutrition and related courses at the college level to pre-nursing and exercise science students. Her hunger to learn didn’t stop upon graduation from college. She continues to research on a regular basis about nutrition as it relates to health. Her hope is to help as many people as possible to enjoy foods that promote health and wellness.

Black-Eyed Pea Dip

Black-Eyed Pea Dip

Here’s an easy and healthful dip made with black-eyed peas. It’s vegan, SOS-free, healthful, easy to make, and delicious. It works well with vegetable sticks, chips, pita bread, with a salad, and can even be used as a sandwich spread. Try it sometime!

Below is a video demonstration of how to make the dip. The written recipe is below the video.

Enjoy!
Judi

Black-Eyed Pea Dip
Makes about 2-1/2 Cups

2 cups cooked black-eyed peas (or 1 (15-oz) can of black-eyed peas, rinsed and drained)
1/2 avocado, diced
1/4 tsp garlic powder (or 2 small cloves garlic, chopped)
1/3 cup chopped onion, or ½ tsp onion powder
1 stalk celery, chopped
1/3 cup chopped bell pepper
½ tsp dried dill weed
3 Tbsp apple cider vinegar or lemon juice

Add all ingredients to a blender or food processor and process until smooth. Taste and adjust seasonings, if needed. Serve with vegetables, crackers, pita bread, and chips, or use as a condiment on wraps and sandwiches. Store leftover in a covered container in the refrigerator and use within 3 days.

Cabbage

Inexpensive Foods with Tips for Healthy Eating When Money is Short

We’ve all had times when money is tight. It’s never fun, but in the vast majority of cases, things WILL get better. It’s usually a matter of “hanging in there” until it does. In the meantime, here is a list of inexpensive foods and tips for healthy eating that can help you make it through the tough times.


Vegetables…

Fresh Carrots

Fresh carrots are a great buy year-round. A one-pound bag is under a dollar in most grocery stores and can go a long way in servings. There is little waste, especially if they are not peeled. Simply wash them very well and cut off the ends and any area that doesn’t look good. They can be eaten raw in salads or as a snack, added to soups, stews, and casseroles, served as a side dish, and included in main dishes. A pound of carrots yields about 3-1/2 cups when sliced. Assuming a serving is about one cup, and the cost of one pound of carrots is $0.75, that brings the cost per serving to about $0.21. The cost of a half-cup serving of cooked carrots, at $0.75 per pound would be about $0.11 each.

Fresh Cabbage

A head of fresh cabbage packs a lot of food within its head. Whether it’s chopped, shredded, fermented, stir-fried, boiled, roasted, sautéed, or used as a wrap, we can get a lot of mileage out of one head of cabbage. One pound of shredded cabbage yields about 4-1/2 cups. Most cabbages weigh well over one pound, so if you opt for a heavy cabbage, you’ll get a lot of servings out of it. Assuming one serving is one cup of shredded cabbage, and assuming that cabbage cost $0.68 per pound, that brings the cost per serving to a mere $0.15.

White Potatoes

A five-pound bag of white potatoes can often be found for around $2.50, or even less. One pound of potatoes yields about 3-1/2 cups chopped or 2-3 cups mashed. Assuming a serving size is 2/3 cup, at $2.50 for five pounds, that brings the cost per serving of chopped potatoes to around $0.09, and mashed potatoes to around $0.13.

Sweet Potatoes

Fresh. Fresh sweet potatoes are usually around $1.00 per pound (sometimes less). As with white potatoes, one pound yields about 3-1/2 cups chopped. So comparisons are equal, assuming a serving size is 2/3 cup (which is what is listed as a serving size on the canned sweet potatoes), at $1.00 per pound, that brings the cost per serving to about $0.19.

Canned. A 40-ounce can of yams sells for about $2.25. The Nutrition Facts panel lists a serving size as being 2/3 cup with 7 servings being in the can (including the liquid). At that rate of usage, the cost per serving is about $0.32. Note that canned yams are usually packed with added sweeteners. If you are trying to avoid such additives, fresh sweet potatoes would be your best option.

Lettuce

Whole heads of lettuce are usually your cheapest option when buying lettuce. They are often the freshest to choose from, offer the most lettuce for your money, and have been shown to have the lowest bacterial count among the options, even when compared with triple-washed lettuce and lettuce blends in bags and plastic boxes. A whole head of non-organic lettuce averages about $1.50, with organic options up to twice that amount.

One head of lettuce yields from 4 to 6 cups when torn, depending upon the variety. For the sake of comparison, we’ll assume one head of lettuce yields 5 cups of torn leaves. Assuming 1 cup is a serving, that brings one serving of torn lettuce leaves to about $0.30. When comparing head lettuce to spring mix baby leaves in an 11-ounce tub that sells for $4.84, a one cup serving comes to $0.69 each.

Cauliflower (Fresh Whole Head vs Frozen Florets)

Fresh. The advantage to buying a whole head of cauliflower is that they are usually priced individually rather than by the pound. Choose a fresh cauliflower that feels very heavy for its size, with no browning on the surface, and you’ll get a lot of bang for your buck. A medium head of cauliflower yields about 6 servings and averages about $2.75 in cost. That brings the cost per serving to $0.46.

Frozen Cauliflower Florets. Frozen cauliflower florets may be found in some stores. When writing this, I found a 12-ounce bag of frozen cauliflower florets for $1.79. The Nutrition Facts panel suggested a serving size as being ¾ of a cup, with 3 servings in the bag. That brings the cost to $0.60 per serving.

Fresh Kale or Other Greens by the Bunch

A one-pound bag of fresh (not organic) kale costs about $2.94. The bag lists about 6 servings per bag. That comes to $0.49 per serving.

Bunches of fresh greens, such as kale, turnip greens, and collard greens often sell for about $1.48 each. Bunch sizes vary, so it’s impossible to precisely state the cost per serving. However, assuming one bunch offers 4 servings, at $1.48, it comes to $0.37 per serving. With that, the individual bunches of greens are cheaper per serving than the prepackaged one-pound bags.

Canned Tomatoes and Tomato Paste

Canned tomatoes and tomato paste are available in just about any grocery store year-round. They are inexpensive and flavorful additions to many foods. They can be added to soups, stews, casseroles, sauces, dressings, and even beverages. Unless you grow your own tomatoes, the canned varieties are usually cheaper than buying fresh tomatoes for the same applications. The price of canned tomatoes (14.5-ounces) usually starts around $1.00 a can, with name brands being a little higher. Generic (6-ounce) cans of tomato paste may start as low as $0.42 a can with name brands being higher than that. Whichever you choose, they are a great buy and can add a lot of flavor to foods.

Frozen Vegetables

Frozen vegetables are a very easy and convenient food to have available. They can be used as side dishes and included into a wide array of other foods like salads, soups, stews, casseroles, etc. Many people are now buying frozen vegetables in steamable packaging, which makes cooking them in the microwave very easy and convenient. However, when comparing the cost per serving, the steamable packaging often adds extra expense to the vegetables. Notice that I said “often.” That is because this is not always the case. In this case, it’s helpful to compare cost per serving to determine which is cheaper…frozen vegetables in steamable packaging or those in regular packaging that cannot be placed in the microwave. Usually, those packaged in regular packaging are cheaper per serving, but not always, especially when comparing like items in a generic brand. That being said, however you buy them, frozen vegetables can go a long way in helping to stretch the food budget, depending upon how they are used.

Fresh Celery (Whole Bunch, Not Celery Hearts)

When shopping for celery, choosing the entire bunch will be cheaper than selecting a package of celery hearts. The whole bunch includes the leaves and root end. Many people cut off and discard the leaves, however, they are completely edible and add celery flavor to any dish they’re added to. If you have aversion to eating the celery leaves, place them in the freezer and save them for soup or stock. The entire bunch of celery often can be purchased for about $1.50, whereas the celery hearts will cost more than that, sometimes up to $3.00 for organic varieties.

Fresh Onions

One 3-pound bag of yellow onions can be found at many grocery stores for around $1.50 a bag. Onions are essential for flavoring some foods, and a 3-pound bag of onions can go a long way when being added to freshly prepared foods. They can be used raw in salads and on sandwiches, added to a huge array of cooked foods, and even caramelized and eaten as a side dish with a uniquely sweet flavor. For anyone who prepares food “from scratch” onions are a very inexpensive essential ingredient.

Fresh Garlic

Fresh garlic may appear to be expensive, since it is usually priced by the pound. However, a bulb of garlic is small and lightweight, bringing the cost per bulb down more than you would think at first glance. When priced by the “each,” garlic bulbs can be found for $0.50 each. Like onions, garlic is an essential ingredient in many home-cooked foods and there simply is no substitution. Considering that many recipes call for only one or two garlic cloves at a time, you can get some flavor bang for your buck when buying garlic.


Fruit…

Bananas

Bananas are one of the cheapest fruits available, often selling for around $0.69 a pound (and sometimes less). One medium banana will usually cost around $0.25 each, of course depending upon its size. They are filling and nutritious, so bananas are excellent options when on a tight budget. Even better is the fact that you can buy whatever number of bananas you want, down to only one, if needed.

Fresh Pineapple

Fresh pineapple is a fruit you may not think of when on a tight budget. However, they can often be found for around $2.25 each. Considering how much fruit you get from one whole pineapple, it’s a good buy, especially when comparing it to the cost of canned pineapple. One fresh pineapple contains about 5 cups of pineapple when cut into cubes. One-half cup is considered to be a serving, so one whole pineapple has about 10 servings of fruit. At $2.25 each, one serving of fresh pineapple comes to about $0.23. One 20-ounce can of pineapple chunks (packed in juice) sells for about $1.28. The can holds about 4-1/2 (1/2 cup) servings, bring the cost per serving to $0.28, so fresh pineapple is a better buy.

Watermelon (when in season)

One large watermelon in season offers a lot of servings and is a great bargain when considering the number of servings you get per fruit. When in season, they are usually sold by weight and are very inexpensive since they are usually plentiful. When off-season, many stores still carry them, but they are much more costly and would not be the cheapest option during the winter months and early Spring. Choose a melon that is heavy for its size, sounds hollow when tapped, and is yellowish on the side where it rested on the ground. There may be pre-cut melons available, but they will cost more per pound than the whole melons.

Frozen Mangoes

When thinking about inexpensive foods, mangoes usually don’t come to mind. However, when comparing the cost of a fresh mango to a large bag of frozen mango chunks, the frozen bag wins the prize. I found a 48-ounce bag of generic brand frozen mango chunks for $6.47. That may sound a bit pricey, but when considering the contents vs buying that same amount in fresh mangos, I considered the frozen option to be a good buy. The large bag had 10 each 1-cup servings, which is equivalent to about 10 average size mangoes. With the price of the large bag, that comes to about $0.65 per mango or per 1-cup serving. Where I live, fresh mangos usually sell for about $1.00 each. Sometimes they sell for less, but it’s not often that I can find them for as low as $0.65 each. So, with all things considered, if you enjoy mangoes, the frozen option may be a good choice for you. Also, the advantage of the frozen option is that you won’t be in a rush to eat them before they go bad. You can simply take what you need from the bag without issue.


Grain Products…

Oats

Oats have become increasingly more popular these days. They can be used as a traditional breakfast porridge, eaten soaked with milk of choice, made into oat milk, added to burgers and other foods, and even eaten in savory dishes at meals other than breakfast. When comparing prices, I focused on old fashioned rolled oats, either regular or quick cooking. Prices varied a lot, with $0.11 to $0.13 being the lowest cost per ½-cup serving (when measured dry) of rolled oats.

When comparing the price of steel cut oats, the cost per serving was about $0.18.

Rice

White Rice Long-Grain. There are many types of rice on the market, and they each have their own price points. For the most part, whichever type of rice you buy, it will have a relatively low cost per serving. When comparing the ever-popular long grain white rice, the cost per serving ranged from $0.04 to $0.08. This is an EXTREMELY low-cost food when considering cost per serving and can be a staple for many meals when on a tight budget.

Brown Rice, Long-Grain. When comparing the price per serving of brown rice, it was very comparable to the long-grain white rice, averaging about $0.06 per serving.

Pasta

Pasta is a standard low-cost food, often being sold for around $1.00 to $1.30 a pound (for traditional wheat-based pasta). It can be used in salads, side dishes, main dishes, soups, casseroles, and even as a crust for pizza. Food processors often list 2 ounces of dry pasta as a serving. From my personal experience, I find that to be about half what I would normally eat when having pasta as a main course. So, assuming pasta is the main course, we’ll count 4 ounces (dry) as one serving. At $1.30 a pound, that brings the cost of one serving to $0.33. If serving pasta as a side dish, using 2 ounces (dry) per serving, the cost would be about $0.16.

Bread

Bread can serve as a foundational element of many meals, from sandwiches to French toast to being used as a pizza base. Assuming a loaf of traditional bread costs about $3.00 and has 22 slices, the cost per slice is $0.14. The cost of specialty bread such as gluten-free bread is usually twice that of traditional wheat bread, and often has fewer slices per loaf. Assuming the cost of such a loaf is $6.00 with only 12 slices, the cost per slice is much higher at $0.50. If you’re on a tight budget and must eat gluten-free, then such bread may be too costly when money is tight. Opting for something else may be preferred.


Protein Foods…

Peanut (and Nut) Butter

Peanut butter can be used as a sandwich and snack filling, and even as a thickener and flavoring agent in sauces, dressings, and other foods. All nut/peanut butters are considered to be good sources of protein and may help meet nutritional needs, especially when dollars are short. Peanut butter is usually cheaper than nut butters, and is available in most grocery stores. Prices per 2-tablespoon serving vary widely among different types of peanut butters. One name brand all-natural peanut butter sold for $4.86 for a 26-ounce jar. The price per serving came to $0.21. Another name brand option of traditional peanut butter sold for $5.44 for a 40-ounce jar, bringing the cost per serving to $.16. A generic brand of traditional peanut butter sold for $4.68 for a 64-ounce jar, bringing the cost per serving to $0.08. DO read the labels because all peanut butters are not created alike. Ingredients DO vary, so be sure you’re getting what you need before making your purchase.

Nut butters vary in price depending upon the type of nut or seed used in the butter. When comparing a name brand of almond butter with a generic brand, of course the generic brand was cheaper per serving. The name brand sold for $6.97 for a 12-ounce jar, with 11 servings, bringing the cost per serving to $0.64. That may be too high when money is tight. The generic brand of almond butter was a little cheaper, selling for $4.98 for 12 ounces, bringing the cost per serving to $0.45. That is still not an extremely cheap food, but it is less costly than meat. So, it may or may not work for you when money is tight.

Dried Beans, Lentils, and Chick Peas

Dried legumes are well known for being inexpensive sources of protein. They can be cooked and used as a main dish or side dish, and added to soups, stews, casseroles, burger, tacos, burritos, and even salads. The prices will vary among the different varieties, but any way you go, you’ll get a lot of food for your dollar. Yes, they must be soaked and cooked, but there is not a lot of hands-on time spent in the process, and it’s actually very easy. Extras can be stored in the refrigerator or in the freezer for a longer period of time. Dried beans, lentils and peas should be a first-choice for a protein source when on a tight budget.

Canned Baked Beans

Canned baked beans are a very inexpensive choice when planning meals on a tight budget. Simply open the can and they are ready to use. They can be used as-is or more flavorings added, if desired, although that is not mandatory. One name brand of baked beans was sold for $1.50 for a 28-ounce can. The can held 6 each ½-cup servings, bringing the cost per serving to $0.25. Putting together a main dish with canned baked beans can’t be any easier when on a tight budget!

Canned Tuna

Canned tuna is another very quick and easy protein option when planning meals on a tight budget. When comparing prices, a 12-ounce can of name brand tuna sold for $2.08. There were three servings listed on the Nutrition Facts panel, bringing the cost per serving to $0.69. Not bad for a complete protein, and it’s cheaper than meat.

Eggs

A dozen eggs can be found in just about any grocery store. They often sell for around $1.50 a dozen, coming to about $0.13 each. This is REALLY inexpensive considering they can be used as a main course, boiled and added to salads and other dishes, used as binding agents in breads, pancakes, and other cooked or baked foods, and even eaten as snacks. When on a tight budget, having a dozen eggs in the refrigerator can help to stretch your dollars in a lot of ways!


Dairy…

Milk

Buying milk by the gallon is cheaper than buying it in smaller containers. If you’re a milk drinker, this may be your preferred option. Nonfat dry milk is usually cheaper than fluid milk, but the flavor is certainly not the same. If you don’t use a lot of milk, but want to have some available, consider buying a small box of dry milk and mix up only what you need at the moment.

Non-Dairy Milk

Non-dairy milks are without a doubt more expensive than cow’s milk. However, there are many reasons why some people avoid cow’s milk and opt for plant-based milks. If you prefer plant-based milks yet find them to be too expensive at the moment, consider making your own oat milk. It’s not hard to make, and you can easily make as much or as little as you want at a time. This saves money and allows you to use what you probably already have in your pantry.


Tips for Healthy Eating When Money is Short…

Plan Home-Cooked Meals and Make a Grocery List

Take time to plan your meals in advance, if at all possible. When money is tight, it’s far cheaper to prepare meals yourself than ordering take-out or going to your favorite restaurant. Take a look in the refrigerator, pantry and freezer and incorporate what you can that you already have into the next week’s meals. This will not only save money, but will help to rotate your food so it’s used before it gets stale or goes bad. Make a grocery list of what you’ll need (that you don’t already have) to make those meals. Try to avoid adding too many extra things that won’t be needed for the next week.

Stick with Your Grocery List When Shopping

When you’re at the store do your best to stick with your grocery list. When choosing items, look for the cheapest option and choose that, if it will work for you. This might be the least cost per ounce, pound, or by the “each.” Sometimes the label on the store shelf will list the price per unit. This can make shopping easier than trying to do the math yourself. If you see something you forgot to add to the list that you know you don’t have at home and will need for the meals you’ve planned, then get it. If it’s not needed for the next week, let it wait and save those few dollars for the moment.

Save Time by Fixing Large Meals and Using the Leftovers

This saves time over the course of the week. Leftovers can be used for lunches the next day, or used as small portions along with a salad for another main meal. They can also be frozen in individual serving size containers for use later when time and/or money is short.

Avoid Shopping When You’re Hungry

Shopping when you’re hungry is a BIG way to add to the grocery bill. It’s all-too-easy to pick up extra items when you have an empty stomach. Before you know it, you’ve gone way over budget. So, try to arrange your shopping trips after having eaten a substantial meal. It’ll do a budget good!

Buy Less Processed Foods (Strive for None)

Less processed, whole foods are healthier to eat than processed. Sometimes, they are cheaper. For instance, a brick of cheese is usually less costly than shredded packaged cheese. A whole cauliflower is cheaper than packaged cut cauliflower. A whole melon will be cheaper per pound than a cut melon. Nevertheless, many people swear that processed foods are cheaper when groceries are tallied. In some cases, that may be true. However, when considering the toll processed foods have on your health, eating whole, unprocessed foods (and preparing meals yourself from plain ingredients) will help to regain and preserve your health far better than their processed counterparts. There’s an adage that applies here… “You either pay for it at the grocery store, or pay later at the doctor’s office.” Truer words could never be spoken when it comes to food. If you want to keep or regain your health, remember that motto and opt for less processed foods any time you can. Your body will thank you for it. AND, so will your pocketbook in the long run!

Buy Generic Brands When You Can

Buy generic brands if you can. Read the labels to be sure they will meet your needs. Sometimes the ingredients in generic brands will differ than those in the name brands. This may or may not be right for you. If possible, use the generic brands since they will almost always be cheaper.

Avoid Junk Food

If a food won’t promote good health, then it’s not worth spending your precious dollars on. If you yearn for a dessert after a meal, choose fresh fruit instead of something laden with added sugars, fat and empty calories. Those foods are unhealthy to eat and are expensive too. Enjoy a piece of fresh fruit and savor it as you eat it. Slow down, enjoy the moment, taste the natural sweetness, chew slowly, and enjoy nature’s bounty as it is intended to be enjoyed.

Take Advantage of Sales

If items you use on a regular basis are on sale, buy a few extra to save dollars over time. If the items are perishable, make sure you can use them before they go bad. Otherwise, you’re simply tossing your hard-earned dollars in the trash.

Eat More Plant Proteins

Plant proteins such as beans, peas, lentils, nuts and seeds are cheaper per serving than most animal proteins. Such foods also provide an array of vitamins and minerals, along with fiber that is not found in animal foods. Even if you enjoy meat, fish and poultry, making one or two days a week “meat-free” will boost your health in many ways as well as giving your budget some relief.

Shop in Season

Fresh foods in season will often be cheaper than those that had to be shipped half way around the world to reach you during off-season months. Foods in season will also be higher in nutrient value than older ones that had to be shipped long distances to reach your grocery store. So, shopping in season and buying locally when possible not only gives your wallet a break, but also boosts your nutritional intake too.

Don’t Forget Frozen Fruits and Vegetables

Fruits and vegetables are usually frozen soon after being harvested. So in some ways, they may be fresher than their counterparts in the fresh produce isle. There may be some nutrient loss during the freezing process, but there is also nutrient loss over time in fresh fruits and vegetables. The only way to get around that is to pick your own from your personal garden or a local farm. Shopping at a local farm market is the next best thing, but in many areas they are not available year-round. Your next best option would be to choose frozen fruits and vegetables. Frozen fruits and vegetables can be used in meals, added to smoothies, used as a topping for morning porridge, thawed and used in salads and desserts. They are very convenient since they will be there when you’re ready for them, with no worries about perishability in the refrigerator.

Buy in Bulk When You Can

If you have storage room, buying in bulk can save money over time since many foods are cheaper by the “unit” when purchased in bulk. Grains are an excellent example. Rice, millet, barley, and oats can often be found in bulk, whether online or in some grocery stores.

Start a Garden, If Possible

Growing your own food is not only rewarding, but cheaper than buying it in grocery stores. Seeds are inexpensive, considering the yield you get from a mere seed or two. Extra seeds can be kept in the freezer to prolong their life, so they can be good for more than one growing season. Also, freshly grown produce often tastes better than store-bought, and its nutrient content should be higher than that of store-bought counterparts since they are not as old. So, get venturesome and start a garden if you can. Start small as you learn, then plant larger gardens as time, space, and knowledge allows.

Pack Your Lunch

Taking your own lunch ensures you have complete control over what’s in your meals. You’ll very likely be eating more nutritious meals than you would have if buying your lunch out, AND you’ll be saving money too. If you’re used to buying lunch out on a regular basis, taking your own lunch may seem like a daunting task. However, it doesn’t have to be. Make extra food in the evenings, pack it up in a to-go container, and place it in the refrigerator for the night. In the morning, simply take your lunch container to work with you and store it in the refrigerator there, if there is one. If not, put it in an insulated bag with ice packs and it should keep well for you until lunchtime. Most offices have a microwave available, so if it needs to be heated, use the microwave. Packing lunch for the next day while preparing supper (OR packing some leftovers when you’re finished eating supper) makes taking your lunch extremely easy and doesn’t take any extra time in the morning. Simple planning ahead makes this very do-able.


Resources
https://www.healthline.com/nutrition/29-cheap-healthy-foods#section2

https://tuppennysfireplace.com/best-frugal-foods-buy-broke/

https://money.usnews.com/money/personal-finance/spending/articles/cheap-foods-to-buy-when-youre-broke

https://familiesforfinancialfreedom.com/cheapest-groceries-list/

https://greatist.com/health/44-healthy-foods-under-1#Drinks

https://www.mymoneyblog.com/cheapest-vegetables.html

https://www.thekitchn.com/best-cheap-fruits-vegetables-258057

https://www.backyardboss.net/cheapest-fruits-and-vegetables/

https://www.almanac.com/content/measuring-vegetables-recipes-pounds-cups#

https://www.walmart.com/

https://www.healthline.com/nutrition/19-ways-to-eat-healthy-on-a-budget#section5

https://www.wisechoicemarket.com/blog/-the-true-cost-of-processed-foods/


About Judi

Julia W. Klee (Judi) began her journey enjoying “all things food” in elementary school when she started preparing meals for her family. That love of food blossomed into a quest to learn more and more about health and wellness as related to nutrition. She went on to earn a BS Degree in Food and Nutrition, then an MS Degree in Nutrition. She has taught nutrition and related courses at the college level to pre-nursing and exercise science students. Her hunger to learn didn’t stop upon graduation from college. She continues to research on a regular basis about nutrition as it relates to health. Her hope is to help as many people as possible to enjoy foods that promote health and wellness.

Blueberries

How to Keep Blueberries Fresh

Fresh blueberries are certainly seasonal. But with the wonders of modern transportation, we can find fresh blueberries in most grocery stores year-round. To say the least, they’re healthful to eat and most of us would benefit from including them in our foods as much as possible. Yet, we’ve all experienced the disappointment of having our prized fresh blueberries turn to moldy mush in the refrigerator. AND, this happens FAR earlier than expected. So, what can we do to remedy this situation? I found a way…read on!

First, moisture is the problem with fresh blueberries. With these delicious berries, moisture invites mold and decay. So, it’s important to keep your fresh berries as dry as possible. Absolutely don’t wash them until you’re about to use them! “OK, I know that” you say.

Here’s the key…When you get your fresh pack of blueberries home, before putting them in the refrigerator, look at the bottom of the carton. If it has a moisture absorber in it, great! Some packages have them whereas others do not. So, that’s Tip #1…look for a moisture absorber.

Tip #2…If it doesn’t have a moisture absorber at the bottom of the container, OR if the moisture absorber looks damp, you’ll need to add your own moisture absorber. It’s really simple. Gently transfer the berries to a clean, DRY bowl. Fold a paper towel or two to fit the bottom of the container and lay the folded paper towel in the container. Gently transfer the berries back into their original container and store them in the refrigerator. It’s THAT simple. They WILL last longer because the paper towel will help to absorb moisture that is released from the berries as they sit in their box.

Tip #3…To take this one step further and help the berries to last even longer, save a container from berries that you’ve finished up. Wash the container well and allow it to dry completely. When you purchase your next box of fresh berries, follow the same procedure as Tip #2, but also place a folded paper towel in the bottom of your extra container. When you return your newly purchased berries back to their container, divide the berries between the two containers, leaving each container only about half full. This allows for more air flow around the berries, helping them to keep fresh even longer.

I’ve tried these methods and trust me, they work! Our fresh berries have lasted much longer than when we simply put the containers directly in the refrigerator. Now, please don’t ask me exactly how long the berries will keep like this. That depends upon how old the berries are to begin with, so I can’t predict that. Nevertheless, we have not had to toss moldy berries in the trash since I started doing this simple trick.

Below are videos where I demonstrate these tips. I hope this helps!

Enjoy,
Judi

Keep Blueberries fresh longer…

About Judi
Julia W. Klee (Judi) began her journey enjoying “all things food” in elementary school when she started preparing meals for her family. That love of food blossomed into a quest to learn more and more about health and wellness as related to nutrition. She went on to earn a BS Degree in Food and Nutrition, then an MS Degree in Nutrition. She has taught nutrition and related courses at the college level to pre-nursing and exercise science students. Her hunger to learn didn’t stop upon graduation from college. She continues to research on a regular basis about nutrition as it relates to health. Her hope is to help as many people as possible to enjoy foods that promote health and wellness.

Quinoa

Quinoa 101 – The Basics

Do you enjoy quinoa, but are looking for some new ideas on how to flavor it, or what to do with it? I have answers! Below is a comprehensive article all about quinoa, from what it is and its health benefits, to how to select, store and prepare it, as well as serving ideas and tips, along with what goes well with quinoa. I even have some suggested recipe links to help you in your quest to find that perfect quinoa dish!

Enjoy!
Judi

Quinoa 101 – The Basics

About Quinoa
Quinoa (pronounced KEEN-wah) is typically used as a grain, but it is actually a seed in the same family as beets, chard, and spinach. It is not a member of the grass family of plants, as are grains. Quinoa has been enjoyed as a staple food for thousands of years beginning in South America, where it was called “the gold of the Incas.” Still today, Peru, Bolivia, and Ecuador remain the world’s top producers of this healthful seed.

There are different varieties of quinoa, usually denoted by their color. We see white or ivory quinoa most often in American grocery stores. But it can also be found in various shades of yellow, red and black. The white or ivory variety has the mildest flavor and cooks the fastest. The flavor of red and black quinoa is described as stronger and more earthy. Nevertheless, all varieties of quinoa have a nut-like flavor. Quinoa is naturally gluten-free is rated as being low in allergenic properties.

Nutrition and Health Benefits of Quinoa
For its size, this tiny seed offers a lot of nutrients. It supplies a lot of manganese, phosphorus, copper, magnesium, folate, fiber (both soluble and insoluble), and zinc. It also has small amounts of omega-3 fatty acids, and more monounsaturated fats than cereal grains. A three-fourth cup serving has 222 calories and 8 grams of high-quality protein (16% Daily Value). Its high fiber and protein content work together to qualify quinoa as a low-glycemic index food.

Furthermore, quinoa is also high in anti-inflammatory phytonutrients, giving this seed even more healthful benefits in the prevention and treatment of disease.

How to Select Quinoa
When buying quinoa, be sure there are no rips in the bag or box. Also look for signs of moisture or insects and avoid any such packages.

How to Store Quinoa
Quinoa will last for several months when kept in an airtight container in a cool, dry place. If kept in the refrigerator or freezer, uncooked quinoa will keep for 2 to 3 years. Cooked quinoa will keep well in the freezer for up to a year.

Once quinoa is cooked, store leftovers in an airtight container in the refrigerator. Use leftovers within a few days. If you won’t be able to eat it that quickly, place your container in the freezer.

How to Prepare Quinoa
Quinoa seed is covered with saponin, a type of phytonutrient that is actually a protective coating developed by the plant. Although it may have some positive health properties, saponin has a soap-like flavor. Most quinoa on the market has already been rinsed at the processing plant to remove some of this coating. However, because of this objectionable taste, most people opt to further rinse their quinoa well before cooking. To remove any remaining saponin, place quinoa in a fine mesh strainer and rinse it very well with fresh water as you gently rub the seeds. Drain well.

To cook quinoa, place 1 part seeds to 1-1/2 to 2 parts water in a saucepan. (Use the lesser amount of water if you want your quinoa to be less mushy.) Bring it to a boil, reduce the heat, and cover the pan. It usually takes about 15 minutes to cook. When done, the seeds will become somewhat translucent and the germ will partially release, forming a little white spiraled tail around the seed. Fluff the cooked seed with a fork before serving.

For a nuttier flavor, dry roast your quinoa first. Place the seeds in a dry skillet over medium-low heat. Stir constantly for 5 minutes, then cook as directed. Some people will add oil to the frying pan to add extra flavor and texture to their quinoa before cooking it.

Quick Ideas and Tips for Using Quinoa
* Serve cooked quinoa as a breakfast porridge by adding nuts, fruits, and milk of choice. Sweeten as desired.

* Use quinoa in place of pasta with your favorite pasta or noodle recipe.

* Add quinoa to vegetable soup.

* Add a little ground quinoa flour to cookie or muffin recipes for a protein boost.

* If you enjoy tabbouleh, but must eat gluten-free, substitute cooked quinoa for the bulgur wheat in your favorite recipe.

* To flavor your quinoa, add some herbs or spices to the pot when cooking it. Try a bay leaf, garlic, salt and pepper, or other seasonings of your choice. Some people add thyme to quinoa while it is cooking.

* Try cooking quinoa in broth of your choice rather than plain water. This will add flavor to your cooked quinoa and may add a lot of flavor to the dish you’ll be using it in.

* Add a little flavored oil to your quinoa as it starts to cook. Sesame oil, walnut oil, or coconut oil would all add distinct flavors to your cooked quinoa.

* Top quinoa with your favorite sauce. Alfredo, marinara, pesto, or cheese sauce are some options. Use your imagination!

* Try adding tomato, avocado and lime for a Southwest flavored quinoa.

* Make an interesting succotash by combining quinoa with summer squash, bell peppers, and corn.

* Quinoa soaks up and retains a lot of water. Drain off any extra water after it has cooked to prevent it from becoming soggy.

* Add quinoa to burger patties, whether they are meat or meatless.

* Add quinoa to chili while it’s cooking.

* “Warm up” your cooked quinoa by adding some cilantro and roasted poblano peppers for some heat. Add this to veggies for a quinoa bowl.

* Make quinoa into a pudding by cooking it slowly in the milk of your choice. Add sweetener and fruit, as desired.

Herbs/Spices That Go Well with Quinoa
Basil, cilantro, cumin, garlic, mint, oregano, parsley, salt

Foods That Go Well with Quinoa
Proteins, Legumes, Nuts, Seeds: Almonds, beans (in general), beef, chicken, eggs, nuts (in general), shrimp, turkey

Vegetables: Arugula, beets, bell peppers, carrots, celery, chard, chiles, chives, cucumbers, endive, greens (i.e. beet, collard), kale, mushrooms, onions, scallions, spinach, squash (winter), tomatoes, zucchini

Fruits: Avocados, citrus fruits, dried fruit, pineapple, pomegranate seeds

Grains and Grain Products: Corn, grains (in general, esp. those with mild flavors)

Dairy and Non-Dairy: Almond milk, cheese (esp. feta), yogurt

Other Foods: Oil (esp. olive), stock (i.e. mushroom, vegetable), vinegar

Quinoa has been used in the following cuisines and dishes…
Baked goods (i.e. breads, muffins), cereals (hot breakfast), Mexican cuisine, pilafs, salads (grain, green), soups, South American cuisines, stews, stuffed vegetables, stuffings, sushi, tabbouleh, veggie burgers

Suggested Flavor Combos Using Quinoa
Add quinoa to any of the following combinations…

Almond milk + cinnamon + nuts
Bell peppers + carrots + parsley + rice vinegar + sesame oil/seeds
Black beans + cumin
Black beans + mango
Cashews + pineapple
Cucumbers + feta cheese + parsley + tomatoes
Cucumbers + lemon + mint + parsley
Dill + lemon juice + zucchini

Recipe Links

Kale Salad with Meyer Lemon Vinaigrette https://damndelicious.net/2013/03/25/kale-salad-with-meyer-lemon-vinaigrette/

Quinoa Stuffed Bell Peppers https://damndelicious.net/2013/06/03/quinoa-stuffed-bell-peppers/

Blueberry Breakfast Quinoa https://damndelicious.net/2013/09/13/blueberry-breakfast-quinoa/

Roasted Shrimp Quinoa Spring Rolls https://damndelicious.net/2012/11/14/roasted-shrimp-quinoa-spring-rolls/

Garlic Mushroom Quinoa https://damndelicious.net/2014/05/02/garlic-mushroom-quinoa/

Strawberry Quinoa Salad https://damndelicious.net/2014/01/28/strawberry-quinoa-salad/

50 Creative Ways to Eat Quinoa: Healthy Quinoa Recipes https://greatist.com/eat/creative-ways-to-eat-quinoa#1

Healthy Quinoa Recipes https://www.foodnetwork.com/recipes/photos/healthy-quinoa-recipes

10 Easy Quinoa Recipes https://www.acouplecooks.com/easy-quinoa-recipes/

Resources

http://www.whfoods.com/genpage.php?tname=foodspice&dbid=142

https://www.foodnetwork.com/recipes/articles/healthy-eating-all-about-quinoa

https://www.bbcgoodfood.com/howto/guide/health-benefits-quinoa

https://www.eatbydate.com/grains/quinoa/

https://www.wikihow.com/Add-Flavor-to-Quinoa

https://www.bustle.com/articles/134474-17-ways-to-make-quinoa-taste-better-because-dinner-should-never-be-boring

Page, Karen. (2014) The Vegetarian Flavor Bible. New York, NY: Little, Brown and Company.

About Judi
Julia W. Klee (Judi) began her journey enjoying “all things food” in elementary school when she started preparing meals for her family. That love of food blossomed into a quest to learn more and more about health and wellness as related to nutrition. She went on to earn a BS Degree in Food and Nutrition, then an MS Degree in Nutrition. She has taught nutrition and related courses at the college level to pre-nursing and exercise science students. Her hunger to learn didn’t stop upon graduation from college. She continues to research on a regular basis about nutrition as it relates to health. Her hope is to help as many people as possible to enjoy foods that promote health and wellness.

Thyme

Thyme 101 – The Basics

Thyme is one of those herbs that we usually have in our dried herb/spice collection. When you do a little digging about thyme, you’ll learn that there’s SO much more to it than just flavoring chicken or beans. Its uses range from flavoring foods, to a sore throat remedy, to an insect repellent! Read on to learn about this ancient herb!

Enjoy,
Judi

Thyme 101 – The Basics

About Thyme
Thyme is a perennial herb in the mint family. It has a delicate appearance, with tiny leaves growing outward from a long stem. The leaves are small and long, with a green-grayish color on top and a lighter shade underneath. It has a strong aroma and flavor. There are about 60 different varieties of thyme, with French thyme (the common variety), lemon thyme, orange thyme, and silver thyme being the most common types. Thyme is used around the world in many food dishes and cuisines. It has a sharp grassy and woody flavor with floral notes, and like the song, it pairs well with parsley, sage and rosemary.

Thyme has been used since ancient times for culinary, aromatic, and medicinal uses. Ancient Egyptians included thyme in their embalming process when preparing deceased pharaohs for the afterlife. Ancient Greeks burned thyme as incense in temples. In medieval times, a sprig of thyme was given to knights as a sign of bravery. Thyme oil has been used as an antiseptic since the 1500’s.

Nutrition and Health Benefits of Thyme
Although we only consume small amounts of this herb in food, thyme is an excellent source of Vitamin C, a very good source of Vitamin A, and a good source of iron, manganese, copper and fiber.

Thyme has been used since antiquity for its medicinal and antiseptic properties. The main active ingredient is thymol and has been included in an array of personal hygiene and home sanitizing products. Thymol has been found to protect the fats in cell membranes and other cellular structures. It has been included in pesticides targeting bacteria, viruses and some animal pests like rats and mice. Thyme has been found to contain a number of flavonoids that increase its antioxidant activity. According to The World’s Healthiest Foods (https://whfoods.com), this brings thyme high on the list of foods providing antioxidant protection.

Thyme has been used in aromatherapy to provide relief from respiratory ailments and to stimulate the immune and circulatory systems.

The oils in thyme have been found to have antimicrobial activity against a number of bacteria and fungi, including Staphalococcus aureus, Bacillus subtilis, Escherichia coli and Shigella sonnei.

Very diluted essential oil of thyme has been used to treat skin and mouth infections. Note that thyme essential oil should always be very diluted, never ingested, nor used to treat children or pregnant women.

How to Select Thyme
Dried thyme is available in the spice section of most grocery stores. Most chefs recommend buying fresh thyme for its bright flavor and ease of use. Many grocery stores now carry fresh thyme in the produce department. Opt for sprigs with a vibrant color, free of dark spots and yellowing.

How to Store Thyme
Store fresh thyme in the refrigerator wrapped in a slightly damp paper towel within a plastic bag. It should keep for about 10 to 14 days. If it develops an “off” smell or appearance, or becomes soft, your thyme has spoiled. Discard it.

Dried thyme should be kept in an airtight container in a dry, dark place. It will keep well for about six months. If you notice your dried thyme has little aroma, especially when the leaves are crushed in your hand or with a mortar and pestle, it’s time to replace it.

How to Freeze Fresh Thyme
Fresh thyme can be frozen. First wash, trim and chop the thyme. Allow it to dry thoroughly, then place it in a freezer bag. Or, you could place your washed, trimmed and chopped thyme into ice cube trays. Add a small amount of water and freeze. When the cubes are frozen, transfer them to a freezer bag. For best quality, use frozen thyme within 4 to 6 months. However, it will be safe to consume long beyond that time frame.

Dried vs Fresh Thyme
The flavor of fresh and dried thyme are about the same. However, the dried herb needs some time to be rehydrated for the flavor to be released, so add it early during cooking. Fresh thyme can be added early during cooking or toward the end. The longer it cooks, the more flavor will be released. Many chefs use whole sprigs of fresh thyme and remove the sprigs before the food is served. The stems won’t break down during cooking, so removing the sprigs is necessary. However, the fresh leaves may also be removed from the stems and used in fresh or cooked foods.

How to Prepare Thyme
A spring of fresh thyme can simply be rinsed and then tossed into food that you’re cooking. Whether dried or fresh, thyme can be added to cooked foods at any stage of cooking. It’s important to note that the longer it is cooked, the more flavor it will release.

Quick Ideas and Tips for Using Thyme
* When converting fresh thyme to dried (or vice versa), use 3 parts fresh thyme for 1 part dried thyme.

*If a recipe calls for fresh or dried thyme and you don’t have any available, fresh or dried rosemary, sage, oregano, marjoram or dried basil (not fresh) may be substituted. Their flavors are similar to that of thyme and blend well with thyme.

* When poaching fish, place sprigs of fresh thyme on the fish and in the water for added flavor.

* The flavor of thyme blends well with beans, especially kidney beans, pinto beans, and black beans.

* Thyme blends well with eggs in omelets or when scrambled.

* The flavor of thyme blends well with tomatoes, so add some to tomato sauce or your favorite tomato dish.

* Make your own insect repellant by mixing 4 drops of thyme essential oil with 1 teaspoon of olive oil, or 4 drops of thyme essential oil with 2 ounces of water.

* Suffering from a cough or bronchitis? Make a soothing thyme tea by infusing three sprigs of thyme in 1-1/2 cups of boiling water. Allow it to steep for 5 to 15 minutes. Remove the thyme sprigs. Add a slice of ginger, a slice of lemon and a bit of honey, if desired. When it cools down, you could also add some sliced apples or peaches for a refreshing fruit beverage.

* For a sore throat, make a soothing gargle that fights bacteria by boiling thyme in water, then allow it to cool. Gargle three times a day. Researchers have found throat infections usually disappears in 2 to 5 days.

* For a refreshing beverage, make thyme-infused water. Place two whole bunches of thyme sprigs in 4 to 8 cups of filtered water (1 or 2 quarts) in a covered container or jar. Allow it to sit overnight at room temperature. In the morning, remove the thyme and add lemon and/or honey as desired. Sip throughout the day.

Other Herbs/Spices That Go Well with Thyme
Basil, bay leaf, garlic, lovage, marjoram, mint, mustard, oregano, parsley, pepper, rosemary, savory, sumac

Foods That Go Well with Thyme
Proteins, Legumes, Nuts, Seeds: Beans (in general), beef, chicken, eggs, fish, lamb, peas, pork, sesame seeds, tofu, venison

Vegetables: Beets, bell peppers, Brussels sprouts, carrots, chard, eggplant, fennel, greens (salad), leeks, mushrooms, onions, potatoes, spinach, squash (summer and winter), tomatoes, winter (root) vegetables, zucchini

Fruits: Apples, citrus (esp. lemon), pears

Grains and Grain Products: Corn, polenta, quinoa

Dairy and Non-Dairy: Cheese (esp. blue, cheddar, fresh, goat, and ricotta)

Other Foods: Oil (esp. olive)

Thyme has been used in the following cuisines and dishes…
Baked goods (i.e. biscotti, biscuits, cookies), Bouquets garnis (usually parsley, thyme and bay leaf), bread pudding, breads, Caribbean cuisine, Cajun cuisine, casseroles, chowders, Creole cuisine, egg dishes, European cuisines, French cuisine, gratins, Green cuisine, gumbos, herbes de Provence, Italian cuisine, Jamaican cuisine, marinades, Mediterranean cuisines, Middle Eastern cuisines, pasta dishes, salad dressings, salads (i.e. pasta), sauces (i.e. barbecue, cheese, cream, pasta, red wine, tomato), soups, stews, stocks, and stuffings

Suggested Flavor Combos Using Thyme
Combine thyme with any of the following combinations…
Garlic + lemon + olive oil
Goat cheese + olive oil
Onions + spinach
sesame seeds + sumac

Recipe Links
Grilled Salmon with Thyme and Lemon https://www.thespruceeats.com/grilled-salmon-with-thyme-and-lemon-334452

Our 35 Best Thyme-Infused Recipes https://www.epicurious.com/ingredients/our-best-thyme-infused-recipes-gallery

Roasted Potatoes with Lemon, Rosemary, and Thyme (vegan) https://theveglife.com/roasted-potatoes-with-lemon-rosemary-thyme-vegan/

Thyme and White Bean Pot Pies https://minimalistbaker.com/thyme-white-bean-pot-pies/

Thyme-Infused Vegetables https://www.vegetariantimes.com/recipes/thyme-infused-vegetables

Vegan Mushroom and Thyme Soup https://theminimalistvegan.com/mushroom-thyme-soup/

Dijon, Thyme, and Pine Nut Broccoli https://www.myrecipes.com/recipe/dijon-thyme-pine-nut-broccoli

Garlic and Thyme Pan Seared Mushrooms https://www.onegreenplanet.org/vegan-recipe/garlic-and-thyme-pan-seared-mushrooms-vegan-gluten-free/

Oven Roasted Potatoes and Carrots with Thyme https://www.sunset.com/recipe/oven-roasted-potatoes-carrots-with-thyme/

Resources
http://www.whfoods.com/genpage.php?tname=foodspice&dbid=77#descr

https://www.stilltasty.com/fooditems/index/18499

https://www.thespruceeats.com/all-about-thyme-996135

https://www.healthline.com/health/health-benefits-of-thyme#4

https://www.food.com/about/thyme-348

https://www.mccormick.com/spices-and-flavors/thyme

https://www.justapinch.com/recipes/dessert/cookies/thyme-uses-and-three-recipes.html

https://www.mariaushakova.com/2017/08/how-to-make-thyme-tea/

https://www.medicalmedium.com/blog/thyme-tea

Page, Karen. (2014) The Vegetarian Flavor Bible. New York, NY: Little, Brown and Company.

About Judi
Julia W. Klee (Judi) began her journey enjoying “all things food” in elementary school when she started preparing meals for her family. That love of food blossomed into a quest to learn more and more about health and wellness as related to nutrition. She went on to earn a BS Degree in Food and Nutrition, then an MS Degree in Nutrition. She has taught nutrition and related courses at the college level to pre-nursing and exercise science students. Her hunger to learn didn’t stop upon graduation from college. She continues to research on a regular basis about nutrition as it relates to health. Her hope is to help as many people as possible to enjoy foods that promote health and wellness.

Salt

Ways to Reduce Your Salt Intake

The current 2015-2020 Dietary Guidelines for Americans recommend that Americans consume less than 2300 mg of sodium a day. That equates to less than one teaspoon of salt. Yet, many Americans still consume a lot more than that. Furthermore, recommendations are moving toward reducing that amount even more, to 1500 mg per day (about 2/3 of a teaspoon of salt, and this does not account for naturally-occurring sodium in our food). Where does all this sodium come from? In the average American diet, about 77% comes from processed foods or foods prepared outside the home (such as restaurant meals), 12% comes from natural sources (naturally occurring sodium in foods), 6% from salt added at the table while eating, and 5% added while cooking. When examining those percentages, it’s clear that most of the sodium in our diet comes from foods that we did not prepare ourselves.

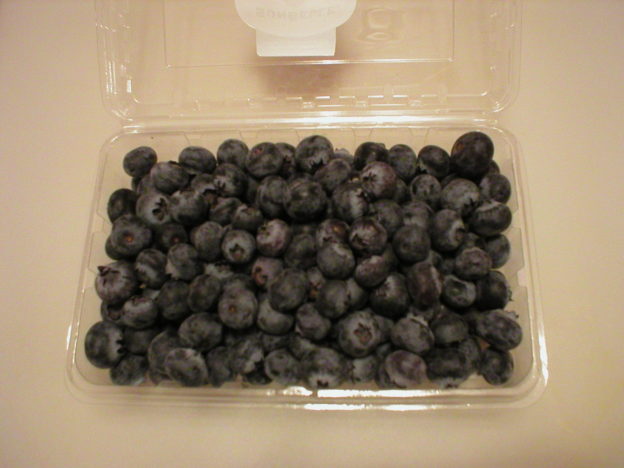
We do need some sodium for our bodies to function normally, but the amount is far less than we consume. A mere 186 mg of sodium per day is all that’s truly needed, and that small amount can be found naturally occurring in whole, unadulterated foods. Furthermore, consuming whole, unadulterated plant foods such as fruits and vegetables, provides an abundance of potassium, helping to balance the potassium to sodium ratio in the body.

Many people need (or want) to slash their salt intake for numerous reasons and struggle to do so. The following are some suggestions on how to reduce your sodium intake, balance the sodium to potassium ratio, and yet still enjoy the flavor of our foods.

Prepare Your Own Foods at Home
This may hard to do all the time, especially if you travel a lot in your career, have odd working hours or a lot of responsibilities with little time to spend in the kitchen. You’re forgiven! However, it’s up to you to work out a way to squeeze a little valuable time for yourself to prepare some of your own foods to take along with you so you can reduce your need for restaurant foods.

Here are some ideas for easy food preparation at home…
* Try overnight oats for a ready-to-go breakfast in the morning. Recipes are all over the internet!

* Take time on a day off to prepare foods ahead for the coming week. Many people spend time on the weekend making a lot of food for the coming week’s lunches. Pack them in individual serving containers so you can just grab one and put it into a travel bag with an ice pack on your way out the door. It’ll be ready when you are. If need be, they could be stored in the freezer and placed in the refrigerator the night before you need it so it can thaw safely.

* Plan on having a large salad once a day, or at least as often as you can. Lettuce can be washed in advanced, drained, and then stored in the refrigerator in a covered container between layers of paper towels. It will stay crisp and will be ready when needed. Other vegetables can also be washed and cut in advance and stored in a similar way. Just be sure they’re not stored overly wet, or sitting in a puddle of water, which could cause them to spoil.

* Make a large pot of soup on a day off. Chill it down well, then store it in the refrigerator, either in a large container, or in individual containers. It can also be frozen in individual serving size containers for an easy lunch or supper when needed. If you remember, transfer a container (for the next day) in the refrigerator the night before so it can thaw (or at least start to thaw). Warm the soup on the stove or in the microwave for a fast meal.

* Make sandwich filling of some sort on a day off. Homemade hummus, nut butter and fruit spread, or (if you’re an omnivore) cooked meat or a meat combo if you prefer, are all possible sandwich fillings where you can control what’s in them. Store the filling in a covered container in the refrigerator and sandwiches will be easy to make when you need them.

* Make a large casserole on your day off. Like the soup, salads, and sandwich fillings, making a large casserole ahead of time gives you a nice option of your own foods made to your liking that you can enjoy during the week and have ready when you are. Individual portions can be stored in the refrigerator or frozen until needed. Warming it in a microwave or even toaster oven is an option, as long as your container is appropriate for those methods.

* Put supper in the crock pot/slow cooker in the morning before you leave for work. This may not work for everyone, since it involves extra time in the morning. But if you can get up a little earlier or work it out, a nice, hot, homemade supper will be ready for you when you get home. How convenient is that?

Season Foods with Herbs or Spices Instead of Salt
Sometimes a little added salt goes a long way in making food palatable, and that should be OK as long as we don’t overdo it (or have a medical issue requiring a salt-free diet). However, seasoning our own food with plenty of herbs and spices can reduce our need for added salt. Try some of the following options to flavor your foods instead of salt…

Proteins, Beans, Legumes, and Marinades: Basil, chiles/cayenne, chives, cilantro, coriander, dill (weed), ginger, nutmeg, oregano, paprika, pepper, rosemary, sage, tarragon, thyme, turmeric

Vegetables, Stir-Fries, Salads: Basil, chiles/cayenne, chives, cinnamon, cilantro, coriander, dill (weed), ginger, mint, nutmeg, oregano, paprika, pepper, rosemary, sage, tarragon, thyme, turmeric

Fruits: Cardamom, cinnamon, coriander, ginger, mint, nutmeg, pepper, rosemary, tarragon (esp. with lemon), thyme (esp. with citrus)

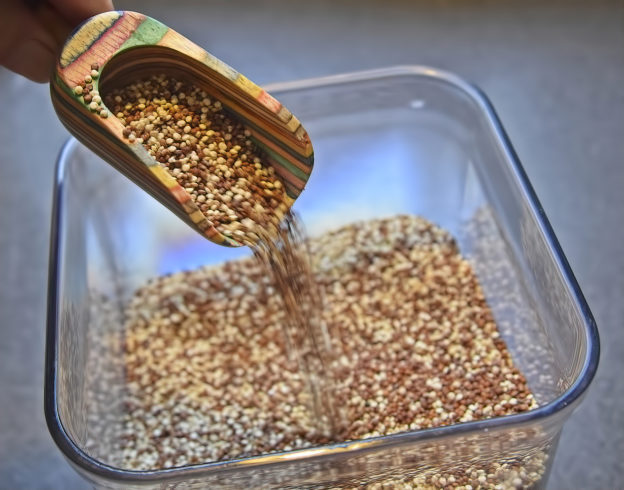
Grains, Grain Products, and Grain Dishes: Basil, cardamom, cinnamon, cloves, chiles/cayenne, coriander, ginger, mint, nutmeg, oregano, paprika, rosemary, sage, tarragon, thyme, turmeric

Dairy and Non-Dairy: Cardamom, chives, dill (weed), mint, nutmeg, rosemary, sage, thyme (esp. with cheese)

Casseroles, Sauces, Soups, Stews: Basil, cardamom, chiles/cayenne, chives, cinnamon, cilantro, coriander, dill (weed), ginger, nutmeg, oregano, paprika, pepper, rosemary, tarragon, thyme, turmeric

About some specific herbs/spices used to replace salt…
* Basil. Basil is sweet yet peppery. Fresh basil has more flavor than that of dried. Basil is excellent in pesto, marinades, dressings, sauces, sandwiches, soups, and salads. It is often used in Mediterranean dishes, especially tomato-based sauces and pizzas. There are different varieties of basil, giving different flavors to this herb.

* Cardamom. Cardamom is a warm, aromatic spice. Whole cardamom pods can be used, or the seeds (which are inside the pods) can be used whole or ground. Cardamom is commonly added to Asian spice mixes and curry pastes. It works well in baked goods and sweet breads along with cloves and cinnamon.

* Chiles/Cayenne. Chile peppers vary a lot in their heat, so always add a little at first if you’re not sure. Cayenne is a specific type of Chile pepper. Chile peppers are available fresh, dried, flaked, ground into powder, and made into hot sauce. Hot sauce may be high in sugar and/or salt, so do read labels if you’re on a salt-restricted plan. Opting for fresh hot peppers gives you more control over the sodium content of your food. Chiles work well in most foods, including vegetable and seafood dishes. A pinch of chili pepper with mustard can help you reduce the amount of cheese needed in a cheese sauce (thereby reducing sodium in the sauce, since cheese is high in sodium). Chiles combine well with cumin, coriander seeds, and turmeric. Cayenne pairs well with meats, grains, soups, and vegetables.

* Chives. Chives have an onion-like flavor but are milder than onions. Add chives to hot dishes at the end of cooking to preserve the flavor. Chives are excellent in mashed potatoes, baked potatoes, casseroles, salads, cream cheese, fish and poultry.

* Cinnamon. Cinnamon is most often used in sweet treats and baked goods like cakes, quick breads, and fruit crisps. But cinnamon also works in some savory dishes too. In Turkish and Middle Eastern cuisines, cinnamon is used to flavor chicken and lamb. It can also be used to add a special flavor to curries, tagines, casseroles, roast vegetables, Bolognese sauce, and stewed fruit.

* Coriander/Cilantro. In the United States, we refer to the seeds of this plant as coriander, whereas the leaves are called cilantro. The cilantro leaves have an earthy yet citrusy flavor. The coriander seeds have a warm, spicy, citrus flavor. Cilantro can be used raw or added to hot foods at the end of cooking time to preserve their flavor. The leaves are excellent in salads, soups (esp. carrot and coriander soup), salsas, curries, fish, and chicken dishes. It is often combined with lime and chiles in stir-fry dishes. Coriander seeds are commonly used in Indian cuisine.

* Cumin. The flavor of cumin is earthy and smoky. Cumin is the second most popular spice in the world (whereas black pepper is the first). Cumin pairs well with many foods, but especially chicken, beef, lamb, game, beans and rice. For a Mexican flare, combine cumin with oregano and chili. For a taste of India, combine cumin with cardamom, coriander, and turmeric.

* Dill. Dill seeds and dill weed (the leaves) are both used in a variety of dishes. Their flavor is very different. Dill seeds have a flavor of fennel, star anise, and celery combined. They are what gives dill pickles their characteristic flavor. The leaves (dill weed) have a fresh, bright flavor that add hints of lemon anise. Dill weed blends well with cottage cheese, cream cheese, omelets, seafood, steak, potato salad, and cucumber salads.

* Ginger. Ginger has a sharp aroma and flavor of pepper and lemon. It can be purchased fresh or dried and ground. Ginger enhances both sweet and savory dishes. Grated fresh ginger can be added to stir-fries, rice, curries, and meats. It can be added to salad dressings and even stewed fruit.

* Mint. This refreshing herb works well in both sweet and savory dishes. Try this with salads, pasta or couscous. Mint also goes well with carrots, cucumber, rice, melon, tomato, yogurt, and peas.

* Nutmeg. Nutmeg is sweet yet pungent at the same time. Most people prefer the flavor of freshly grated nutmeg rather than that of dried nutmeg, but use whatever you have on-hand. It works well in baked goods with cinnamon and cloves. Nutmeg plus black pepper complement each other in white sauces and cheese sauces. Nutmeg also adds a natural “warmth” when added to homemade potato, cauliflower, and cabbage soups.

* Oregano. Oregano has a warm, aromatic, and slightly bitter flavor with a strong aroma. It is commonly used in Greek and Mediterranean cuisines. It can be used in meat, poultry and seafood marinades. Use it also in egg dishes, breads, casseroles, and salads. It’s an essential ingredient in spaghetti sauce and gives pizza its classic flavor.

* Paprika. Paprika is made from dried and ground sweet peppers and hot peppers. It is milder and sweeter than cayenne pepper. Paprika can be paired with caraway, coriander, cinnamon and dill for a Hungarian flare. Combine paprika with garlic for a Spanish twist. Paprika also goes well with chicken, lamb and fish, on baked sweet potatoes, in beans, and with scrambled eggs.

* Parsley. Parsley has a mildly bitter, grassy flavor that blends well with other flavors, but does not overpower them. Flat-leaf parsley is preferred by chefs because its flavor holds up well when heated. Curly parsley is often used as a garnish. Parsley goes well with roast lamb, grilled steak, fish, chicken, vegetables, potatoes, omelets, stuffing, soft cheese, marinades, dressing, sauces and soups.

* Peppercorns. Peppercorns are not only the common black variety, but can also be red, green, yellow, and white. Each color has its own flavor. Some are sweet, some are bitter, while others are hot. Try a blend of different colored peppercorns for a warm flavor twist to your dishes.

* Rosemary. Rosemary is an aromatic herb with a pine-like fragrance. Use rosemary sparingly, as it can overpower other flavors. Use rosemary fresh or dried, but crush the dried rosemary first to release its essential oils and flavors. Rosemary can be added to meats, breads, pizza, tomato sauce, beans, potatoes and egg dishes. Roast whole springs of fresh rosemary with root vegetables such as carrots, parsnips, and sweet potatoes.

* Sage. Sage is similar in flavor to rosemary, but with more lemon and eucalyptus flavor. Sage retains its flavor with prolonged cooking, which is unlike many herbs. Sage is often used in Italian and French cuisines where it is added to meats, poultry, and stuffing. Chopped sage is often added to pasta and gnocchi.

* Spice/herb blends. There are a number of spice/herb blends on the market that have no salt added to them. These can make cooking easy for you if you’re in a hurry or don’t want to spend time researching what to season a food with. When shopping for a spice blend, look for “Salt-Free” on the label, or carefully read the ingredients list to be sure there is no added salt in the mix.

* Tarragon. Tarragon has a distinct licorice-like flavor with a star anise aroma. To preserve its flavor, add it near the end of cooking time. Tarragon is often used in French cuisine and goes well with fish, poultry, eggs, beef, and vegetable soups. It can also be added to salad dressings.

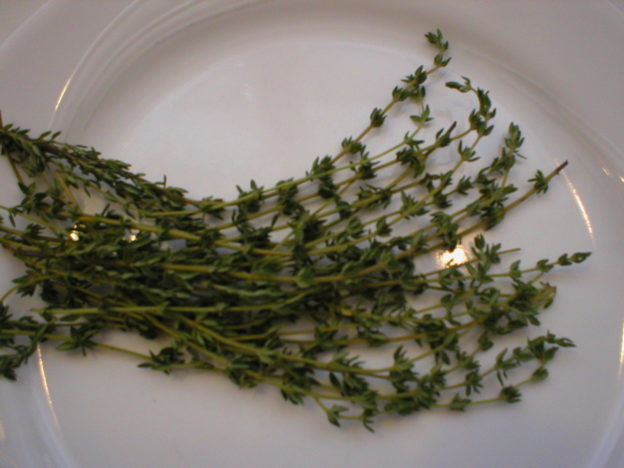
* Thyme. Thyme has a strong earthy, slightly minty flavor. Unlike many herbs, the flavor of thyme improves and is released with prolonged cooking. Whole thyme sprigs are often added to dishes early on to release their full flavor. Whole sprigs are often added to slow-cooked meals and casseroles, and removed at the end. Thyme pairs well with rosemary, parsley, sage, savory and oregano. It is used to flavor meats, chicken, game, and roasted vegetables. Thyme pairs well with paprika, oregano, and cayenne in Cajun cuisine. It also pairs well with cinnamon, nutmeg, and cayenne pepper in Caribbean cuisine. Lemon thyme goes well in soups and vegetable dishes.

* Turmeric. Turmeric is a common ingredient in curry and is often used in South Asian dishes. North Africans often use turmeric with ginger in flavoring meats, vegetables, and rice. A little turmeric goes a long way, as its flavor intensifies with cooking.

Foods That Can be Used to Season Dishes Without Added Salt
In addition to specific herbs and spices being used to replace added salt, some foods can be used as ingredients to replace added salt by adding another flavor dimension to a dish. Here are some examples…

Proteins, Beans, Legumes, and Marinades: Balsamic vinegar, beverages (beer, wine, coffee), celery, garlic, kelp granules, lemon, mushrooms, nutritional yeast, onions, salsa/chutney, vinegar (in general)

Vegetables, Stir-Fries, Salads: Balsamic vinegar, celery, garlic, kelp granules, lemon, mushrooms, nutritional yeast, onions, salsa/chutney, vinegar (in general)

Fruits: Balsamic vinegar, celery, lemon, vinegar (in general)

Grains, Grain Products, and Grain Dishes: Balsamic vinegar, celery, garlic, kelp granules, lemon, mushrooms, nutritional yeast, onions, salsa/chutney, vinegar (in general)

Dairy, Non-Dairy, Cheese: Balsamic vinegar, celery, lemon, mushrooms, nutritional yeast, onions, salsa/chutney

Casseroles, Sauces, Soups, Stews: Balsamic vinegar, beverages (beer, wine, coffee), celery, garlic, kelp granules, lemon, mushrooms, nutritional yeast, onions, vinegar (in general)

More about specific foods used to replace salt…
* Balsamic vinegar. Balsamic vinegar can be used far beyond salads. It comes in a variety of flavors that helps it to pair well with many foods. Some balsamic flavors include lemon, cherry, espresso, chocolate, garlic, apple, and more. The flavors enable balsamic vinegar to pair with many foods. It can add a sweet, fruity flavor to ice cream, yogurt, and beverages. It can be used to marinade red meats. Garlic and lemon balsamic vinegars can be used to flavor poultry, seafood and vegetables.

* Beverages (esp. beer, wine, coffee). Assorted beverages have been used to flavor foods in lieu of salt. Beer, wine, and even coffee have been used to flavor stews, soups, chili, pasta sauces, and braised dishes. These liquids can be used on their own or combined with broth. [Note! Beware of commercially prepared broth, as it may be high in sodium. Read the label to be sure it meets your needs regarding sodium intake.]

* Celery. For someone on a highly sodium-restricted diet, eating celery may be questionable. But for the rest of us, the unique flavor of celery can add a salty flare to otherwise bland foods. One stalk of celery naturally contains 32 mg of sodium, which is not a lot. But, since celery is mostly water, that sodium flavor seems to be accentuated in celery. So if you’re mixing up some food of whatever sort and you are missing a salty component, rather than reaching for the salt shaker, try adding a stalk or two of celery. Hopefully it will do the trick.

* Garlic. Garlic is an excellent alternative to salt. We’re all familiar with it and most likely have some in the kitchen, whether fresh or dried. Raw garlic adds a pungent zest to foods while roasted garlic adds a delicious sweet, nutty flavor. Add garlic to chicken, fish, meats, vegetables, salads, breads, and stir-fries…almost anything!

* Kelp granules. This option may be new to some people even though kelp has been available as a food for quite a white. Kelp granules are what they say…dried granules of kelp. It is salt-free, but NOT sodium-free. Along with other nutrients, kelp does contain iodine, a needed element that is added to table salt. Kelp granules do contain some naturally-occurring sodium from growing in the salty sea water. (One teaspoon generally contains about 100 mg of sodium.) However, it is far less than what you would find in table salt. (One teaspoon of table salt contains 2,325 mg of sodium.) This can serve as a good food source of iodine if you’re on a low-sodium or salt-restricted diet. However, it’s important to read the nutrition facts label first to be sure it meets your needs regarding sodium restriction. Also, don’t overdose on kelp because that could lead to an iodine overload!

* Lemon zest/lemon juice (or any citrus zest/juice). Lemon (or any citrus fruit) brightens flavors and pairs with most foods, from appetizers, to main dishes and vegetables, to salads, breads, and desserts. It can be added to marinades to bring flavor to foods without a lot of salt. The zest of the fruit brings out an even stronger flavor than the juice, so add it when you want a more pronounced citrus flavor to foods.

* Mushrooms. Mushrooms can add a subtle umami flavor to foods without adding extra salt to the dish. A mixture of caramelized onions, garlic, and mushrooms with a dash of balsamic vinegar may be all you need to flavor a specific food.

* Nutritional yeast. Nutritional yeast is deactivated (killed) yeast that comes in powder or flakes. It is an excellent source of an array of vitamins and minerals, with only 5 mg of sodium in two tablespoons of nutritional yeast flakes. It is described as having a nutty, cheesy, savory flavor. Nutritional yeast is often used as a vegan cheese substitute. If you’re not used to eating nutritional yeast, it’s best to slowly add it to your diet. Adding it too quickly may cause some unpleasant side effects. (1) Nutritional yeast has a lot of fiber, with about 5 grams in just 2 tablespoons. Adding too much too fast may cause gas, cramps, or even diarrhea. Drinking plenty of liquids with nutritional yeast may help to prevent this. (2) Some yeast products may trigger migraine headaches in some people. This is due to tyramine, a compound the body makes from the amino acid tyrosine contained in yeast products. (3) Nutritional yeast contains high amounts of the B-vitamin niacin, which can cause a flushing reaction in some people. This is like a facial to full-body hot flash, with reddening of the skin followed by burning and itching. It can last for ten to twenty minutes. The condition is uncomfortable, but not harmful. (4) Some individuals with irritable bowel disease are sensitive to yeast products. Nutritional yeast may trigger an immune response, worsening symptoms in some individuals with such conditions.

* Onions. Onions add a deep umami flavor to foods, especially when paired with garlic. Onions are used to flavor many foods including stews, soups, any braised or roasted dish, tomato based sauces, burgers, meatloaf, casseroles, pizza, salads, and more. When caramelized, onions add a sweetness to many foods including vegetarian and vegan dishes.

* Salsa and chutney. Salsas and chutneys add a fresh flavor to meats, fish, omelets, vegan/vegetarian dishes, appetizers, cheeses, chips and crudités. Homemade versions would be ideal for those on a reduced salt plan since you can control the ingredients. When purchasing store-bought varieties, read the nutrition facts panel and ingredients list to be sure it meets your needs.

* Vinegar (in general). When the flavor of a dish seems “flat” and bland, add a touch of acid to brighten it up. Vinegar (or even citrus juice) will enhance the flavors in sauces, salads, green vegetables, marinades, salsas, and chutney. There are many flavors of vinegars which vary from extremely to mildly acidic and very sour to sweet, so experiment with enhancing the flavors of foods with different vinegars rather than added salt.

Foods to Avoid When on a Low-Sodium Diet
* Canned soups. Canned soups are usually very high in salt content, so avoid them if you are on a reduced sodium diet. If you see a low-sodium option, also read the label before purchasing it to be sure it meets your needs, because they may also have too much sodium for some people.

* Bouillon cubes and commercially made broths. Traditional bouillon cubes and prepared broths can be extremely high in added salt. Be sure to read the nutrition facts panel and ingredients list, even if it is labeled as low-sodium. It still may have too much sodium for some people who are on a sodium-restricted diet.

* Chips and salted snacks. This one almost goes without saying. Commercially prepared chips and salted snacks like nuts, pretzels, popcorn, and pork rinds are laden with added salt. If you’re on a salt-restricted plan, such items will be off your list unless you opt for an unsalted or low-sodium version. (They ARE out there!) Always check the label first.

* Milk and cheese products. Cow’s milk has some naturally-occurring sodium (about 105 mg per cup). When milk is made into cheese, the sodium content is concentrated, resulting in products that are often higher in sodium. Furthermore, most cheeses are high in sodium since salt is added during the cheese-making process. Therefore, cheese may be off your list if you’re on a low-sodium diet. Be sure to read the Nutrition Facts panel on all milk products to be sure they meet your needs.

* Salted butter and margarines. These foods can be a source of sodium that we often don’t think about, but when combined with the sodium in other foods, it can add up. Opt for unsalted or low-salt versions when possible.

* Flavorings and condiments with added salt. The list can be long here, but this includes all herb/spice blends with added salt, such as garlic salt, celery salt, onion salt, and seasoning salt. Meat tenderizers, barbeque sauce, soy sauce, ketchup, mustard, teriyaki sauce, oyster sauce, salad dressings, tamari, Worcestershire sauce, pickles and pickle relish, sauerkraut, bacon bits, and even croutons will likely contain added salt. When in doubt, read the label!

* Food mixes. Prepared food mixes are often high in added salt. Such items include gravy mixes, boxed pasta/vegetable/rice mixes with seasonings, instant pudding mixes, Ramen noodles and other instant soups, and all other instant or convenience foods. Even dried bean mixes with seasoning packets are something to beware of when on a sodium-restricted plan. Always check the label to be sure it meets your needs.

* Frozen dinners and prepared frozen foods. These foods are usually laden with added salt used as a flavoring and even preservative. This also includes frozen pizzas. When in doubt, read the label for the sodium content on the Nutrition Facts panel to see if it meets your needs.

* Processed meats. Processed meats such as bacon, lunchmeats, ham, corned beef, hot dogs, salt pork, and sausages, are often very high in salt content. Avoid these unless they are a low-sodium option that actually meets your nutritional needs (check the label).

* Poultry. Many poultry items (such as Thanksgiving turkeys) are injected with broth for moisture and flavoring. This can greatly increase the sodium content of these foods, possibly raising it above your limits. Check the label or ask the meat department manager in your store about the sodium content of what you’re considering.

* Some bread products. Salt is normally added to yeast bread dough because it helps to control the growth of the yeast during the bread baking process. Read the label to be sure any bread you purchase meets your needs.

* Some canned foods. When on a reduced-sodium diet, another way to lower sodium intake is to choose salt-free canned foods rather than “regular” canned options. This includes canned vegetables, beans, sauces, gravies, salsa, and soups. More and more foods are being packed with salt-free options, so the choices are increasing. When on a sodium-restricted plan, reading canned food labels is a must-do.

* Bottled vegetable juice. Many tomato-based vegetable juices are high in sodium. However, some varieties are labeled as being “reduced-sodium.” Read the Nutrition Facts panel to be sure it meets your needs.

* Restaurant foods. Many of these same principles apply when dining at a restaurant. When in doubt, ask the server which menu options are low-sodium.

* Beware of softened water. Softened water is “softened” with added sodium. This should be avoided when on a sodium-restricted plan. Softened water should not be used for food preparation nor drinking when sodium intake needs to be low.

Resources
https://www.cdc.gov/salt/index.htm

https://health.gov/dietaryguidelines/2015/guidelines/

https://www.google.com/url?sa=t&rct=j&q=&esrc=s&source=web&cd=10&ved=2ahUKEwiBn9zxz4_mAhUSEawKHY–AMIQFjAJegQIAxAC&url=https%3A%2F%2Fwww.heart.org%2F-%2Fmedia%2Ffiles%2Fabout-us%2Fpolicy-research%2Ffact-sheets%2Faccess-to-healthy-food%2Freducing-sodium-in-the-us-diet-fact-sheet-2019.pdf%3Fla%3Den%26hash%3DD86A882315B2BA51D74F104EF00B74DCCF41C980&usg=AOvVaw1WLawWhm8kk_JELArmKMMo

https://www.healthline.com/nutrition/sodium-per-day#recommendations

https://www.bhf.org.uk/informationsupport/heart-matters-magazine/nutrition/herbs-and-spices

https://www.savoryspiceshop.com/dill-weed

https://foodinsight.org/cutting-down-on-sodium-6-alternatives-to-salt/

https://shescookin.com/10-naturally-delicious-sodium-substitutes/

https://nutritionovereasy.com/2011/02/is-kelp-high-in-sodium/

https://nutritiondata.self.com/facts/custom/1323565/2

https://www.healthline.com/nutrition/nutritional-yeast-dangers#1

https://my.clevelandclinic.org/health/articles/15426-sodium-controlled-diet

https://www.ucsfhealth.org/education/guidelines-for-a-low-sodium-diet

https://healthfinder.gov/healthtopics/category/health-conditions-and-diseases/heart-health/low-sodium-foods-shopping-list

Page, Karen. (2014) The Vegetarian Flavor Bible. New York, NY: Little, Brown and Company.

About Judi
Julia W. Klee (Judi) began her journey enjoying “all things food” in elementary school when she started preparing meals for her family. That love of food blossomed into a quest to learn more and more about health and wellness as related to nutrition. She went on to earn a BS Degree in Food and Nutrition, then an MS Degree in Nutrition. She has taught nutrition and related courses at the college level to pre-nursing and exercise science students. Her hunger to learn didn’t stop upon graduation from college. She continues to research on a regular basis about nutrition as it relates to health. Her hope is to help as many people as possible to enjoy foods that promote health and wellness.

Cutting Board

Cutting Boards 101 – The Basics

Cutting boards come in different sizes, shapes, thicknesses, and materials including wood, plastic, bamboo, stone, glass, and more. Most of us have them in our kitchen equipment, and we use them on a regular basis. But cleaning them can be a bit confusing because the different materials can require different treatments. To complicate matters, the type of food we use on them (from raw meats to fresh vegetables and fruits, to baked breads) also makes a difference on how they should be treated.

First, one important rule-of-thumb when using cutting boards is to have several of them, with one being reserved only for use with raw meats, seafood, and poultry. Raw animal foods carry their own risks for specific food-borne illnesses that can create serious concerns if not handled properly during food preparation. Reserving a board only for such uses can help to avoid potential cross-contamination of pathogens that can lead to serious disease.

The following information will hopefully help you out with how to choose the right cutting boards for your needs, and regularly clean and maintain the boards for safe use in food preparation.

Wood Cutting Boards
Wooden cutting boards are a favored piece of kitchen equipment for most chefs, both professional and casual alike. Yet, they do require some specific care to maintain them over the years.

Pros: It has been proven by research that wood boards retain less bacteria than plastic boards, especially those with a lot of knife marks. Wood boards can be sanded and resurfaced if necessary. Also, they are usually heavy and don’t slide around easily, which can be extremely hazardous. It has been proven that wooden boards are THE BEST surface for maintaining a sharp knife edge. Also, they come in a variety of sizes, shapes and thicknesses.

Cons: They require more routine maintenance than other types of boards (i.e. waxing and oiling). They cannot be soaked for long periods of time. They cannot be put in the dishwasher.

Routine cleaning: Wooden cutting boards should NOT be placed in the dishwasher. The exposure to prolonged heat and water can cause the board to warp and possibly crack. Cracks in wooden cutting boards will tend to harbor microbes that can feed on trapped food particles. This is NOT what you want to happen to your cherished wooden cutting board!

Routine cleaning of your wooden cutting board, after using it to cut breads, fruits and vegetables can be done simply by hand washing it in hot, soapy water with as much manual scrubbing action as is needed to get it clean. Using a scrub brush will help to make this job faster and easier. Rinse it well, pat it dry, then stand it up to air dry completely before putting it away.

When using your wood board for high-risk foods such as raw meat, fish, and poultry, it should be immediately hand-washed in hot soapy water, then sanitized. Dry the board, then allow it to air dry before putting it away.

Sanitizing your wooden cutting board: Research has shown that wooden cutting boards harbor fewer microbes than do plastic cutting boards. Nevertheless, if you have used your wood board for cutting raw animal foods (meats, poultry, fish), sanitizing it after it is hand-washed is important to kill any remaining pathogens after it was washed. This should be done EACH time the board is used for raw animal foods, especially if that same board will be used for cutting fruits and/or vegetables that are to be eaten raw (this practice is not recommended). There are some options (listed below) on how to sanitize your board.

If your wooden cutting board is not being used for raw animal products, you can get by with sanitizing it less often than when using it for raw animal foods. According to the results of a study published in the Journal of Applied Microbiology (August 2015), traditional detergent-based household methods of cleaning will usually sufficiently clean cutting boards used in the preparation of foods that are not high risk (such as raw animal foods) or when not being used for immune-compromised individuals. Ideally for ultimate food safety, cutting boards should be sanitized after each use. However, when no one being fed is immune compromised or when only low-risk foods are being prepared, sanitizing it less often should suffice.

To reduce the risk of cross-contamination if using a cutting board for high-risk foods such as raw meat, fish, and poultry, it is suggested that we have different cutting boards for high-risk foods than for low-risk foods (fresh vegetables, fruits and breads). Having different colors, shapes or sizes for different types of food can help to keep the cook from using the wrong cutting board during food preparation.

Bleach: The USDA recommends that we sanitize a board used for cutting raw animal foods in a solution of 1 tablespoon of unscented bleach to 1 gallon of water. First, hand-wash the board in hot, soapy water, and scrub it well. Then apply the bleach solution and allow it to sit for 3 to 5 minutes, rinse well, then dry it with a clean cloth or paper towel. Stand it up for a little while to help ensure it is completely dry before storing it.

A slightly stronger solution, but simpler to mix up was suggested by Global News of Canada. Mix one teaspoon of bleach to three cups of water. Pour that over the washed cutting board and allow it to sit for a few minutes. Rinse it well, then dry the board.

Vinegar: Vinegar is a non-toxic item that most of us keep in our kitchen. After being hand-washed in hot, soapy water, a wood board can be sanitized with a solution of 1 part of white vinegar to 4 parts of water. Allow the solution to remain on the board for a few minutes, then rinse it well, and pat it dry. Allow the board to air dry before storing it.

If you REALLY want to “go for the gusto,” you could also use undiluted white vinegar to sanitize your board. Spray your cutting board with straight white vinegar, allow it to sit for 3 to 5 minutes, rinse it well, pat it dry, then stand it up, and allow it to air dry before putting it away.

Hydrogen Peroxide: As always, wash your board first with hot, soapy water. According to The Food Network, wood cutting boards can be sanitized by pouring 3% hydrogen peroxide (this is the type of hydrogen peroxide commonly found in your local pharmacy) all over the board. Distribute the liquid around the board with a cleaning sponge, and leave it alone for a few minutes as it bubbles, killing any microbes that are left on the board. When finished, rinse well, and wipe it off with a clean cloth or paper towel. Allow it to air dry before storing the board.

To Deodorize a Wooden Cutting Board: There are several suggested ways to deodorize a wood cutting board…
If your board has any lingering odor from some food used on it, sprinkle baking soda on the board, then pour white vinegar onto it. Important! This will create a lot of bubbling, so be sure to do this in a sink! When the bubbling stops, rinse the board well, dry it with a clean cloth or paper towel, and then stand it up to air dry.

Another way to remove odors from a wood board would be to rub the board well with a cut lemon, squeezing the juice as you rub. Allow the juice to sit on the board for a few minutes, then rinse it well and dry the board.

Some people remove stains and odors from a wood cutting board by sprinkling it with coarse salt, then rubbing it with a cut lemon, squeezing to remove the juice as they rub. When finished, rinse the board well and dry the board. Allow it to air dry before putting it away.

Spritzing the board with white vinegar after use can help to avoid the development of odors in your board.

Protect the Wood: Oiling wooden boards helps to maintain their surface and keeps them from drying out, which could cause them to crack. This also helps to prevent liquids from food and microbes from penetrating the board, helping to keep it clean and germ-free. The goal is to penetrate the wood and saturate the wood fibers with board oil.

All wooden cutting boards should be oiled periodically by rubbing them with food-safe (this is critical!) mineral oil (or an alternative oil of choice). This oil can be found in most local pharmacies. Note, that mineral oil is the oil of choice by most professional chefs for this application, since it will not go rancid over time. Do not use vegetable oils for this purpose. They will spoil, causing the board to smell bad and possibly transmit rancid oils into your food.

If you prefer to use a food-derived oil, you could use traditional coconut oil (which is solid at room temperature) or fractionated coconut oil (which is liquid at room temperature). Just note that some say traditional coconut oil may go rancid over an extended period of time, whereas fractionated coconut oil should not.

First, be sure your board is as clean (and dry) as possible. Then, simply rub a generous amount of your preferred oil very well into the DRY board with a clean, dry cloth, or new paint brush dedicated to this purpose (do not use your hands as you might get a splinter!). Doing this will help to prevent cracks in the board, keeping it from harboring microbes in hard-to-reach areas. After being oiled, stand your cutting board up on its side on a clean, dry towel, or place it on a wire rack. Allow the oil to soak in as long as possible before wiping any excess off. Try to allow the oil to soak in for at least a few hours (up to 24 hours) before wiping away the excess. A simple way to do this would be to wipe the board with oil in the evening. Allow it to sit overnight. Wipe any excess oil off in the morning, and allow it to air dry until it is not tacky or sticky feeling. Then use the board as needed.

How often you should oil your board depends upon how often you use it. Wooden boards used daily may benefit from being oiled once a month. Those not used very often could be oiled once or twice a year. If your board feels “dry to the touch” it’s time to oil it. If nothing else, let that tip be your guide.

Spoon (Wood) Butter (Cutting Board Creams or Waxes): You can also condition your board with “spoon butter” or “wood butter” which is a mixture of beeswax, food-grade mineral oil, and sometimes other waxes. These same creams may also be referred to as cutting board creams or waxes. They can be purchased in stores (local and online) that carry cutting boards and kitchen supplies.

While board oil penetrates the wood, board creams or waxes coat the surface of the board, protecting it from liquids and stains. Board creams or waxes also help to protect sanitation, as they fill in knife marks, where bacteria can live, even after the board is cleaned. When used in conjunction, both board oil and cream or wax can protect your wooden cutting board from inside to out, helping it to serve you well for years.

To use board creams or waxes, rub a generous amount of the mixture into your board and allow it to sit for at least several hours, up to 24 hours (overnight is really convenient). Then buff excess off your board with a clean, dry cloth. Allow it to air dry until it no longer feels tacky or sticky, then use your board as normal. Use it freely on any wood or bamboo bowl, board, or kitchen utensil.

Plastic Cutting Boards
Plastic cutting boards are enjoyed by many. They are usually made from polyethylene and can be washed at the sink, soaked for indefinite periods of time, and placed in the dishwasher. They are relatively good on knife blades, but not as good as wood boards in that respect.

Pros: One benefit of plastic boards is that they come in different colors. The assorted colors can help you isolate their use for specific types of foods, such as one specifically for raw meats, while another is specifically for raw vegetables, and yet another is dedicated only to cutting breads. Such a system is excellent to help prevent cross-contamination of bacteria which can be deadly.

Plastic boards can be safely soaked for long periods of time and can also be placed in the dishwasher.

Plastic boards are relatively good for maintaining the sharp edge of your knife, since they give slightly in the cutting process.

Cons: Over time, plastic boards can get a lot of knife gouges in them which are permanent. Such furrows allow places for bacteria to harbor, even after the board has been washed. When a plastic board becomes “fuzzy” or has a lot of knife furrows in it, it’s time to replace it.

Sanitizing Your Board: Always start by first washing your board in hot soapy water, or running it through a dishwashing cycle. If your board has been used for low-risk foods such as breads or fresh fruits and vegetables, occasionally letting your plastic board soak in a diluted bleach solution (1 tablespoon of unscented bleach to 1 gallon of water) for 5 minutes can adequately sanitize the board. If the board has been used for cutting raw meat, seafood, or poultry, it’s important to sanitize it after EACH such use.

Placing it in the dishwasher after each use is also a good way to help keep your plastic board clean and fresh.

No matter how your board has been washed or sanitized, be sure your board is completely dry before storing it. Any moisture left on the board can allow bacteria to remain viable.

Bamboo Cutting Boards
Bamboo cutting boards have increased in popularity in recent years. They require less maintenance than traditional wood cutting boards and are harder and less porous than hardwoods.

Pros: Bamboo cutting boards require less maintenance than traditional wood boards. Since they do not retain water as traditional wood boards can, they are less likely to warp, crack, or harbor bacteria. Bamboo absorbs very little moisture and resists scarring from knives, so they are more resistant to bacteria than traditional wood boards. They make lovely serving trays for cheese, crackers, and other appetizers or finger foods.

Because bamboo is harder than traditional wood, it resists scarring from knife use, as does traditional wood. This makes it easier to clean and less likely to retain bacteria after use.

The hardness and density of bamboo makes it less likely to stain when preparing some foods like meats or tomatoes.

Bamboo is a sustainable crop, so less damage is done to the environment when bamboo is harvested than trees. Bamboo is a grass and one of the fastest growing plants on the planet! It is one of the simpler and more economically grown plants available. Also, they are relatively inexpensive.

Cons: Do not put bamboo cutting boards in the dishwasher, which might cause the board to warp and/or crack. Also, do not soak your bamboo board.

Read the label carefully when buying a bamboo cutting board. Some bamboo products are processed with formaldehyde and glues that can leach into foods over time. Choose only boards made with non-toxic treatments or organic practices.

Since bamboo is harder than traditional wood boards, they are not as forgiving to knife blades as wood boards. Hence, your knife may not last as long when using a bamboo cutting board, especially if it is a cheaper knife made with a softer metal than a higher-priced knife.

Bamboo boards should not be used as hot plates or trivets for hot items, since this might burn the board.

Pre-conditioning your bamboo board: If your bamboo board was not pre-conditioned by the manufacturer, you’ll need to do that before you use it. First, wash it well in hot soapy water, then dry it and allow it to completely air dry. Then prime it with food grade mineral oil. Apply a generous amount of oil and let it sit for a few hours to overnight. Wipe off any remaining oil in the morning with a clean, dry cloth or paper towel until it does not feel damp or sticky, and it will be ready to use. Do this about once a month to maintain your board and extend its life, or repeat this process any time your board looks dry.

Spoon (Wood) Butter: See this topic under the Wood board section. The same information applies to bamboo boards.

Washing, Sanitizing, and Maintaining Your Bamboo Cutting Board: Clean bamboo cutting boards with hot soapy water; and sanitize if it each time it is used for cutting raw meats, seafood, or poultry. Dry it thoroughly before putting it away. Do not put it in the dishwasher.

To sanitize your bamboo board, scrub it well with a mixture of 1 tablespoon bleach to 1 gallon of water (or 1 teaspoon of bleach to 1 quart of water…which is slightly stronger than the 1 gallon mixture). Allow it to sit for a few minutes, then rinse the board well afterwards, and wipe it dry. Allow it to air dry completely before putting it away.

Glass Boards
Glass cutting boards can be beautiful decorative elements in any kitchen. They make a nice platform or tray for items that you want to protect from other surfaces. Although they can be easy to clean and maintain, most professionals do not use glass boards for reasons stated below.

Pros: Glass boards are easy to clean since they are nonporous. Germs can’t penetrate them. They may be placed in the dishwasher.

Cons: Since glass boards are hard and have no “give” whatsoever, they can damage knife blades over time. For this reason, most authorities do not recommend glass cutting boards for cutting purposes.

Sanitizing Your Board: Simply wash your glass board at the sink or in the dishwasher. An occasional sanitizing with a bleach or vinegar solution is always advisable (see how, under “Wood” section).

Stone/Marble/Granite Boards
Stone boards are excellent when used for rolling pastry. They are naturally cool to the touch which helps to keep the butter or other fat in the pastry from melting during the rolling process. Doughs also tend to stick less to stone, marble, or granite when being rolled out. They can also be used to place pots on to keep them from scratching a counter top. But since they are extremely hard, they can dull knife blades over time when used to cut foods, so they are generally not recommended for use as a traditional cutting board.

Pros: There is no chance these boards will warp. They can be used as a hot pad or trivet. They can be very attractive and add a nice element to your kitchen décor. They are simple to clean and sanitize and do not need special treatment to maintain.

Cons: They can dull your knife blade when used as a true cutting board. If not careful, they can chip or crack if mishandled or bumped.

When to Replace Your Cutting Board
Replace your cutting board when it shows a lot of wear, such as extensive knife marks. Deep groves in any board can allow bacteria to live on the board, even after being washed.

Also replace your board if it has warped. Using a warped board will not be stable on the counter or table, which can be very hazardous when using a sharp knife. The cost of a new board is well worth it when compared to having a serious knife injury.

If you are using a wood or bamboo board and the seams are starting to separate, it’s time to replace the board. It may be unstable to use, making working with a sharp knife potentially dangerous. Also, deep groves may catch your knife making cutting action erratic and possibly invite an injury. Furthermore, deep groves or cracks can also harbor bacteria. So, needless to say, a board that is separating is not worth keeping! When dealing with food and food-related equipment…”When in doubt, throw it out!”

About Judi
Julia W. Klee (Judi) began her journey enjoying “all things food” in elementary school when she started preparing meals for her family. That love of food blossomed into a quest to learn more and more about health and wellness as related to nutrition. She went on to earn a BS Degree in Food and Nutrition, then an MS Degree in Nutrition. She has taught nutrition and related courses at the college level to pre-nursing and exercise science students. Her hunger to learn didn’t stop upon graduation from college. She continues to research on a regular basis about nutrition as it relates to health. Her hope is to help as many people as possible to enjoy foods that promote health and wellness.

Resources
https://www.thekitchn.com/the-best-way-to-clean-and-care-for-wood-cutting-boards-good-questions-164690

https://www.foodnetwork.com/how-to/packages/help-around-the-kitchen/photos/how-to-clean-a-wooden-cutting-board

https://www.quora.com/What-kitchen-wood-cutting-boards-are-dishwasher-safe

https://www.cuttingboard.com/blog/how-to-properly-clean-your-wood-cutting-board/

https://www.thekitchn.com/how-to-oil-and-maintain-a-wooden-cutting-board-lessons-from-the-kitchn-195642

https://www.cuttingboard.com/how-to-oil-and-maintain-a-cutting-board/

https://www.fsis.usda.gov/wps/portal/fsis/topics/food-safety-education/get-answers/food-safety-fact-sheets/safe-food-handling/cutting-boards-and-food-safety

https://www.eatright.org/homefoodsafety/four-steps/separate/cutting-board-safety

https://www.canr.msu.edu/news/cutting_boards_and_food_safety_1

https://montgomery.osu.edu/program-areas/family-and-consumer-sciences/healthy-people/sanitize-counter-tops-and-cutting-boards

https://www.cookinglight.com/cooking-101/techniques/how-to-clean-wooden-cutting-board

https://globalnews.ca/news/4043583/clean-disinfect-chopping-board/

https://www.ncbi.nlm.nih.gov/pubmed/26060060

https://housewifehowtos.com/clean/how-to-clean-your-cutting-board/

https://www.huffpost.com/entry/cutting-boards-to-avoid_n_1335613

https://www.consumerreports.org/food-safety/are-plastic-cutting-boards-better-than-wood/

https://www.cuttingboard.com/blog/top-five-benefits-of-a-bamboo-cutting-board/

https://cooking.stackexchange.com/questions/34324/what-are-the-dos-and-donts-regarding-cleaning-a-bamboo-cutting-board

https://www.thekitchn.com/whats-the-best-kind-of-cutting-board-plastic-wood-or-bamboo-51821

https://foodal.com/kitchen/knives-cutting-boards-kitchen-shears/cutting-boards/knife-friendly-hygienic/

https://www.thekitchn.com/how-to-oil-and-maintain-a-wooden-cutting-board-lessons-from-the-kitchn-195642

https://www.cooksillustrated.com/how_tos/8625-caring-for-wood-cutting-boards-and-utensils-with-spoon-butter

https://news.ncsu.edu/2014/09/cutting-boards-food-safety/

Desiccant Packets

Uses for Desiccant Packets

You know what I’m referring to here…those little packets of drying agent found in bottles of vitamins, etc. We usually toss them with the bottle when it’s empty. Well, there ARE useful things we can do with them, so consider keeping one of those bottles and save the packets in there for future use. Here are some ways to use them…

Store some with silver tableware or silver jewelry. The drying agents won’t stop silver from tarnishing, but it will slow it down.

Add some with clothes and blankets during off-season storage. The drying effect will help to prevent mustiness and mildew.

Add them to whatever you store in a damp basement. They will help to keep items dry and prevent mustiness and mold from forming.

Put them in a camera bag. If you use your camera outdoors, the humidity in the camera bag can cause some film and condensation to form on the camera. Placing some drying packets in the camera bag can help to prevent that from happening.

Add them to any container where you store photos. Moisture can cause old photos to stick together and ruin them. Adding some drying packets to the photo box can help to save those precious old photos.

Protect important documents. Add some drying packs to any container where old, important documents are being stored. Birth certificates, marriage licenses, death certificates, property titles, important receipts, and treasured old letters and cards are all prime examples. This will help to preserve the documents.

Use them when storing dry flowers. Many people use dried flowers for potpourri, room decor, and assorted craft projects. Drying packets can help to dry flower petals and also keep them dry in their storage containers.

Add them to your toolbox. Some tools and accessories are prone to rusting. Adding some drying packets to your toolbox can help to prevent that from happening.

Help keep electronics dry. Put some drying packets in your electronics bags and storage containers to help keep them dry and prolong their life.

Add them to powdery mixtures to prevent clumping. Some powdery mixtures can tend to clump up when humidity enters the box. Laundry detergent, dishwasher detergent, and other powdered cleaning agents are good examples. Toss in a few drying packets to help prevent the clumping. Be sure to remove them when using the detergent!

Preserve stored collectables. If you have a collection of old baseball cards, comic magazines, or any other such paper items, add some drying packets to the storage container. This will help to soak up moisture in the box, preserving your precious items that much more.

Help to preserve holiday decorations. Adding some drying packets to your boxes of stored holiday decorations can help to keep them fresh and dry for your next use.

Revive old musty books. Place some drying packets in a plastic bag with a musty book. Leave it there for a few days and that will help take the moisture and musty smell out of the book.

Add them to garden seed packets. If you save seeds from year to year, add some drying packets to the bag your seeds are stored in. The reduction in moisture may help to preserve your seeds a bit longer.

Place some in bathroom medicine cabinets. Adding some drying packets to bathroom medicine cabinets can help prevent shelves from rusting, and also to help protect the contents of the cabinet from the excessive moisture in the bathroom.

Add them to your sorted vitamins and other pills. If you divvy out pills in advance, adding some drying agents to your storage container can help to keep your pills dry and fresh.

Keep fishing tackle items from rusting. Placing some drying packets in your fishing tackle box can help to keep those items from rusting.

Store some in shoes. If your shoes have gotten wet, or if your feet tend to sweat a lot, place some packets inside your shoes when storing them to help dry them out and reduce odors.

Prevent carpentry nails from rusting. If you store carpentry nails and such, they might rust over time. Placing some drying packets in with those items can help keep them from rusting.

Prevent holiday tins from rusting. We all enjoy the beauty and joy decorative tins can bring to our homes and tables during the holidays. But they do have a tendency to rust over time. Place some drying packets in your favored tins when they are being stored to help keep them dry and prevent rusting.

Place some in closets. Closets can tend to smell stale, especially if not used regularly. Place some drying packets in closets to help make them (and their contents) fresh and dry.

Place some in gym bags. This will help to keep the contents dry and smelling fresh.

Rescue your cell phone. Many people have accidentally dropped their cell phones in water. After retrieving your phone, wipe it dry and remove the battery and memory card, if you can. Place your phone, battery, and memory card in an air-tight container (such as a plastic bag) with some drying packets. Leave it there at least overnight, even up to 24 hours, and your phone should (hopefully!) be fine.

Keep windows dry. Sometimes condensation can form between window panes. Placing a few drying packets between the window panes can help to stop the condensation from forming.

Keep pet food dry. If you invest in a large, bulk bag of dry pet food, place a few drying packets in the bag to help keep the pet food dry and fresh. Of course, be careful not to feed them to your pet…they are NOT edible!

Keep windshield from fogging up. The car windshield can get foggy on humid days, especially during early morning drives. Placing some drying packets on the dashboard can help to soak up some of that humidity, preventing the window from getting foggy.

Extend razor blade life. Razors tend to have a short life, especially when not dried after use. They’re too expensive to waste them like that! After use, dry them off, then go one step further by placing them in an air-tight container with some drying packets.

Preserve dry makeup. Preserve the life of dry makeup powders by storing them in an air-tight container with a few drying packets. This is especially helpful if you live in a humid area.

Keep dry foods dry. Add one or more drying packets (depending on size) to opened, dry foods. Bread crumbs, flour, herbs and spices, pastas, rice and other grains, and crackers are good examples of foods that can age quickly if moisture gets in them. The drying packets will help to keep these foods fresh and dry until needed. This is especially helpful if you live in a humid climate.

Freshen stale dresser drawers. Have you ever noticed a musty odor when you open a dresser drawer that isn’t used very often? Place some drying packets in the drawer to keep the things inside fresh and dry.

Freshen luggage. When returning home from a long trip, dirty laundry in luggage can cause smelly, and even moldy luggage. Carry some desiccant packs with you and turn them loose in your luggage to do their job on the way home. You’ll still need to wash your laundry, but at least it (hopefully) shouldn’t be moldy!

Revive your used packets…Don’t Throw them Out!
When your packets have been used and reused, don’t toss them! They can be revived by placing them outside in the sun on a dry, hot day. Afterwards, store them in a tightly closed container until you need them again.

If that won’t work for you, place the used packets on a clean, dry baking sheet and place them in your oven set at its lowest temperature. Allow them to “bake” for an hour or more to dry them out. (Be careful not to burn the packets during the process. If you see the packets turning dark, remove them from the oven!) Store them in an airtight container.

Better yet, if you have a dehydrator, place the used packets in the dehydrator with the temperature set at about 120°F for 2 or more hours. Return them to your storage container to be used again.

Resources
https://www.practicallyfunctional.com/17-uses-for-desiccants-how-to-make-your-own/

https://www.makelifelovely.com/6-uses-for-silica-gel-packets-dont/

https://www.edcosupply.com/3-unbelievable-uses-for-desiccant-packs/

https://www.mythirtyspot.com/17-clever-ways-to-use-silica-gel-that-you-never-knew/

https://www.littlethings.com/silica-gel-household-uses/1

https://www.bobvila.com/slideshow/10-reasons-you-shouldn-t-toss-silica-gel-packets-51628

https://www.ifixit.com/Answers/View/403/What+is+the+best+way+to+dry+used+desiccant+Silica-Gel