If you have an abundance of fresh beets, you may want to freeze them so they’ll keep for later. The process is not hard, but it does take a little effort. Below is a video demonstrating how to freeze fresh beets. The steps are outlined below the video. I hope this helps!
Enjoy,
Judi
Steps to freeze fresh beets:
Cut off the stems, leaving about 2 inches attached to the beet. Do not cut off the tap root.
Wash the beets, and do not peel them.
Put your washed beets in a pot and cover them with water, like you would boil a whole potato.
Boil the beets until they are tender, until a sharp knife can be easily inserted into the beet.
Transfer the beets from the boiling water to a bowl of cold water. Allow them to stay there until they are completely cooled.
Remove the beets from the cold water and place them on a cutting board or plate (a plate may be preferred since the beets may stain a cutting board).
Cut off the stems and tap root. Remove the skin, either with a paring knife, or by gently rubbing the beet with your fingers.
Cut the beets into desired size pieces and lay them so they don’t overlap on a parchment paper-lined tray or baking sheet.
Place the tray in the freezer and allow the beets to freeze. This may take about an hour.
Transfer the frozen beets to a freezer bag or container. Label them with the current date and use them within one year, for best quality. They will be edible beyond that, but the quality may deteriorate.
About Judi
Julia W. Klee (Judi) began her journey enjoying “all things food” in elementary school when she started preparing meals for her family. That love of food blossomed into a quest to learn more and more about health and wellness as related to nutrition. She went on to earn a BS Degree in Food and Nutrition, then an MS Degree in Nutrition. She has taught nutrition and related courses at the college level to pre-nursing and exercise science students. Her hunger to learn didn’t stop upon graduation from college. She continues to research on a regular basis about nutrition as it relates to health. Her hope is to help as many people as possible to enjoy foods that promote health and wellness.
The following is a comprehensive article all about beets. If you need to know a little something about beets, you should find the answer here, from what they are and their health benefits, to how to select, store and prepare them, to tips for using them, to what goes with them, to suggested recipe ideas, and more! Read on…
Enjoy!
Judi
Beets 101 – The Basics
About Beets
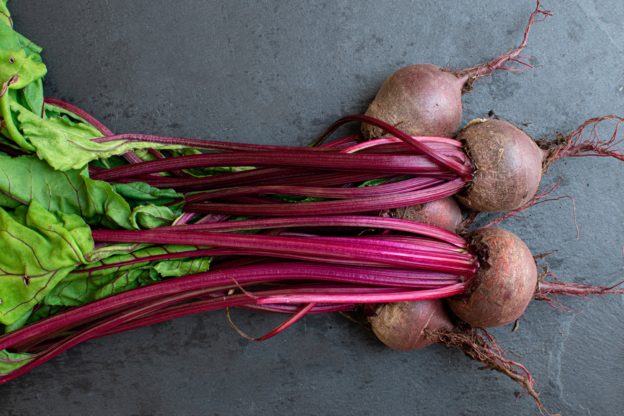
Beets are root vegetables with a deep, colorful round or oblong root, with long, stems growing upward with bright green leaves at the top. All parts of the plant are edible. Beets are in the same plant family as Swiss chard and their leaves resemble Swiss chard in both taste and texture. The beets we typically find in grocery stores are a rich, reddish-purple color, but they can also be found with white, golden/yellow, and even rainbow color roots.
Beet roots appear to be hardy since they can be hard to cut, but they bruise and puncture easily. This causes their colorful pigments (which are healthful phytonutrients) to leach out when cooked. So, it is helpful to treat beet roots as a delicate food, even though they appear to be hardy.
Beets have a high sugar content which makes them an important source for sugar in the sweetener industry. However, the beets used for sugar consumption are a different variety then what we typically purchase in the store.
Beets roots may be eaten cooked or raw. Raw beet roots have a crunchy texture that becomes soft and buttery when they are cooked. Beet roots are more often eaten cooked than raw. They are the main ingredient in the eastern European soup, borscht. In many areas, beets are available year-round, but they are in season from June through October.
Beet greens have an earthy, somewhat bitter flavor, like that of Swiss chard. Beet greens are delicious and can be eaten raw or prepared like Swiss chard, spinach, or any other delicate leafy green vegetable. They are rich in nutrients including many vitamins, minerals, and carotenoids.
Nutrition and Health Benefits of Beets
Beet roots are rich in folate, manganese, potassium, copper, fiber, magnesium, phosphorus, Vitamin C, iron, and Vitamin B6. One cup of cooked, sliced beets has 75 calories.
One cup of cooked beet greens is high in Vitamins K, A, C, E, B1, B2, B6, folate and pantothenic acid. They are also rich in potassium, manganese, magnesium, copper, calcium, iron, phosphorus, and zinc. One cup of cooked beet greens has only 39 calories. That’s a big nutritional boost for so few calories. So, don’t toss the greens!
Antioxidant, Anti-Inflammatory, and Detoxification Effects. Beet roots are rich in colorful pigments and other compounds (betaine, betalains, nitrates, and others) that offer many health benefits. Researchers have found that betaine is used in many cellular functions and protects cells against oxidative stress which can damage cells. Betalains, which give beets their rich color, have strong antioxidant, anti-inflammatory, and detoxification effects. The nitrates in beets help to relax and expand blood vessels, increasing blood flow and lowering blood pressure.
Possible Anti-Cancer Effects. Preliminary lab studies with human cells have shown that the compounds in beets may have anti-cancer benefits, helping to protect us from colon, stomach, nerve, lung, breast, prostate, and testicular cancers. Large-scale human studies still need to be conducted, but future research may verify that beets may be protective against cancer.
Glycemic Load. Beets are known to have a high sugar content, and some people avoid eating them for this reason. Even though beets have more sugar than other root vegetables, their effect on blood sugar is countered by their high fiber, which slows the sugar’s absorption into the bloodstream. Because of the fiber content, when included in a meal, beets are considered to have a low glycemic load, so they should not be of concern for most people.
Don’t Toss the Greens! Beet greens are also worth mentioning for their high nutritional value. Many people toss them away, but they are completely edible and very nutritious, so enjoy them as a side dish, added to stir-fry vegetables or toss them in a salad or soup! Beet greens are rich in many nutrients, as stated earlier. One cup of beet greens provides about 2400 International Units of beta-carotene (a Vitamin A precursor) that is linked to eye and skin health, and a reduced risk of breast cancer.
Possible concerns…
Beeturia. Beeturia is an uncommon condition where urine turns a reddish color after the consumption of beet roots. This is not a harmful condition and should not be of concern. About 5 to 15% of American adults experience this condition. People with problems metabolizing iron are more prone to this condition. If you experience beeturia and suspect you are deficient in iron, or have an iron overload or problems utilizing iron, consult your doctor regarding your condition.
It is also possible for stool to be reddish after beet consumption. This condition is more common in children than adults. It is not harmful.
Oxalates. Beets are known to be high in oxalates, naturally occurring acids found in many foods. Oxalates play a supportive role in the metabolism of many foods, but some people experience problems when ingesting a lot of them. When combined with a high level of calcium in the body, oxalates may promote the formation of kidney stones in some people. If you have problems utilizing oxalates, it may be wise to limit the amount of beets you include in your diet.
How to Select Fresh Beets
Look for fresh beets that are small to medium in size, are firm and smooth-skinned, and have a deep color. Smaller beet roots will be more tender than larger ones. Avoid beet roots that are soft, with bruises or spots, or have wet areas. Such problems indicate spoilage. Older beet roots may be shriveled and will be tough and fibrous. Beets larger than 3 inches in diameter will be touch and fibrous.
If you plan to eat the beet greens (which are delicious in themselves), look for those that appear fresh, tender, and have a bright green color.
How to Store Beets
If your fresh beets still have leaves/stems attached, cut the leaves with most of the stems away from the root. Leaving about 2 inches of stems still attached helps to keep the beet roots from bleeding during cooking. Also, do not cut roots attached to the beet itself. Store your beet roots, unwashed, wrapped in a dry cloth or paper towel, placed in a plastic bag in the refrigerator. They should keep for about 10 days, up to 3 weeks.
Store unwashed beet greens wrapped in a dry cloth or paper towel, placed in a plastic bag, and stored in the refrigerator. Use them within four days.
How to Prepare Beets Beet Roots. Wash your beet roots by gently rinsing them under running water. Wearing kitchen gloves can help to keep your hands from getting stained. Trim the stems from the bulb, leaving about 2 inches of the stems attached. Do not trim roots away from the bulb.
Beets may be eaten raw, shredded for salads. They can also be enjoyed cooked by boiling, steaming, stir-steaming, or roasting them. They can be peeled before or after being cooked. Leaving the peel on and roots attached while being cooked can help to keep their colorful pigments from leaching into the cooking liquid. After being cooked, the peels should easily slip off. An easy way to prepare them for steaming is to cut the beet root into quarters, leaving 2 inches of tap root and one or two inches of stems attached. The skin can be removed after the pieces are cooked.
It is important to note that the colorful, healthy pigments that give beets their rich color, are water-soluble and leach out during the cooking process. To help preserve these important compounds, it is recommended that beets be cooked for the least amount of time possible, and with one or two inches of stems still attached, along with the roots.
Beet Greens: Prepare beet greens as you would any other tender leafy green, such as Swiss chard. Simply wash the greens and cut or tear them as desired. They can be eaten raw, sautéed in a small amount of olive oil and garlic, or stir-steamed in a little vegetable broth or water. Season with salt and pepper and some red pepper flakes, if desired. Finish them with a splash of white wine, lemon juice, or vinegar. The added acidic ingredient at the end will brighten the flavor and make them even more inviting.
How to Freeze Beets
Choose fresh, tender beets that are small to medium size. Buying them all about the same size will allow them to cook within the same time frame. Cut off the leaves and stems, leaving about an inch or two attached to the beet. Leave the roots attached. Leaving some of the stems attached and the roots intact helps to keep the beets from bleeding during the cooking process.
Wash your beets well to remove any dirt or debris. Do not peel them yet. Fill a pot with water and add the beets. Bring everything to a boil, and cook anywhere from 25 to 50 minutes, depending on the size of the beets. They are done when they are fork tender. When they are cooked, transfer them to a bowl of ice water and allow them to cool completely. Then remove the tops, roots, and skins, which should practically slip off with your fingers. Cut the beets into desired size pieces. Lay them on a parchment paper lined baking sheet in a single layer. Place them in the freezer until completely frozen. Transfer your frozen beets to a freezer bag or container and remove as much air as possible. Beets have a high water content, so they will keep best in an air-tight container with as little air as possible. Label the container and return them to the freezer. Beets will keep well for about one year. They will be edible beyond that, but their quality may decline thereafter.
Quick Ideas and Tips for Using Beets * If your hands get stained when preparing beets, rub them with some lemon juice and the stains should come off.
* If your countertop or floor get stained with beet juice, clean them with some well-diluted bleach and the stain should come off.
* When buying fresh beets, be sure to remove the stems and leaves from the beet roots before storing them, leaving about one to two inches of stems still attached to the bulb. Leaving the leaves attached will cause the roots to go bad faster. Also, leave the roots attached to the bulb, which will help to preserve the color during the cooking process.
* Raw beet roots can be grated and sprinkled on salads for a flavor, crunch, and color boost.
* Beet greens can be stir-steamed quickly in a small amount of vegetable broth or water. This makes a very fast, easy, delicious, and nutritious side dish to go with just about any meal.
* In case you’re wondering, the beets we buy in the store have not been genetically modified. However, beets used for sugar production have been modified. So, if you’re avoiding genetically modified foods, you should be aware of this.
* One way to roast beets while keeping them tender is to wrap them in foil before roasting. That will allow the sugars to caramelize while the foil locks in the moisture, keeping them moist and tender. Preheat oven to 350°F. Remove the stems from the bulb, leaving one to two inches of stems still attached. Cut roots back, leaving an inch or two still attached to the bulb. Scrub the beet well to remove any dirt or debris. Place your prepared beets on a large sheet of aluminum foil, drizzle them with a little olive oil, and season with salt and pepper, or as desired. Fold the foil and crimp the edges, wrapping them together in a foil packet. Bake them for 40 to 60 minutes, until tender. Test by poking them with a knife through the foil packet. When tender, remove them from the oven and allow them to cool in the foil packet. When they are cool enough to handle, remove the skins.
* Another way to roast beets is to leave the roots attached and cut the stems off, leaving about 2 inches still attached to the beet root. Wash the beets to remove any dirt or debris. Place them in a casserole dish that has a lid. Add a little water to the dish with your prepared beets. Cover the dish and roast them at 425°F for 40 to 45 minutes, or until tender. Allow them to cool, then cut off the roots and stems, and slip off the skins. Serve as a side dish, season them with a vinaigrette dressing, or add them to soup.
* Try dressing diced roasted beets with a little lemon juice and yogurt.
* Top cubed, roasted beets with a mustard vinaigrette dressing and serve with your favorite green salad.
Herbs/Spices That Go Well with Beets
Allspice, anise, basil, bay leaf, capers, caraway seeds, cardamom, chervil, chili pepper flakes, cilantro, cinnamon, cloves, coriander, cumin, curry powder, dill, fennel seeds, ginger, lemongrass, mace, marjoram, mint, mustard powder, nutmeg, oregano, paprika, parsley, pepper, poppy seeds, sage, salt, savory, star anise, tarragon, thyme
Foods That Go Well with Beets Proteins, Legumes, Nuts, Seeds: Beans, beef, black-eyed peas, chickpeas, duck, edamame, eggs (esp. hard boiled), fish, lentils, nuts (esp. hazelnuts, macadamia, pecans, pine nuts, pistachios, walnuts), poppy seeds, pork, pumpkin seeds, sunflower seeds, tofu
Other Foods: Agave nectar, chocolate, cocoa, honey, horseradish, lavender, maple syrup, mayonnaise, oil, soy sauce, stock (vegetable), sugar (esp. brown), vinaigrette, vinegar (esp. balsamic, cider, red wine, sherry, white balsamic, white wine), wasabi, wine (dry red)
Beets have been used in the following cuisines and dishes…
Baked goods (i.e. cakes), chips, chutneys, crudités, desserts, falafel, hash (i.e. red flannel), juices (i.e. beets, carrots, celery), relishes, risottos, Russian cuisine, salads, soups, stews, tartares, veggie burgers
Suggested Food and Flavor Combos Including Beets Add beets to any of the following combinations…
Page, Karen. (2014) The Vegetarian Flavor Bible. New York, NY: Little, Brown and Company.
About Judi
Julia W. Klee (Judi) began her journey enjoying “all things food” in elementary school when she started preparing meals for her family. That love of food blossomed into a quest to learn more and more about health and wellness as related to nutrition. She went on to earn a BS Degree in Food and Nutrition, then an MS Degree in Nutrition. She has taught nutrition and related courses at the college level to pre-nursing and exercise science students. Her hunger to learn didn’t stop upon graduation from college. She continues to research on a regular basis about nutrition as it relates to health. Her hope is to help as many people as possible to enjoy foods that promote health and wellness.
The following is a complete article about the herb rosemary, from what it is, to its health benefits, to how to prepare, preserve, and use it, to tips, ideas, and suggested recipes using rosemary, AND more! If you need information about this popular herb, hopefully you’ll find it here.
Enjoy!
Judi
Rosemary 101 – The Basics
About Rosemary
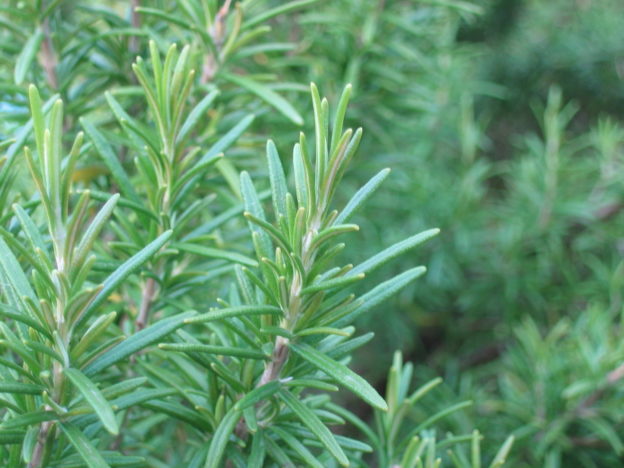
Rosemary, Rosmarinus officinalis, is a small evergreen bush with fragrant, evergreen, needle-like leaves. The bush produces white, pink, purple, or blue flowers. It is a member of the mint family. Rosemary is native to the Mediterranean region.
Rosemary has a pine-like fragrance and flavor that is balanced by a rich pungency. It has been used to flavor food since at least 500 B.C., and is still highly favored by many chefs today. Additionally, rosemary has been used since ancient times for its medicinal properties. It is believed to stimulate and strengthen memory. In the 16th and 17th centuries, rosemary became popular as a digestive aid. Today, researchers are focusing on the beneficial compounds in rosemary and are uncovering even more benefits from this ever-popular herb.
Nutrition and Health Benefits of Rosemary
Rosemary is a good source of Vitamin A.
It also contains compounds that help to stimulate the immune system, increase circulation, and improve digestion. Anti-inflammatory compounds in rosemary appear to help reduce the severity of asthma attacks. Rosemary has also been shown to increase blood flow to the head and brain, improving concentration, which explains its age-old usage for improving memory.
How to Select Rosemary The flavor of fresh rosemary is considered to be better than that of the dried herb, so most chefs will recommend fresh over the dried form. Fresh rosemary is often sold in small bunches in sealed plastic packages in the produce section of many grocery stores. Look for sprigs that aren’t wilted, dried out, moldy, or discolored.
If you prefer dried herbs, most grocery stores carry dried rosemary in the spice isle of the store.
How to Store Rosemary Storing Fresh Rosemary. To keep your fresh rosemary sprigs from drying out, wrap them loosely in a slightly damp paper towel or cloth, place it in a plastic bag or storage container, and store it in the refrigerator. Wrapping the sprigs tightly may invite mold, so be sure you wrap them loosely to allow some air around them. Rosemary should keep fresh for one to three weeks, depending on how long it has been since it was harvested.
Storing Dried Rosemary. Store dried rosemary in an airtight container in a cool, dry, dark place.
How to Preserve Fresh Rosemary
Fresh rosemary may be stored in the freezer, either in ice cubes or as individual sprigs. It may also be dried, although the drying process does reduce some of the flavor. When using dried rosemary in place of fresh rosemary, use 1/4th to 1/3rd of the amount called for in a recipe.
Ice Cube Method. Remove the leaves from the stems, and chop them as desired. Place the prepared rosemary leaves in ice cube trays in desired amounts. Fill the trays with water and freeze. Once frozen, transfer the cubes to a freezer bag or container. When needed, place a cube or two in whatever food, soup, or stew as you’re cooking. Use within 4 to 6 months.
Freeze Individual Sprigs. To freeze individual rosemary sprigs, first wash and dry them well. Then spread them in a single layer on a baking sheet or tray and place them in the freezer for about 30 minutes, or until frozen. Transfer them to a freezer bag or container and return them to the freezer. Use within 4 to 6 months.
Dehydrating Rosemary. Wash and dry your fresh rosemary sprigs. Place them in a single layer on food dehydrator trays and return the trays to the dehydrator. Set the dehydrator for a very low setting, usually 95 to 115°F, as indicated in the owner’s manual of your dehydrator. Dry the rosemary until the leaves are dry and brittle. The owner’s manual of your dehydrator should give you suggested drying times for herbs. Remove the leaves from the stems, and discard the stems. Store your dehydrated rosemary leaves in an airtight container in a cool, dry, dark place. Properly stored dried rosemary will keep indefinitely, but the flavor will dwindle after one or two years.
Oven Dried Rosemary. Wash and dry your fresh rosemary sprigs. Place them in a single layer on a parchment paper lined baking sheet. Place them in the oven at the lowest temperature possible. If you have a gas oven, the pilot light may provide enough heat to dry the springs. Allow them to bake until they are dry, brittle, and the leaves easily fall off the stems. The process can take anywhere from 1 hour to 1 or 2 days, depending upon the oven temperature and humidity level in your area. If your oven will not operate at a very low temperature (such as below 170°F), it may be necessary to leave the oven door open about 2 or 3 inches to keep the temperature down during the drying process. Once they are dry, remove the leaves from the stems. Store your dried rosemary leaves in an airtight container in a cool, dry, dark place. Properly stored dried rosemary will keep indefinitely, but the flavor will dwindle after one or two years.
Hanging Rosemary to Dry. Rinse and pat your rosemary sprigs dry. Tie sprigs together at the base of the stems with twine or a rubber band. Hang them upside down in a well-ventilated, dry area. To keep the herb clean during the process, they can be covered with a paper bag by poking the cut ends of the stems through the bottom of a paper bag then hang them upside down. Or hang the sprigs upside down within a paper bag that has some holes punched into it. This allows air to reach the sprigs while keeping dust from settling on them as they dry. Allow them to dry for about 2 weeks, or until the leaves are dry, brittle, and can be removed easily from the stems. Check them regularly to be sure they have not gotten moldy or infested with insects. The drying process may take about two weeks. When they are dry, separate the leaves from the stems and store the leaves in an airtight container in a cool, dry place. Discard the stems. Store your dried rosemary leaves in an airtight container in a cool, dry, dark place. Properly stored dried rosemary will keep indefinitely, but the flavor will dwindle after one or two years.
Microwave Drying Rosemary. The microwave can be used to quickly dry fresh rosemary if you’re in a hurry and need dried rosemary right away or don’t want to take a lot of time to dry the sprigs. Rinse and dry your fresh rosemary sprigs. Spread them out on a layer of paper towels on a microwave safe dish or tray. Place them in the microwave and cover them with another layer of paper towels. Microwave on high for one minute, then for 20 seconds at a time until they are dry enough to be crumbled. Separate the leaves from the stems. Discard the stems. Use the leaves as needed or allow them to cool. Store your dried rosemary leaves in an airtight container in a cool, dry, dark place. Properly stored dried rosemary will keep indefinitely, but the flavor will dwindle after one or two years.
How to Prepare Fresh Rosemary
Simply rinse rosemary sprigs under cool water and shake or pat dry. They may also be swished around in a bowl of cool water. The leaves can easily be removed from the stems by grasping the tip of the stem with one hand, then grasp the stem with fingers of the other hand and gently push your fingers along the stem, removing the leaves as you push upward. Whole sprigs may be added to soups, stews, and meat dishes. Just remember to remove the sprigs before serving.
Quick Ideas and Tips for Using Rosemary * When storing fresh rosemary, wait to wash it until you’re ready to use it. Washing it in advance may invite mold.
* Add fresh rosemary to omelets and frittatas.
* Try adding rosemary to tomato sauce and soups.
* Make a dipping sauce for bread by combining pureed fresh rosemary leaves with olive oil.
* Mince rosemary leaves if not using whole sprigs. The leaves are needle-like and will remain tough even after being cooked.
* The flavor of rosemary is strong. When adding it to a dish, use less rather than more. You can always add more if desired.
* Because the flavor of rosemary is strong, it pairs especially well with strong-flavored meats such as goat and lamb.
* When adding whole rosemary sprigs to a cooked dish, be sure to remove them before serving. The stems will remain tough, and could possibly be a choking hazard.
* The flavor of dried rosemary is concentrated. Dried rosemary will continue to release its essential oils and flavors while being cooked. Excessive cooking may make it bitter. So, using it in moderation may help to avoid bitterness or an overpowering flavor from the dried herb.
* If a recipe calls for fresh rosemary and you only have dried, use one-fourth to one-third of the amount called for when substituting dried for fresh.
* If a recipe calls for adding one sprig of fresh rosemary and you only have dried, assume that one sprig equals one teaspoon of leaves. When converting that to dried, use 1/4th to 1/3rd teaspoon.
Herbs and Spices That Go Well with Rosemary
Bay leaf, fennel seeds, lavender, marjoram, mint, oregano, parsley, pepper, sage, thyme
Foods That Go Well with Rosemary Proteins, Legumes, Nuts, Seeds: Beans (esp. cannellini, fava, green, white), chicken, eggs, lamb, lentils, peas (split), pine nuts, pork, salmon, tofu, tuna
Vegetables: Asparagus, beets, bell peppers, Brussels sprouts, cabbage, carrots, cauliflower, celery, chives, eggplant, fennel, garlic, leeks, mushrooms, onions, parsnips, potatoes, radicchio, scallions, shallots, spinach, squash (summer and winter), sweet potatoes, tomatoes, and tomato juice, vegetables (in general), zucchini
Other Foods: Gin, honey, oil (esp. olive), sherry, vinegar, wine
Rosemary has been used in the following cuisines and dishes…
Baked goods (breads, cakes, cookies, focaccia, scones, shortbread), bouquet garni, desserts, egg dishes, French cuisine, grilled foods, herbes de Provence, Italian cuisine, kebobs, marinades, Mediterranean cuisines, pasta dishes, pizza, risotto, salad dressings, salads, sauces, soups, stews, stock, stuffing, tomato sauce
Suggested Food and Flavor Combos Using Rosemary Add rosemary to any of the following combinations…
Page, Karen. (2014) The Vegetarian Flavor Bible. New York, NY: Little, Brown and Company.
About Judi
Julia W. Klee (Judi) began her journey enjoying “all things food” in elementary school when she started preparing meals for her family. That love of food blossomed into a quest to learn more and more about health and wellness as related to nutrition. She went on to earn a BS Degree in Food and Nutrition, then an MS Degree in Nutrition. She has taught nutrition and related courses at the college level to pre-nursing and exercise science students. Her hunger to learn didn’t stop upon graduation from college. She continues to research on a regular basis about nutrition as it relates to health. Her hope is to help as many people as possible to enjoy foods that promote health and wellness.
Bok choy is a delicious cruciferous leafy green vegetable that is often included in Asian stir-fries. Yet, there are many ways to use bok choy beyond that. Read on to get plenty of ideas and information about this wonderful, often underutilized vegetable.
Enjoy!
Judi
Bok Choy 101 – The Basics
About Bok Choy
Bok choy is a cruciferous vegetable that has been given a variety of names: Bok Choy, Pak Choi, Chinese Cabbage, White Cabbage, Mustard Cabbage, Celery Cabbage, Peking’s Cabbage, and Chinese White Cabbage, among others. It is not to be confused with Napa cabbage, which is sometimes also referred to as Chinese cabbage. They are two different varieties of cruciferous vegetables. Unlike other vegetables in the cruciferous family, bok choy does not form a “head.” Instead, the stalks are elongated with leaves loosely clustering toward the top half of the plant. The size can range anywhere from 4 to 12 inches tall.
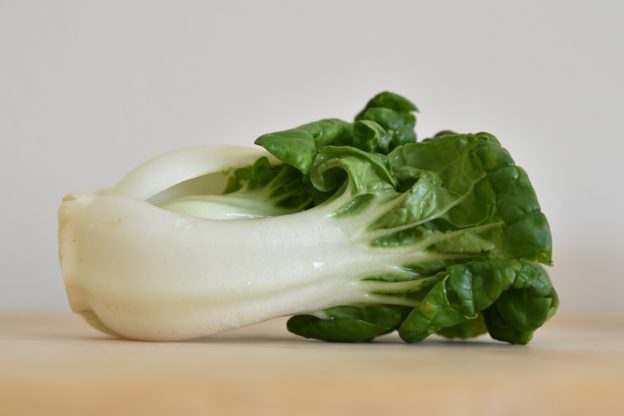
There are many varieties of bok choy, including those with different colors, some with green stalks and others with purple leaves. The common variety available in the United States has slightly flattened white stalks with spoon-shaped green leaves.
Bok choy has been cultivated in China for over 5,000 years, and has been grown in North America for over 100 years. Most North American bok choy is grown in Mexico, with some also grown in Canada and the United States in California, Arizona, and Texas.
Bok choy has a mild flavor, with the leaves and stalks all being edible. It has a mild flavor, sometimes with a slight sweetness in the stalks. It can be eaten raw, but only in moderation, especially if you have hypothyroidism. (Excessive raw cruciferous vegetables may hinder thyroid activity.) Bok choy can also be enjoyed steamed, stir-fried, braised, grilled, roasted, stewed, and even added to soups. When cooked for a short length of time, bok choy will have a bit of a crisp texture. Extended cooking gives boy choy a creamy texture.
Nutrition and Health Benefits of Bok Choy
Bok choy is an excellent source of Vitamins K, C, and A (in the form of carotenoids), potassium, folate, Vitamin B6, calcium, and manganese. It is also a very good source of iron, Vitamin B2, phosphorus, fiber, and protein. It also contains choline, magnesium, niacin, Vitamin B1, copper, omega-3 fatty acids, zinc, and pantothenic acid. Bok choy also contains a number of flavonoids and antioxidants. One cup of raw, shredded bok choy has a mere 9 calories, with about 20 calories in 1 cup of cooked bok choy.
Since bok choy is a leafy green cruciferous vegetable, it’s packed with health benefits.
Fights inflammation and oxidative stress. Bok choy contains a number of antioxidants that are known to fight inflammation and protect cells throughout the body. It is an exceptionally good source of quercetin, a flavonoid with antioxidant properties. According to WebMD, quercetin has antioxidant and anti-inflammatory effects which might help reduce inflammation, kill cancer cells, control blood sugar, and help prevent heart disease.
Reduces risk of heart disease. Researchers have found a link between leafy green cruciferous vegetables and a decreased risk of cardiovascular disease. A research study found that people who consumed more of these vegetables showed a 15% lower rate of cardiovascular disease.
Fights cancer. Cruciferous vegetables have anti-cancer properties. Studies suggest that eating more cruciferous vegetables helps to protect against various cancers, including prostate, lung, breast, and colorectal cancers.
Low in FODMAPs. FODMAPS are specific types of carbohydrates called “fermentable oligo-, di-, mono-saccharides, and polyols. People with irritable bowel syndrome and Crohn’s disease often find relief of symptoms when they eat diets low in such carbohydrates. Bok choy is low in these factors and are permitted on a low-FODMP diet.
Non-dairy calcium. Bok choy is an excellent source of calcium, with 158 mg in one cup of cooked bok choy. This can be an important source of dietary calcium for those who do not consume dairy products.
Vitamin K. Bok choy is rich in Vitamin K, a nutrient that is needed for proper blood clotting. Those who take blood thinners may need to regulate the amount of Vitamin K-rich foods they eat so their blood clotting function stays within normal limits. If you are on such medications, consult with your doctor before increasing the amount of bok choy you eat.
How to Select Bok Choy
Choose bok choy with firm, brightly colored leaves, and moist, sturdy stems. The leaves should not be wilted and be without browning, yellowing, and small holes. The heads can be small to very large. In most places, bok choy is available year-round, but its growing peak is from the middle of winter to early Spring.
How to Store Bok Choy
Most resources suggest storing bok choy, unwashed, in a loose (or perforated) plastic bag in the crisper drawer of the refrigerator. It should be used within a few days, but may keep up to 1 week.
How to Freeze Bok Choy Remove the stalks from the base and wash them well to remove any dirt or debris. Cut the stalks and leaves into desired size pieces. Bring a large pot of water to boil, then place the prepared bok choy into the boiling water. Set the timer right away for 2 minutes. When the time is up, or when the leaves turn a very bright green, remove your bok choy from the boiling water and immediately transfer it into a bowl of ice water. Leave it there for 2 or 3 minutes until it is completely chilled. Drain it well and dry the leaves as much as you can with a clean cloth or paper towel. There are two ways to store your blanched bok choy in the freezer:
(1) Place your prepared bok choy in a freezer bag or container. Remove as much air as possible, and if it is in a bag, flatten the bag and lay it on its size in the freezer.
(2) If you prefer your bok choy pieces to be frozen separately so it’s not in a big lump, spread your blanched/dried bok choy on a waxed paper or parchment paper-lined baking sheet. Place the baking sheet in the freezer for about 2 hours, until the vegetable pieces are completely frozen. Then transfer them to your desired freezer container and return them to the freezer.
Properly frozen blanched bok choy will keep in the freezer for up to 12 months. It will be safe to eat beyond that, but the quality may decline with age.
How to Prepare Bok Choy
Small, baby bok choy can be cut in half lengthwise, then washed and drained before being cooked. Larger heads should have stalks removed from the base, either individually or by cutting across the base of the head, removing all stalks at once. Rinse them well either under running water or in a tub of water to ensure any dirt has been removed. Drain excess water off, then cut as needed for your recipe.
Quick Tips and Ideas for Using Bok Choy * For a quick and easy side dish, stir-steam bok choy, snow peas and mushrooms in a small amount of vegetable broth. Season as desired (aromatics like onions, garlic and ginger would work well). A small drizzle of soy sauce or tamari would blend well with these vegetables.
* The bok choy stalks can have a slight sweetness to them. Try adding some raw bok choy to a green salad.
* For an easy side dish, slice baby bok choy lengthwise and braise it in a mixture of your favorite stock, ginger, garlic, soy sauce, and red pepper flakes. Drizzle it with a little sesame oil for added flavor and garnish.
* Use bok choy leaves on a sandwich in place of lettuce.
* If you like to fill celery sticks with things like nut butter, cream cheese, or guacamole, try filling bok choy stems with those things instead.
* Try grilling halves of baby bok choy. Cut them lengthwise, wash and drain them, and drizzle with a little oil and a sprinkling of salt.
* Add thin shreds of bok choy leaves as a last-minute garnish to soup.
* Bok choy is often eaten stir-fried with a little soy sauce and garlic. If you’re new to bok choy, this is a great way to start enjoying it! Simply heat a little oil in a wok or frying pan. Add aromatics of choice (such as garlic, onion, and/or minced ginger), and stir-fry for 3 to 8 minutes until it is crisp-tender. Drizzle with a little soy sauce and enjoy!
* Try braised bok choy for something a little different. Chop the bok choy into bite-size pieces and heat it in a pan with some broth of choice. Add aromatics as desired (garlic, onion, ginger, chili paste). Cover and simmer up to 20 minutes, until the vegetable is as tender as you want. Drizzle with toasted sesame oil for added flavor, and enjoy!
* Try roasted bok choy, by chopping the leaves and stems into bite-size pieces. Drizzle with some oil and sprinkle with salt. Toss the pieces to coat them, then spread them on a baking sheet. Roast them anywhere from 350F to 425F for up to 20 minutes, until the leaves are tender and starting to brown.
* Baby bok choy is more tender and a bit sweeter than its full-grown counterpart. It can be cooked whole, sliced in half lengthwise, or with the stalks separated, like you would the larger variety.
* Note that the leaves of bok choy will cook faster than the stems, so add the leaves later in cooking if you don’t want them to overcook.
* To quickly and easily remove stalks from bok choy, simply cut across the root end about 1 inch or so up from the bottom. Discard the bottom end. The stalks will easily separate.
* Besides cooking bok choy with aromatics such as garlic, onions, and ginger, the flavor can further be enhanced by adding any combination of soy sauce, vegetable broth, rice vinegar, sesame oil, honey, and chili flakes.
Herbs/Spices That Go Well with Bok Choy
Cardamom, chili pepper flakes, cilantro, cinnamon, curry powder, five-spice powder, garlic, ginger, lemongrass, salt, turmeric
Foods That Go Well with Bok Choy Proteins, Legumes, Nuts, Seeds: Almonds, beans (esp. black beans), beef, cashews, chicken, peanuts and peanut sauce, pork, seafood, soybeans, tahini, tofu
Other Foods: Chili paste, chili sauce, mirin (a type of rice wine), miso (fermented soybeans), oil (esp. olive, peanut, sesame), soy sauce, stock (i.e. mushroom, vegetable), sugar (brown), tamari, tempeh, vinaigrette, vinegar, wine (esp. dry sherry)
Bok choy has been used in the following cuisines and dishes…
Asian cuisines, casseroles, Chinese cuisine, curries, salads, slaws, soups, stews, stir-fries, Thai cuisine
Suggested Flavor Combos Using Bok Choy Add bok choy to any of the following combinations…
Asian noodles + peanut sauce
Bell peppers + olive oil + mushrooms
Black bean sauce + water chestnuts
Brown rice vinegar + sesame oil + tamari
Chiles + garlic + ginger + sesame oil
Chili flakes + coconut milk + red bell peppers
Garlic + ginger + soy sauce
Garlic + olive oil
Garlic + sesame + tofu
Ginger + tofu
Lemon + tahini
Mushrooms + tofu
Scallions + shiitake mushrooms
Page, Karen. (2014) The Vegetarian Flavor Bible. New York, NY: Little, Brown and Company.
About Judi
Julia W. Klee (Judi) began her journey enjoying “all things food” in elementary school when she started preparing meals for her family. That love of food blossomed into a quest to learn more and more about health and wellness as related to nutrition. She went on to earn a BS Degree in Food and Nutrition, then an MS Degree in Nutrition. She has taught nutrition and related courses at the college level to pre-nursing and exercise science students. Her hunger to learn didn’t stop upon graduation from college. She continues to research on a regular basis about nutrition as it relates to health. Her hope is to help as many people as possible to enjoy foods that promote health and wellness.
If you want a simple treat to make that’s not overly sweet and made without added fat, this is for you! It’s a spin-off from my sweet potato oat cookies, so it’s similar, but not exactly the same. The recipe is fast and easy to put together and can easily be adjusted to make more, if needed. Below is a video demo of how to make these treats. The written recipe follows the video.
Enjoy!
Judi
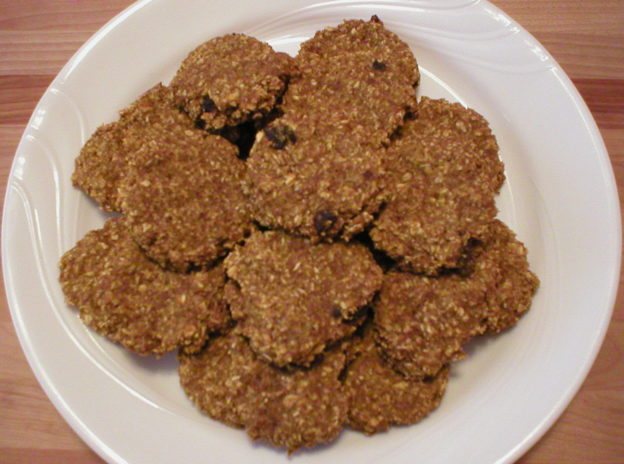
Winter Squash Oat Cookies
Makes About 2 Dozen
2 cups oats (old fashioned or quick, not flavored)
2 tsp ground cinnamon
2 Tbsp ground flax seed
1 cup roasted winter squash (butternut, acorn, buttercup, delicata, kabocha, pumpkin, or turban squash) OR canned pumpkin (not pumpkin pie filling)
2 Tbsp maple syrup (optional)
3-4 Tbsp milk of choice, or enough to make a moist dough that holds together but is not overly wet
Up to ½ cup add-in of choice*
Add the oats, cinnamon and ground flax seed to the bowl of a food processor. Pulse the mixture until the oats are crumbly and coarse, but not a fine powder. Add the squash and maple syrup (if using it), and milk, starting with 3 tablespoons. Pulse the mixture until it is well combined. Add more milk if needed to make the dough moist, but not overly wet. The mixture should hold together well when formed into a ball. Add whatever optional add-in ingredient you want and pulse very briefly to combine the mixture, but not enough to grind up the add-in ingredients.
Allow the mixture to rest about 10 minutes as the oven preheats to 350°F. Scoop the mixture with a #40 cookie scoop, or with two tablespoons onto a parchment paper or silicone-lined baking sheet. Slightly flatten the cookies with your fingers or a spatula, because they will not spread and flatten as they bake.
Bake at 350F for 15 to 18 minutes, until the cookies are lightly browned and set. Allow them to cool on the baking sheet, then enjoy. Store extra cookies in a covered container in the refrigerator.
* Optional add-in ingredients that would work well in these cookies:
Raisins or currants
Chopped pecans
Chopped walnuts
Hemp hearts (hulled hemp seeds)
Dried cranberries
Sunflower seeds
Chocolate chips
White baking chips
Literally anything else you would like to add to them!
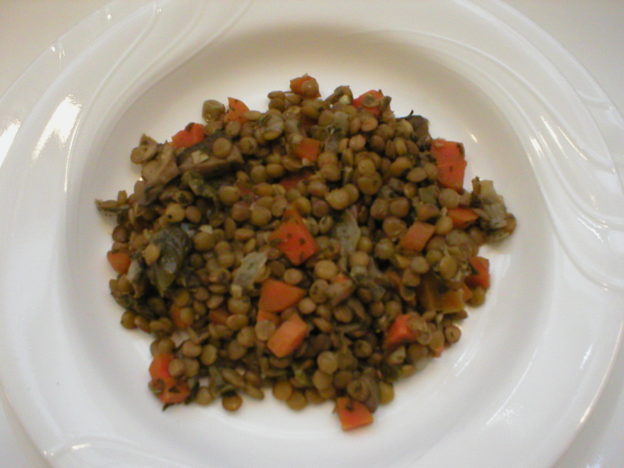
Here’s a REALLY easy recipe for delicious lentils that can be used in a variety of ways. Simply gather your ingredients and add them all to the pot. Bring them to a boil, cover the pot and simmer until the lentils are tender. It’s THAT easy! Serve them as they are, over a bed of cooked grain or pasta, over mashed potatoes, as stuffing for tomatoes or cooked winter squash, in a tortilla wrap, or even as a meatless Sloppy Joe filling. Use your imagination!
Below is a video demonstration of how to cook the lentils. The written recipe is below the video.
Enjoy!
Judi
Simple Lentils Makes About 6 Servings
3 cloves garlic, finely chopped
½ cup diced yellow onion
1/3 cup diced bell pepper
1 cup diced carrot
1 (4.5 oz) jar or can of sliced mushrooms, drained
1 cup dried brown lentils, rinsed and drained
2-1/2 cups vegetable broth
1-1/2 tsp dried thyme
1-1/2 tsp dried parsley
Salt and pepper to taste
Place all ingredients in a medium size sauce pan. Bring to a boil, then lower the heat to simmer. Place a lid on the pot, and allow the lentils to cook, stirring occasionally, for about 30 minutes, until the lentils are tender and most of the liquid is gone. Taste and adjust seasonings if needed. Serve.
Serving Suggestions: Serve the lentils as they are, over a bed of cooked grain of choice (such as rice, quinoa, couscous, millet, barley, wild rice, etc.), over pasta, over mashed potatoes, as a stuffing for tomatoes or winter squash, wrapped in a tortilla, or used as filling for a meatless Sloppy Joe sandwich. The possibilities are only limited to your imagination!
About Judi
Julia W. Klee (Judi) began her journey enjoying “all things food” in elementary school when she started preparing meals for her family. That love of food blossomed into a quest to learn more and more about health and wellness as related to nutrition. She went on to earn a BS Degree in Food and Nutrition, then an MS Degree in Nutrition. She has taught nutrition and related courses at the college level to pre-nursing and exercise science students. Her hunger to learn didn’t stop upon graduation from college. She continues to research on a regular basis about nutrition as it relates to health. Her hope is to help as many people as possible to enjoy foods that promote health and wellness.
About Butternut Squash
Butternut squash is a winter squash with orange-flesh and a sweet flavor. It’s commonly treated as a vegetable, but technically, it’s a fruit since it contains seeds. Butternut squash is very versatile with many culinary uses from both sweet to savory dishes. It is a popular winter squash featuring a large bell-shaped bottom section and a slimmer, tapering neck. It’s often recognized by its tannish colored skin.
Butternut squash, like other squash varieties belongs to the Cucurbitaceae plant family. This family contains a lot of foods many people enjoy regularly, such as watermelons and other melons, and even cucumbers.
Winter squashes and related plants appear to be native to Central and South America. Not surprisingly, such foods have been an important part of the diet of the indigenous people for thousands of years. Since they are rich in nutrients and they store well in cooler temperatures, winter squashes were nutrient-rich foods that helped to nourish ancient people through the colder months when such foods were not in season.
Nutrition and Health Benefits of Butternut Squash
Butternut squash is an excellent source of Vitamin A from its carotenoid content. It also provides plenty of Vitamins C, B6, B2, B3, and K, along with fiber, manganese, copper, folate, pantothenic acid, potassium, and magnesium. Enjoy the seeds for a good supply of Vitamin E. One cup of cooked, mashed butternut squash has a mere 82 calories.
The bright orange color of butternut squash is a clear indication that it is packed with carotenoids, Vitamin A precursors. This makes them powerful antioxidant foods, protecting eye, skin and cardiovascular health, as well as warding off cancer.
Despite the fact that some people consider winter squash to be high-carbohydrate foods, winter squash is considered to be low on the glycemic index, with a rating of 55. Winter squash has been found to steady the release of sugars in the digestive tract, lowering the glycemic response to meals.
How to Select a Butternut Squash
Choose a butternut squash that is free of blemishes or decay, and feels firm and heavy for its size.
How to Store Butternut Squash
Butternut squash will keep well in a cool, dry, dark place. The ideal storage temperature is 50 to 68°F. Freshly picked squash have been stored in these conditions for up to 6 months. Most should store well for 1 to 3 months.
If mold appears on your squash, the molded area should be cut away and the remaining parts of the squash that are still good should be used immediately. Sometimes, commercial growers wax the squashes to prolong their shelf life and deter mold. If yours was not waxed and you want to extend the shelf life, you could oil the squash yourself. Wash the squash well to remove any dirt. Dry it well…make sure it is completely dry before proceeding or moisture left on it may invite decay. Place a small amount of food-grade oil of your choice on a paper towel or cloth, and wipe the entire surface of the squash, spreading a thin layer of oil all over. Be sure you get oil in all cracks and crevices of the squash. Buff off any excess oil. The surface should be shiny, but not oily to the touch. Store it in a cool, dry, dark place.
Once your squash has been cut, it should be tightly wrapped or stored in an airtight container in the refrigerator for no more than a week. Cooked butternut squash should be stored in an airtight container in the refrigerator, and used within 3 to 5 days.
Cooked butternut squash may be frozen in an airtight container. It will keep well for 10 to 12 months. Beyond that, the quality may decline, but it will still be safe to eat.
How to Prepare a Butternut Squash
First remove any label that was placed on your squash at the store. Then rinse the squash with water to clean it off. Butternut squash does not need to be peeled before being cooked, but you can peel it, if desired or if a recipe calls for peeling it first. The peel is tough, but they can be peeled with a vegetable peeler or a knife.
When cutting butternut squash, it’s easiest to cut it in half, separating the neck from the bulb end. Then the seeds need to be removed from the bulb end. They can be removed by scooping them out with a spoon, or by first cutting the bulb in half from top to bottom, then scraping the seeds out with a spoon. The stem end can then be cut off the top of the neck end. The neck end can then be stood upright to remove the peel, then the flesh can be cubed. Or the neck end can be cut in half lengthwise for roasting or cooking in another method.
Roasted Butternut Squash. Butternut squash can be roasted different ways. The squash may be cut into four large pieces (cutting the bulb end from the stem end, then cutting both the bulb and stem ends in half lengthwise) and removing the seeds as described above. Place all pieces, peel side up, on a parchment paper-lined baking sheet and roasting it at 375°F or 400°F until a sharp knife can easily be inserted through the pieces. Remove the tray from the oven and allow the squash to cool enough to be handled. Scrape the flesh from the peel with a spoon and use accordingly in your recipe.
This method can be simplified by placing your entire uncut, washed squash on a baking sheet and roasting it until a knife can easily pierce through its thickest part. Remove it from the oven, allow it to cool enough to be handled, then cut it, removing seeds, stem end, and scraping off the flesh to be used as needed.
Butternut cubes can also be roasted by first cutting the squash in half, separating the bulb end from the neck. Then trim off the stem end, stand the squash piece upright and remove the peel with a knife or vegetable peeler. Then slice the flesh into cubes. Most recipes for roasted butternut squash cubes call for placing the cubes on a parchment-lined baking sheet and coating the cubes with oil, then sprinkling them with salt and pepper to taste. Roast at 400°F or 425°F about 20 to 30 minutes, until fork-tender.
Steamed Butternut Squash. Place medium size chunks of peeled and seeded butternut squash in a steamer basket. Add water to the pot, but not so much that the squash pieces sit in water. Cover the pot with a tight-fitting lid and bring the water to boil. Steam for 10 to 12 minutes, or until the squash pieces are fork-tender. Remove the squash pieces to a bowl and proceed with desired recipe.
Sautéed Butternut Squash. Peeled, seeded butternut squash cubes may be sautéed in oil or butter in a skillet over medium heat. First, warm the fat in the skillet, add the squash cubes, then stir frequently and sauté until lightly browned and caramelized, about 10 to 15 minutes.
How to Freeze Butternut Squash
Cooked, pureed and frozen butternut squash is ready to be used in pies, soups, baked goods or in any recipe calling for pureed pumpkin or other winter squash. Simply wash the squash, cut it as desired, and cook it in whatever way you prefer…roasted with or without oil, steamed, or boiled. Scrape off the pulp from the peel, and puree the pulp in a food processor. Pureeing the pulp is not mandatory, but makes it much easier to work with when it’s time to use it. Place your pureed pulp in a freezer bag or container (leave about one inch of headspace). Label it with the date and store it in the freezer. Frozen pureed butternut squash will keep for 10 to 12 months. It is safe to use beyond that, but the quality may deteriorate.
Quick Ideas and Tips for Using Butternut Squash * To make butternut squash easier to peel before cooking it, microwave it for 2 or 3 minutes first.
* The peel of butternut squash is edible, but tough. If you want to eat the peel, slow roast the squash and the peel will get softer as it roasts.
* For something different, try butternut squash fries instead of potato fries.
* Top salads with cubes of roasted butternut squash.
* Add chunks of butternut squash to stews.
* Stuff a roasted butternut squash half with a mixture of cooked grains and vegetables for a delicious and filling dish.
* Add roasted butternut squash to breakfast for something different.
* Add thin slices of raw butternut squash to salads for added flavor and texture.
* Enjoy roasted butternut squash in place of potatoes, pumpkin, or sweet potato.
* Mash cooked butternut squash with a little milk of choice and cinnamon and serve it instead of mashed potatoes.
* Use pureed butternut squash in place of pumpkin when making pies and tarts.
* Add cooked butternut squash to pasta dishes, or puree it and make an interesting pasta sauce.
* Combine pureed butternut squash with coconut milk for a creamy squash soup.
* Butternut squash seeds are edible! They can be saved and roasted as you would pumpkin seeds. Once scooped out, separate the seeds from the stringy pulp, and rinse them well. Coat the seeds with a little oil, and season them as desired. Spread the seeds in a single layer on a parchment or foil-lined baking sheet and roast them at 225°F for about 15 minutes until the seeds start to pop. Allow them to cool on the baking sheet before serving.
* Do you want to enjoy pureed squash, but are not sure how to flavor it? Try topping pureed butternut squash with cinnamon and maple syrup.
* For an interesting side dish, steam cubes of butternut squash. Then toss with a little olive oil, soy sauce, and ginger. Sprinkle with toasted squash seeds for a little added crunch.
Herbs/Spices That Go Well with Butternut Squash
Allspice, basil, bay leaf, cardamom, cayenne, chili pepper flakes, chives, cilantro, cinnamon, cloves, coriander, cumin, curry powder, garlic, ginger, marjoram, nutmeg, oregano, paprika (smoked)
Foods That Go Well with Butternut Squash Proteins, Legumes, Nuts, Seeds: Beans (i.e. adzuki, lima, pinto, white), chicken, chickpeas, eggs, lamb, nuts (esp. almonds, pecans, walnuts), pork, pumpkin seeds, sesame seeds, sunflower seeds, tahini, tofu
Butternut squash has been used in the following cuisines and dishes…
Baked goods (i.e. muffins), casseroles, gratins, pasta (i.e. gnocchi, lasagna, ravioli), pizza, purees, risottos, soups and bisques, stews, succotash, tarts
Suggested Flavor and Food Combos Using Butternut Squash Add butternut squash to any of the following combinations…
Allspice + cinnamon + cloves + maple syrup + vanilla
Apples + cinnamon + ginger + maple syrup + walnuts
Apples + cheese + honey
Apples + nuts
Balsamic vinegar + mushrooms + pasta
Browned butter + pine nuts + sage + pasta
Fruit (cranberries, dates) + nuts (pecans, pistachios)
Ginger + tamari + tofu
Orange + sage
Quinoa + walnuts
Rosemary + tomatoes + white beans
Sage + walnuts
Page, Karen. (2014) The Vegetarian Flavor Bible. New York, NY: Little, Brown and Company.
About Judi
Julia W. Klee (Judi) began her journey enjoying “all things food” in elementary school when she started preparing meals for her family. That love of food blossomed into a quest to learn more and more about health and wellness as related to nutrition. She went on to earn a BS Degree in Food and Nutrition, then an MS Degree in Nutrition. She has taught nutrition and related courses at the college level to pre-nursing and exercise science students. Her hunger to learn didn’t stop upon graduation from college. She continues to research on a regular basis about nutrition as it relates to health. Her hope is to help as many people as possible to enjoy foods that promote health and wellness.
The following is a comprehensive article all about tomatoes. From what they are to how to select, store, freeze them, and suggested recipes…anything you’re looking for regarding tomatoes should be included in this article. If not, please let me know!
Enjoy!
Judi
Tomatoes 101 – The Basics
About Tomatoes
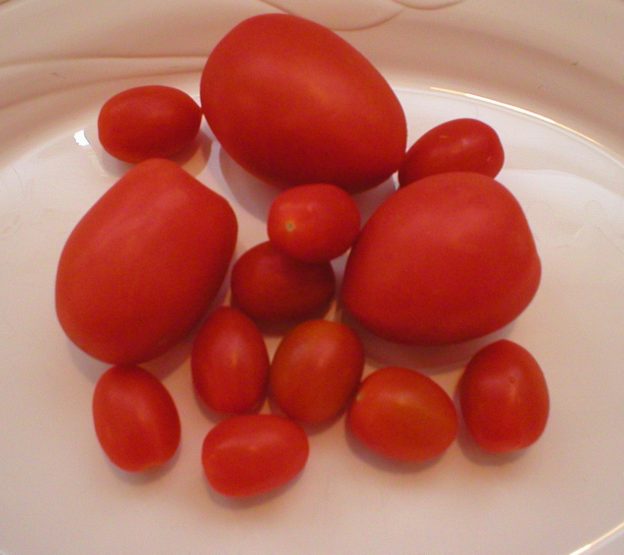
Tomatoes are the fourth most popular vegetable in the United States, following potatoes, lettuce, and onions. We treat tomatoes as vegetables, but botanically they are fruits since they contain seeds of the plant. But in terms of nutrient content, tomatoes have more in common with vegetables than fruits, so treating them as a vegetable is not far off from the truth.
Tomatoes come in a variety of shapes from round to oval and pear-shaped, with sizes ranging from tiny grape tomatoes to very large beefsteaks. Their colors vary also with the most common being orange-red. Other colors of tomatoes include yellow, orange, green, pink, purple, brown, and black. All tomatoes belong to the Solenoid family of plants called the Solanaceae. This is also called the nightshade family of plants.
Tomatoes are native to the western side of South America. It appears they were first cultivated in Mexico. The word “tomato” may have originated from the Aztecan word “tomati” which meant “the swelling fruit.” In much later years, tomatoes made their way to Europe on ships from Mexico returning to Europe. From there, tomatoes became a staple in Mediterranean cuisine.
Today, most commercially grown tomatoes are destined for processing into food products like tomato sauce, tomato paste, canned tomatoes, and tomato juice. In the United States, most tomatoes are grown in California and Florida, followed by a number of other states from the Midwest to the East coast. About a third of the fresh tomatoes sold in the United States are imported from other countries, most notably Mexico, where they are grown mostly in greenhouses.
Nutrition Tidbits and Health Benefits
Tomatoes are an excellent source of Vitamin C, biotin, molybdenum, and Vitamin K. They are also a very good source of many other nutrients including copper, potassium, manganese, fiber and beta-carotene (a Vitamin A precursor), Vitamin B6, folate, niacin, Vitamin E, and phosphorus. They are a good source of chromium, pantothenic acid, protein, choline, zinc and iron. The World’s Healthiest Foods (https://whfoods.com) ranks tomatoes along with kale regarding nutrient content. One cup of fresh tomato slices has 2 grams of fiber with a mere 32 calories.
Lycopene: Lycopene is a type of carotenoid found in some foods that gives them a red color. It is found in tomatoes, watermelon, red oranges, pink grapefruit, apricots, guavas, papayas, and more. Sun-dried tomatoes are a very concentrated source of lycopene. Like other carotenoids, lycopene is fat-soluble, so it is easier to digest and absorb when there is some fat in the same meal as lycopene-containing foods. Because of its fat-soluble properties, lycopene tends to concentrate in blood lipoproteins and fatty tissues such as skin, liver, lungs, and the prostate gland.
Lycopene is not only a color pigment, but also a powerful antioxidant that may help protect cells from free radical damage. If not controlled, free radicals cause cellular damage that leads to oxidative stress, setting the stage for cancer, cardiovascular disease, diabetes and Alzheimer’s disease. Observational studies have found that diets rich in lycopene may be protective against breast, prostate, and lung cancers. The antioxidant properties of lycopene help to balance the free radical activity in the body, which helps to protect us from these conditions. The antioxidant activity of lycopene seems to be enhanced when tomatoes are cooked, especially when cooked with fat. So, feel free to add tomatoes to soups, stews, casseroles, stir-fries, and any other dishes you want, especially if there is a little fat in there too!
Cancer: Tomatoes are an excellent source of Vitamin C and other antioxidants including beta-carotene. These factors help to fight free radicals in the body that are known to cause cancer. Studies have shown that a high intake of beta-carotene aids in the prevention of tumor development in prostate cancer. A study in Japan also demonstrated that beta-carotene may reduce the risk of colon cancer.
Heart health: Tomatoes are rich in the antioxidant nutrients Vitamins C and E, and lycopene. Antioxidants are critical for cardiovascular health since the system carries oxygen throughout the body. Antioxidants are used to protect the oxygen from damage as it travels in the blood. Lycopene is well known for its benefit of protecting fats lining cell membranes. Without this protection, damaged cell membranes can lead to chronic inflammation which in turn leads to damaged blood vessels and atherosclerosis.
Also, regular tomato intake has been shown to improve lipid profiles, reducing total cholesterol, LDL (low-density lipoprotein) cholesterol, and specific markers in the immune system that indicate oxidative stress, a prerequisite for atherosclerosis.
Compounds in tomatoes have also been shown to have anti-clotting effects by helping to prevent excessive clumping of blood platelets. Although platelet clotting is a critical function within our cardiovascular system, excessive clotting is dangerous to our health. This function along with others by compounds in tomatoes makes them an excellent food to consume for cardiovascular health.
Eye Health: Some studies have shown that lycopene may prevent or delay the formation of cataracts, and reduce the risk of macular degeneration in older adults.
All of that combined is plenty of good reason to include tomatoes in your meals whenever you can!
Nightshade Family of Vegetables Tomatoes are members of the nightshade family of plants, Solanaceae. This family includes over 2,000 species of flowering plants, most of which are not edible. However, some of them, like tomatoes, potatoes (not sweet potatoes), peppers, tomatillos, and eggplants are all edible. Cayenne and chili peppers are also included in this same family. These foods are rich in nutrients and serve as staples in many cultures. Yet, despite their nutritional components and health benefits, some people find that they do better without these foods. They find that they contribute to inflammatory bowel disease and other autoimmune conditions.
The complaints about tomatoes and other nightshade foods often focus on the alkaloids found in them. Alkaloids are nitrogen-containing compounds found in the leaves, stems, and vines of nightshade foods. Alkaloids are also found in cocoa, coffee, tea, black pepper, and some honey (depending upon the type of flowers the bees used). They are bitter and function as a natural insect repellent. But those parts of the plants are usually inedible.
The edible portions of nightshade plants also contain alkaloids, but not as much as the inedible parts. Research has found that excessive intake of alkaloids may cause some health issues. “Excessive” is key here, as it may be challenging to ingest a large amount of alkaloids unless you eat inedible parts of the plant. For instance, the amount of alkaloid in a tomato decreases as the tomato ripens. Also, the Food and Drug Administration has set a maximum level of alkaloids in potatoes at 200 mcg per gram. When tested, most potatoes were found to have less than that. Cooking nightshade foods has been shown to reduce their alkaloid content. This is one reason why it is advisable to cook potatoes, rather than eat them raw. Also, removing any sprouting spots, and green areas of potato skin is also advisable since they contain more alkaloids than other areas of potatoes. While the fact that the health conditions of some people (usually arthritis and joint pain associated with rheumatoid arthritis) improve with the elimination of nightshade foods is indisputable, there is currently little scientific research in this area. Therefore, it’s best to avoid nightshade vegetables IF you are sensitive to them. Otherwise, enjoy!
How to Select Tomatoes
Choose tomatoes with a vibrant color. They should be well shaped with smooth skins. Avoid those with wrinkles, cracks, bruises and soft spots. Ripe tomatoes will yield when lightly squeezed, and they have a sweet aroma.
How to Store Tomatoes
This is a hotly debated topic. Obviously, if a tomato is not fully ripe when you bring it home, it is best to store it at room temperature, away from direct sunlight, until it fully ripens. If you want to speed up ripening of tomatoes, place them in a paper bag with a banana or apple. The ethylene gas released by the banana or apple with encourage the tomato to ripen faster.
If your tomatoes are already very ripe when you bring them home, you can slow down further ripening of the fruit by placing it in the refrigerator. That will help to prolong the life of the tomatoes. Remove them from the refrigerator about 30 minutes before eating them will help to regain their full flavor and juiciness.
Sun-dried tomatoes should be stored in an airtight container, with or without olive oil, in a cool dry place (and not in the refrigerator, unless recommended to do so on the label).
How to Freeze Tomatoes
Whole tomatoes (with or without their skin), chopped tomatoes, and tomato sauce all freeze well for later use. The simplest way to freeze tomatoes is simply to wash them well, then dry them. Remove the core where the stem was attached. Place the whole tomato in a freezer container and store it in the freezer. They will keep well like this for six months.
When you’re ready to use your tomatoes, allow them to sit at room temperature for about 30 to 45 minutes. When they start to soften up, the skin should be easily removed by pinching it with your fingers and pulling it off the tomato flesh. While still frozen, tomatoes can easily be grated for sauce. When thawed, they can be chopped and added to soups, stews or sauces. Once frozen, tomatoes will need to be cooked. Their texture will not be suitable for use in a fresh salad.
A faster way to remove the skin from your frozen whole tomatoes is to run them under warm water right after removing them from the freezer. As they warm up, the skin will loosen and can easily be removed with your fingers.
Removing tomato skin before freezing: Another way to freeze tomatoes would be to remove their skin before freezing. Simply wash your tomatoes and remove the core from each one. Cut a shallow “X” in the bottom of the tomato. Bring a large pot of water to boil. Drop a few of the whole, cored tomatoes in the boiling water for about 30 seconds. When you see the skin start to split, transfer the tomato with a slotted spoon to a bowl of ice water. Allow it to cool until you can handle it, then gently pinch the skin to remove it with your fingers. The tomatoes can then be frozen whole, chopped, or juiced before being placed in the freezer. Here’s a video on how to remove skin from tomatoes …
How to Prepare Tomatoes
Simply rinse your tomatoes then pat them dry and they’re ready to be used. It is advisable not to cook tomatoes in aluminum cookware because the acid in the tomatoes can cause the aluminum to leach out into the food.
How to remove seeds from tomatoes: To deseed your tomatoes, remove the stem end. Then simply cut them in half around the middle. Hold one half of the tomato in your hand over a bowl. Gently squeeze and the seeds should fall out. Another way would be to remove the seeds from your tomato halves with a spoon. Proceed with your recipe from there.
Quick Tips and Ideas for Using Tomatoes
Tomatoes can add a lot of flavor to many different foods and dishes. Keeping some canned tomatoes in the pantry ensures you always have some available whenever the need arises. Here are some quick tips and ideas for using tomatoes in your foods.
* Add tomatoes to bean and vegetable soups for a classic, well-rounded flavor.
* For a classic tomato salad, top sliced fresh tomatoes with some sliced red onion, a sprinkle of basil, some mozzarella cheese and a little drizzle of olive oil.
* Make an easy salsa with chopped tomatoes, onions, and chili peppers. Add some cilantro for a citrusy flavor.
* Make a cold gazpacho soup by blending tomatoes with cucumbers, bell peppers, scallions, garlic, vinegar, and salt and pepper.
* Add tomato slices to salads and sandwiches for a juicy, sweet and flavorful addition.
* The next time you fire up the grill, cut some tomatoes in half and grill them for a nice addition to your other foods.
* Enjoy stuffed roasted tomatoes by cutting large tomatoes in half and removing the seeds. Stuff them with a mixture of cooked rice and veggies of choice. Roast them in the oven until heated through and enjoy!
* Top a toasted baguette with a mixture of chopped tomatoes, fresh basil, balsamic vinegar, olive oil, and red onion.
* If your tomato dish, sauce or soup seems a little too acidic, add a little sugar (up to a teaspoon, depending on how large your recipe is). That will cut the acidity and bring out the natural sweetness of the tomatoes.
* Are you wondering what to do with extra tomato paste from the opened can? Portion it into ice cube trays in one tablespoon increments. Once frozen, transfer them to a freezer bag or container and return them to the freezer. Use them within 9 months.
* Never cook tomatoes in an aluminum pot because the acid in the tomatoes will react with the aluminum. The tomatoes will cause the aluminum to pit and discolor, and will even absorb some of the aluminum. Also, the tomatoes may become bitter and fade in color a bit.
* Do you need “stewed tomatoes” and don’t have any? Make your own by combining 2 cups of diced tomatoes (that had the skin removed first) OR one (14.5 ounce can of diced tomatoes) with 3 tablespoons of finely chopped celery, 2 tablespoons of finely chopped onion, 1 tablespoon of finely chopped green pepper, ½ teaspoon of sugar, and 1/8 teaspoon of salt. Use in any dish calling for stewed tomatoes.
* Are you having trouble slicing tomatoes without smashing them? Use a serrated knife rather than a straight-edge knife. Your slices will hold their shape better and will be less runny.
Herbs/Spices That Go Well With Tomatoes Basil, bay leaf, caraway seeds, capers, cayenne, celery seeds, chervil, cilantro, cinnamon, coriander, cumin, dill, garlic, ginger, lemon thyme, lovage, marjoram, mint, nutmeg, oregano, paprika, parsley, pepper, rosemary, saffron, sage, savory, tarragon, thyme, turmeric
Other Foods That Go Well with Tomatoes
Proteins, Legumes, Nuts, Seeds: Almonds, bacon, beans (in general), beef, chicken, chickpeas, eggs, legumes (in general), lentils, snap peas, tofu
Page, Karen. (2014) The Vegetarian Flavor Bible. New York, NY: Little, Brown and Company.
About Judi
Julia W. Klee (Judi) began her journey enjoying “all things food” in elementary school when she started preparing meals for her family. That love of food blossomed into a quest to learn more and more about health and wellness as related to nutrition. She went on to earn a BS Degree in Food and Nutrition, then an MS Degree in Nutrition. She has taught nutrition and related courses at the college level to pre-nursing and exercise science students. Her hunger to learn didn’t stop upon graduation from college. She continues to research on a regular basis about nutrition as it relates to health. Her hope is to help as many people as possible to enjoy foods that promote health and wellness.
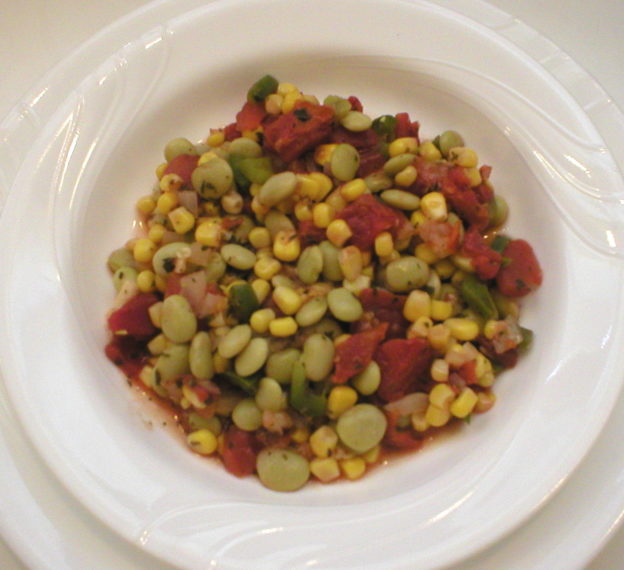
Here’s a REALLY easy recipe to put together and it’s delicious too! You can use canned lima beans, or frozen or dried lima beans that you’re already cooked. Any way you go, this is a winner! The succotash can be served any temperature you want, from cold to hot. It can be eaten as it is, or served over a hot cooked grain or pasta. It can even be included in a salad. So, it’s as versatile as your imagination! The recipe is below along with a video demonstration of how to make the dish.
Enjoy!
Judi
Easy Succotash
Makes 4 to 6 Servings
1 (14.5 oz) can diced tomatoes
½ cup diced bell pepper
½ cup diced yellow onion
2 cloves garlic, minced
1-1/2 tsp dried parsley
1-1/2 tsp dried thyme
Crushed red pepper flakes to taste (optional)
2 cups cooked lima beans, or 1 (15.25 oz) can lima beans, rinsed and drained
1 (15 oz) can organic corn, drained
Salt and pepper to taste
2 Tbsp apple cider vinegar
Cooked hot grain or pasta of choice, optional
Place a strainer over a medium to large saucepan that has a lid. Empty the can of diced tomatoes into the strainer and allow the juice to drain into the pan. Transfer the strainer to rest on a bowl so it can collect any remaining juice. Bring the strained juice to boil and add the diced bell pepper, onion, garlic, parsley, thyme, and red pepper flakes. Sauté the vegetables and herbs in the tomato juice until the vegetables start to soften and most of the juice is gone. Add the cooked lima beans, corn, strained tomatoes (including any remaining juice that strained into the bowl), and salt and pepper to taste. Stir to combine and allow the mixture to heat through, if desired. Taste and adjust seasonings if needed. Remove from heat and drizzle with apple cider vinegar; stir to combine.
This may be served cold, room temperature, warm or hot. It can be enjoyed as it is, or served over a hot cooked grain of your choice, or even pasta. It could even be used as part of a salad. Enjoy!
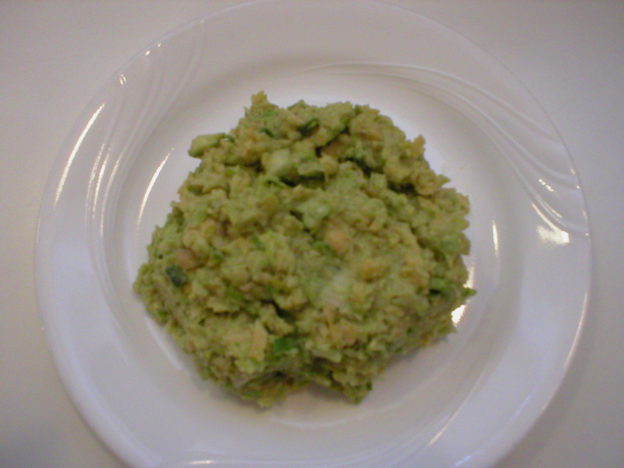
If you’re looking for a very simple chickpea salad (mock tuna) recipe that’s fast and easy to put together, you found it! This skips using any prepared mayonnaise, has no added oil, and is vegan. Below is a video demonstration of how to make the salad. The written recipe follows the video link.
Enjoy!
Judi
Easier Chickpea Salad (Mock Tuna)
Makes 1 or 2 Servings
½ cup cooked (or canned, drained) chickpeas
2 Tbsp to ¼ cup diced celery
2 Tbsp diced onion of choice
¼ avocado, diced
1-1/2 to 2 tsp white wine vinegar
1-1/2 to 2 tsp prepared Dijon mustard
Dash of black pepper, or to taste
Place all ingredients in a small food processor and pulse until coarsely chopped and somewhat creamy. Enjoy!
This is excellent by itself, served on a bed of salad greens, used as a sandwich filling, wrapped in a tortilla, or wrapped in large leaves of greens such as kale, collards, cabbage or lettuce leaves. Use this salad any way you would enjoy a tuna or chicken salad.
2 to 4 Servings…
1 cup cooked (or canned, drained) chickpeas
¼ to ½ cup diced celery
¼ cup diced onion of choice
½ avocado, diced
1 Tbsp (+1 tsp if more tang is desired) white wine vinegar
1 Tbsp (+1 tsp if more tang is desired) prepared Dijon mustard
Black pepper to taste


 English